How to Bleed Brakes with a Vacuum Pump?
Your car’s braking system is one of the most important safety features, and keeping it in good shape is crucial. One task that comes up from time to time is bleeding the brakes. Now, bleeding brakes might sound complicated, but with a vacuum pump, you can do it yourself without breaking a sweat. Let me walk you through the entire process so you can tackle this job like a pro.
Why You Need to Bleed Your Brakes
Before we dive into the how-to, let’s talk about why bleeding your brakes matters. Your braking system relies on hydraulic fluid to work. When air gets trapped inside the brake lines, it can weaken your brakes and make them feel soft or spongy. This is dangerous, and you don’t want to ignore it.
Air bubbles can enter your brake system in several ways. You might have a leaky brake hose, or perhaps you drained your brake fluid to replace a brake component. Anytime the system loses fluid, air can slip in. That’s why bleeding the brakes removes those air pockets and restores your brakes to full strength.
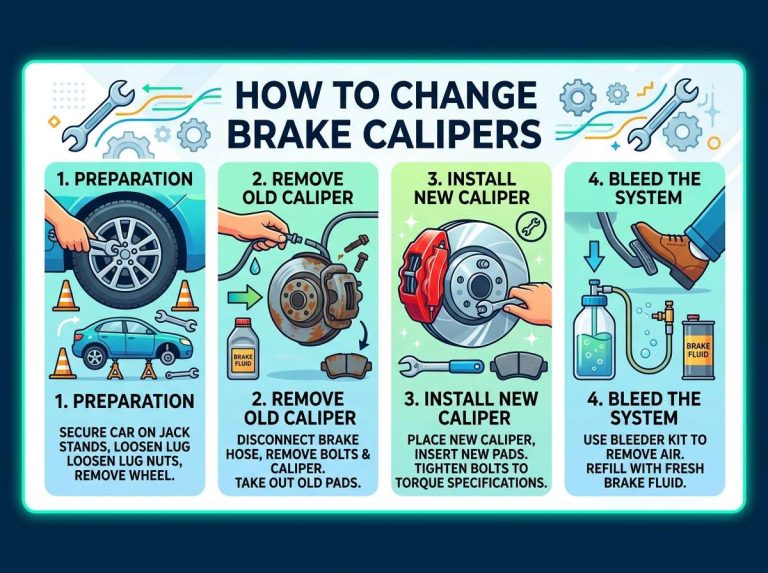
A vacuum pump makes this job way easier than the old pedal-pumping method. Instead of needing a friend to help you press the brake pedal while you bleed the lines, a vacuum pump does the heavy lifting for you. It creates suction that pulls the fluid through the lines and pulls out any trapped air at the same time.
What You’ll Need to Get Started
Let’s talk about what tools and supplies you need before you start. Having everything ready before you begin will save you time and frustration.
First, you’ll need a vacuum pump. There are manual vacuum pumps and electric vacuum pumps. Manual ones work by hand, while electric ones run on batteries or plug into a power outlet. Electric pumps are faster and easier to use, but manual pumps work fine if that’s what you have. Look for one with a good vacuum gauge so you can see the pressure.
Next, grab your brake fluid. Check your car’s manual to find out what type your vehicle needs. Common types include DOT 3, DOT 4, and DOT 5.1. Don’t mix different types together, so be careful which one you buy. You’ll want to have more than you think you need, since some will get used during the bleeding process.
You’ll also need some clear tubing that fits over your brake bleeder valves. This tubing lets you see the fluid coming out and lets any air bubbles escape. A container or jar to catch the old brake fluid is essential too. Brake fluid is toxic, so never let it spill on your skin or your car’s paint.
Grab a socket set or wrench that fits your bleeder valves. These are small screws on your brake calipers or wheel cylinders. You’ll need to open and close them during the process. A jack and jack stands are crucial if you need to lift your car to reach certain parts. Never work under a car that’s only held up by a jack.
Have some shop rags or paper towels nearby. Brake fluid can be messy, and you’ll want to clean up spills right away. Safety glasses are smart too, since you’re working with fluid that can splash.
Getting Your Car Ready
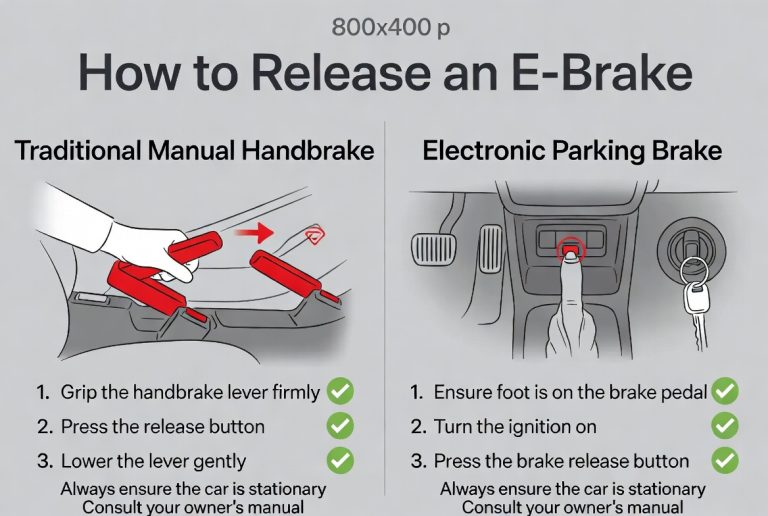
Before you touch anything, park your car on a flat, level surface and turn off the engine. Engage the parking brake to keep the car from rolling. If you need to raise the car to reach the brakes, use a jack to lift it and then support it with jack stands. Never trust only a jack to hold your car up.
Open the hood and locate your brake fluid reservoir. This is usually a clear or translucent plastic container near the back of the engine compartment. Check the brake fluid level. If it’s low, top it off with the correct type of brake fluid before you start. This step is important because you don’t want the reservoir to run dry during bleeding, which would let more air into the system.
Take a moment to find all four bleeder valves on your car. Most cars have one at each wheel. You’ll find them on the brake calipers in the front and on the wheel cylinders in the back. They’re small screws with a rubber dust cap on top. Gently remove the dust caps and set them aside. You can clean them and put them back later.
Now’s a good time to review the brake bleeding order. This varies by car, so check your manual. Many cars bleed right rear, left rear, right front, then left front. Starting at the wheel farthest from the master cylinder and working toward the closest helps push air toward the end of the system. Some cars have a different order, though, so confirm with your manual.
Setting Up Your Vacuum Pump
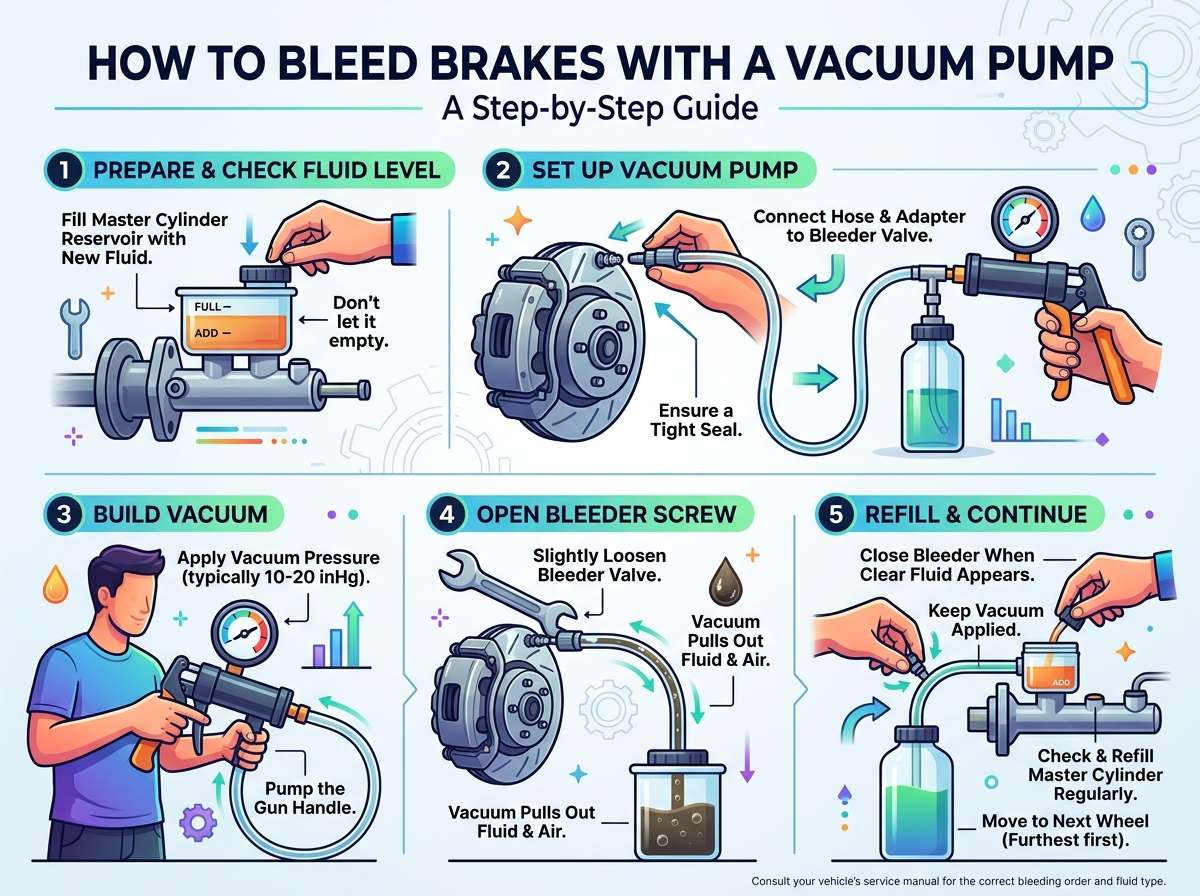
Your vacuum pump will come with a kit that includes several components. Take a moment to look over all the pieces. Most kits have different adapters and tubing sizes to fit various bleeder valves. Find the right adapter for your car’s bleeder valve and attach it to the pump.
Fill your vacuum pump’s reservoir if it has one. Some pumps have a small tank that needs brake fluid or vacuum oil. Check the instructions that came with your pump to see if this applies to yours. If it does, fill it to the marked line.
Connect your clear tubing to the vacuum pump. One end goes to the pump, and the other end goes over the bleeder valve. Make sure the connection is tight so you don’t lose suction. A loose connection will make the pump work harder and might prevent it from creating enough suction to pull the fluid through.
If you’re using an electric pump, make sure the battery is charged or plug it in. If you’re using a manual pump, get ready to work the handle. Before you start pumping, have a container ready to catch the brake fluid that will come out.
Bleeding Your Brakes Step by Step
Now we get to the real work. This is where everything comes together. Start at the first bleeder valve according to your car’s bleeding order. Position yourself so you can see the bleeder valve and the clear tubing at the same time. This way, you can watch for the color change in the fluid and spot when air bubbles stop coming out.
Attach the clear tubing to the bleeder valve. Make sure the adapter is snug and won’t slip off under pressure. Turn the bleeder valve counterclockwise with your wrench or socket. Turn it just a half turn or so. You don’t want to open it all the way, or it might get stuck or strip the threads.
If you’re using an electric pump, turn it on now. If you’re using a manual pump, start pumping. The pump will create a vacuum that pulls the brake fluid through the system. Watch the clear tubing. You should see brake fluid start to come out, and it might look dark or discolored. This is the old fluid mixed with air bubbles. Keep the pump running or keep pumping.
As you continue, the fluid should get clearer. Watch closely for air bubbles. You’ll see them as little pockets moving through the tubing. The goal is to see clear fluid with no air bubbles coming out for several seconds. This tells you that air pocket is gone.
Once you get clear fluid with no bubbles, tighten the bleeder valve by turning it clockwise. Turn it until it’s snug, but don’t crank it too hard or you might damage the valve. Stop the pump right after you close the valve. Letting the pump run while the valve is closed can damage the pump over time.
Move to the next bleeder valve in your sequence. Repeat the exact same steps. Attach tubing, open the valve a half turn, run the pump or pump by hand, watch for clear fluid and no bubbles, close the valve, and stop the pump.
Watching the Brake Fluid Reservoir
While you’re working through all four wheels, keep an eye on the brake fluid reservoir under the hood. As you pull fluid through the system, the level will drop. If it gets too low, air will enter at the reservoir and undo all your hard work. Top off the reservoir with fresh brake fluid whenever it gets close to the minimum level line. Some people like to top it off after each wheel to be safe.
The color of the brake fluid tells you a lot. If you’re still seeing dark or discolored fluid, keep pumping. Fresh brake fluid is usually clear or has a light amber color. When you get to the last wheel and see that clear, fresh-colored fluid coming out, you’re almost done.
Common Mistakes to Avoid
Even though bleeding brakes is pretty straightforward, there are a few things that can trip you up. The most common mistake is not keeping the reservoir topped off. This is the easiest way to trap more air and create more work for yourself. Check it often.
Another mistake is not opening the bleeder valve enough. You need a half turn or so, but some people barely crack it open. The pump might not create enough suction to pull fluid through a valve that’s barely open. On the flip side, some people open the valve too much. This can cause it to get stuck or the threads to strip, which is a real headache.
Not letting the pump run long enough is another issue. People sometimes stop too soon and think they’re done when there are still air bubbles in the line. Keep pumping until you see clear fluid for at least ten to fifteen seconds with no bubbles. This ensures all the air is gone.
Some folks also make the mistake of skipping the correct bleeding order. Your car’s manual tells you the right order for a reason. The order ensures that air gets pushed out of the system in the most efficient way. Don’t skip around or do them in a different order.
Using the wrong type of brake fluid is a big one too. If you pour DOT 5 into a DOT 3 system, you’ll cause problems. The two types don’t mix well together. Always check your manual and use the exact type your car needs.
If Something Goes Wrong
What if you’re halfway through and the pump stops creating suction? First, check that the connection between the pump and the tubing is tight. A loose connection will kill your suction. Tighten it and try again.
If the bleeder valve won’t open or feels stuck, don’t force it. Forcing it might break it or strip the threads. Try spraying a little penetrating oil around the valve and let it soak for a few minutes. Then gently try again. If it’s still stuck, you might need to call a mechanic.
If you see brake fluid leaking from the connection point, the adapter might not be tight. Turn off the pump, tighten the adapter, and try again. Sometimes the adapter just needs an extra quarter turn.
If the vacuum gauge on your pump isn’t showing any suction, check that the reservoir on the pump is full if it has one. An empty reservoir will prevent the pump from working right. Fill it and try again.
Is the brake fluid still dark after finishing all four wheels? This sometimes happens if the fluid in your system is very old. In that case, you might need to bleed the system a second time with fresh fluid. Top off the reservoir, go through all four wheels again, and you should see much clearer fluid the second time around.
Finishing Up Your Brake Bleeding Job
Once you’ve gone through all four wheels and you’re happy with the results, you’re almost done. Make sure all four bleeder valves are tight and the dust caps are back in place. Don’t forget the dust caps, since they keep dirt and moisture out of the valve.
Check the brake fluid level one more time and top it off if needed. The level should be right at the fill line or between the minimum and maximum marks, depending on your car. Don’t overfill it, or the excess might leak out as the fluid heats up during driving.
Put the cap back on the reservoir and push it down until it clicks or seals tight. The reservoir cap is important because it lets air in as you brake and prevents a vacuum from building up in the reservoir.
Now it’s time for a test drive. Get in your car and start the engine. Before you go anywhere, pump the brake pedal several times. Feel how the brake pedal responds. It should feel firm and solid, not soft or spongy. If it still feels spongy, you might have more air in the system and need to bleed again.
Once the pedal feels good, drive slowly in a safe area and test your brakes gently. Make sure they respond the way they should. Don’t drive far or fast until you’re confident the brakes are working right.
Different Types of Vacuum Pumps and Their Pros and Cons
There are a few different styles of vacuum pumps out there, so let’s talk about what each one offers.
A hand-operated pump works by pumping a handle back and forth. It’s the most affordable option and doesn’t need batteries or electricity. The downside is that it takes more effort, and it’s slow. If you have patience and don’t mind a bit of work, a hand pump gets the job done.
An electric pump runs on batteries or AC power. It’s much faster and easier than a hand pump. You don’t have to do any physical work, so it’s less tiring. The trade-off is that electric pumps cost more money. If you’re going to bleed brakes more than once or twice, the extra cost might be worth it.
Some shops have air-powered pumps that run on a shop air compressor. These are fast and powerful, but you need access to a compressor. Most home garages don’t have one, so this is more of a professional tool.
For most beginners working at home, an electric pump is the sweet spot. It’s not too expensive, it’s easy to use, and it gets the job done fast.
Tips for Getting Great Results
Here are some tips that will make your brake bleeding experience better.
Work in a clean environment. Brake fluid is hygroscopic, which means it absorbs moisture from the air. The cleaner your work area, the less moisture gets into your fluid. A dirty garage with a lot of dust and moisture can introduce contamination that causes problems down the road.
Take your time with each wheel. Rushing through the process just means you’ll have to do it again. Spend a few minutes on each bleeder valve to make sure you get all the air out. It’s much better to spend a little extra time now than to have spongy brakes later.
Watch the fluid color closely. The transition from dark old fluid to clear new fluid is your visual feedback that you’re making progress. Don’t stop just because fluid is coming out. Keep going until it’s clear.
Keep accurate notes if you’re doing multiple wheels. Write down the order and how long you spend on each one. This helps if you need to troubleshoot or if you’re repeating the process.
Temperature matters too. Brake fluid responds to temperature changes. Bleeding in a moderate temperature is easier than in extreme heat or cold. If it’s very hot or very cold outside, work in a garage or wait for better weather if you can.
Let the system sit for a few hours after you finish. This allows any remaining tiny air bubbles to work their way out naturally. Then do another test drive and feel the brakes. They should feel even firmer.
When to Call a Professional
Most people can handle brake bleeding at home, but there are some situations where professional help makes sense.
If your bleeder valves are stuck or corroded and won’t budge, a shop has tools and experience to deal with them without damage. Trying to force a stuck valve yourself might break it, which gets expensive fast.
If you’re not confident about your ability to do the job safely, there’s no shame in taking it to a shop. Brakes are too important to guess about. A professional can do it quickly and guarantee the job is done right.
If your car has a special brake system like anti-lock brakes or a more complicated setup, a professional might be the better choice. Some modern systems require special tools or procedures that aren’t worth investing in for a one-time job.
If you don’t have the time or the workspace to do it properly, a shop is a good option. Some people would rather pay someone else than spend their free time working on their car, and that’s totally fine.
Maintaining Your Brakes Going Forward
After you’ve successfully bled your brakes, keep them in good shape going forward. Check your brake fluid level every month or so. If it’s getting low, there might be a leak somewhere, and you should get it checked.
Brake fluid should be changed every couple of years, even if the brakes are working fine. Old fluid absorbs moisture and loses its ability to function properly. Fresh fluid keeps your braking system in peak condition.
Listen to your brakes. If they start feeling soft or spongy again, air has probably gotten back in. Don’t ignore this. Bleed them again or get a professional to check it out.
Keep your brakes clean by washing your wheels regularly. Dirt and brake dust can hide problems and make it harder to spot leaks or damage.
Wrapping It Up
Bleeding your brakes with a vacuum pump is a task that looks intimidating until you actually start doing it. Take your time, follow the steps carefully, and pay attention to what you see coming out of the bleeder valves. The whole job usually takes a couple of hours from start to finish, depending on how many wheels you’re bleeding and how much air is in the system.
Your brakes are essential for your safety and the safety of everyone on the road around you. Taking the time to maintain them properly, including bleeding out air when needed, is time well spent. With a vacuum pump, the job is straightforward enough for a beginner to handle alone.
Don’t hesitate to reach out for help if something doesn’t feel right during the process. A phone call to a friend who knows cars or a quick visit to a shop can save you from making a costly mistake. But if you follow this guide step by step, you should be able to bleed your brakes successfully and gain confidence in working on your vehicle.
The first time you do this, take extra time and don’t rush. The second time you do it, you’ll be much faster and more comfortable. Soon you’ll be the person helping your friends bleed their brakes. Good luck, and remember that working on your own car is a skill that lasts a lifetime.

Peterson is an automotive enthusiast and auto parts reviewer with a passion for vehicle maintenance, upgrades, and performance. He enjoys researching and testing car parts, tools, and accessories to help drivers make informed buying decisions. Through AutoPartsTalk.com, Peterson shares honest reviews, practical maintenance tips, and expert guides to keep vehicles running safely and efficiently.