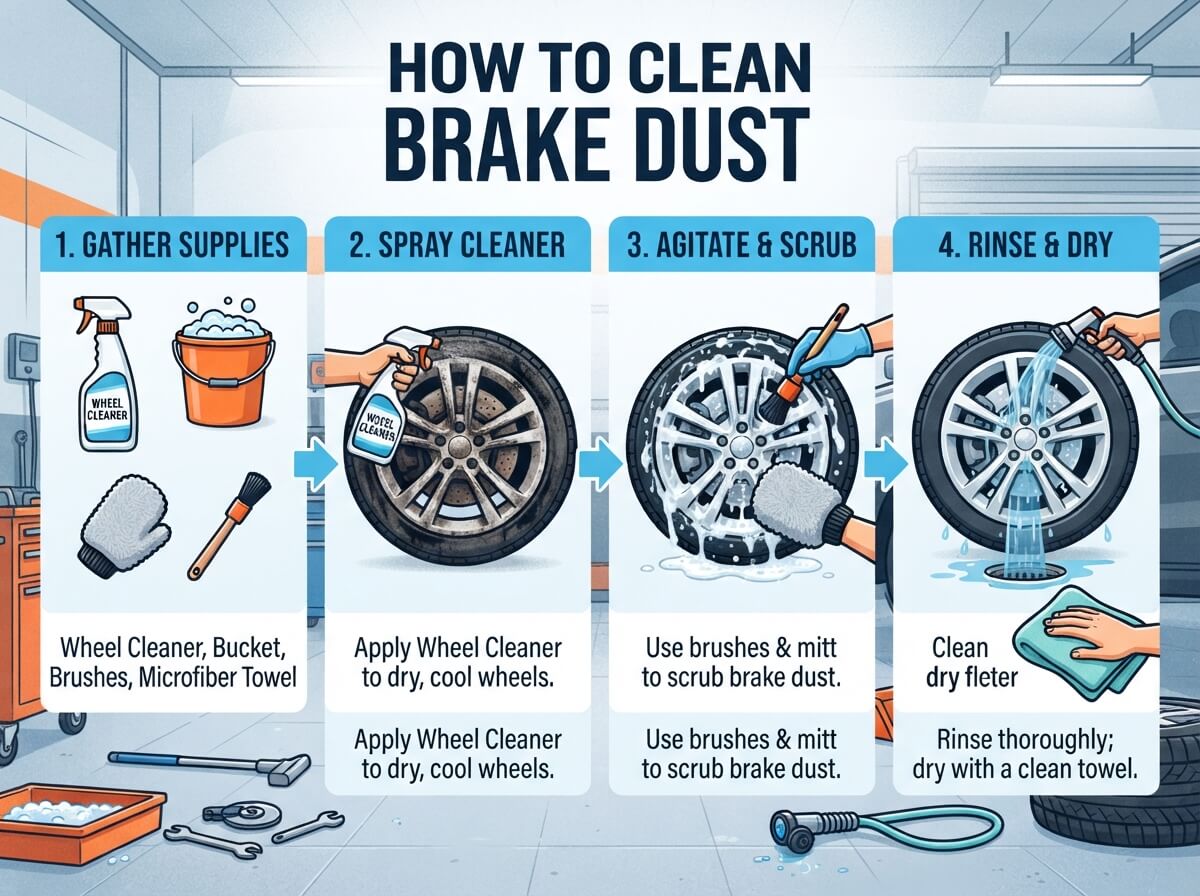
How to Clean Brake Dust?
Your car’s wheels deserve some love too. If you’ve noticed a dark, grimy film covering your rims and tires, that’s brake dust, and it’s more common than you think. Every time you hit the brakes, tiny metal particles fly off your brake pads and collect on your wheels. The good news? You can easily clean it yourself without spending a fortune at a professional detailing shop.
Let me walk you through everything you need to know about brake dust removal and wheel cleaning. This guide covers why brake dust matters, what tools you’ll need, and step-by-step instructions to get your wheels looking brand new.
What Exactly Is Brake Dust?
Brake dust forms when your brake pads rub against the brake rotors. The friction creates heat, and that heat breaks down the brake pad material into fine particles. These particles spread across your wheels and stick to the rim. Some of this dust comes from metal compounds in your brakes, while other parts come from friction materials.
Here’s the thing: brake dust isn’t just ugly. It can actually damage your wheel finish over time. The particles contain iron and other harsh chemicals that eat into clear coats and paint. If you leave brake dust sitting on your wheels for too long, you might end up with permanent staining. That’s why regular wheel maintenance matters so much.
The amount of brake dust your car produces depends on several factors. Your driving habits play a big role. If you drive in heavy city traffic with lots of stop-and-go braking, you’ll get more dust. Aggressive drivers who brake hard and fast tend to see more buildup. The type of brake pads you use makes a difference too. Some brake pad materials generate more dust than others.
Why You Should Clean Your Brake Dust Regularly
You might wonder if brake dust is worth worrying about. After all, it’s just on the outside of your car. But here’s what happens when you ignore brake dust buildup:
Your wheels lose their shine. Brake dust makes even the nicest alloy wheels look dull and neglected. Clean wheels transform the entire look of your vehicle.
Damage to your wheel finish happens fast. The iron particles in brake dust corrode the protective coating on your wheels. Once corrosion starts, it spreads quickly. What began as surface staining can turn into permanent pitting.
Resale value takes a hit. Buyers notice dirty, dusty wheels. Clean wheels suggest a well-maintained vehicle and can help you get a better price when it’s time to sell.
Your brake system works better. Brake dust buildup actually interferes with your brake cooling. Clean wheels allow better airflow to your brake components, helping them run cooler and last longer.
It prevents brake fluid issues. While you’re cleaning your wheels, you’ll also spot any brake fluid leaks or issues that need attention. Regular cleaning helps you catch problems early.
Gather Your Supplies
Before you start cleaning, grab the right tools and products. Using proper supplies makes the job easier and protects your wheel finish.
Brake cleaner spray is your best friend for this job. This special solvent dissolves brake dust and grease without requiring you to scrub hard. Look for aerosol brake cleaner at any auto parts store. This stuff works on stubborn buildup that soap and water can’t touch.
Microfiber wash mitts are gentler on your wheels than regular sponges. They grab dirt without scratching your wheel finish. Grab two mitts so you can use one for the wheels and one for the rest of your car.
Wheel-specific soap or general car wash soap works well for the initial cleaning. Avoid harsh degreasers that can damage painted or clear-coated wheels.
Soft-bristled wheel brushes help you reach tight spaces between spokes and around lug nuts. Look for brushes designed specifically for wheel cleaning, not harsh metal-bristled brushes.
Large buckets (at least two) let you rinse your tools and keep soapy water separate from rinse water. This two-bucket method prevents you from spreading dirt around.
A hose with a spray nozzle gives you control over water pressure. High-pressure washers can force water into wheel bearings and brake components, so stick with regular hose pressure.
Microfiber drying towels prevent water spots and scratches as you dry your wheels. Regular towels tend to leave lint and can scratch.
Wheel wax or sealant (optional but recommended) protects your clean wheels and makes future cleaning easier. Wax creates a barrier that keeps brake dust from sticking as aggressively.
Safety glasses protect your eyes when spraying brake cleaner. This product is strong and you don’t want it splashing in your face.
Gloves keep your hands clean and protect your skin from harsh chemicals in brake cleaner.
The Step-by-Step Process for Cleaning Brake Dust
Now let’s get down to business. Here’s exactly how to clean your wheels and remove brake dust.
Step 1: Park in the Shade
Find a spot where you can work without direct sunlight beating down on your wheels. Sun heats up the wheel surface and causes cleaning products to dry too quickly. This leaves streaks and spots. Shade lets you work at your own pace and get better results.
Also, make sure your brakes are cool. Don’t start this job right after driving. Let your car sit for at least 30 minutes so the brake system cools down completely. Hot brake components are more delicate and can be damaged by cold water.
Step 2: Rinse Away Loose Dirt
Start by spraying each wheel with your hose on medium pressure. Focus on getting the loose dirt off first. This initial rinse prevents you from smearing dirt across your wheel surface with your wash mitt. Spend a good minute on each wheel, spraying from different angles to loosen stubborn debris.
Pay special attention to the inside of the wheel where most brake dust accumulates. This area gets less direct spray and collects more gunk.
Step 3: Apply Brake Cleaner
This is where the real magic happens. Shake your brake cleaner can for about 30 seconds. Spray it directly onto the wheel surface, focusing on areas with visible brake dust. The cleaner will foam up and start dissolving the dust right before your eyes. You’ll actually see the grime separate from the wheel.
Work on one section at a time. Spray the cleaner, let it sit for 30 to 60 seconds, then gently brush the area with your soft-bristled brush. Don’t scrub too hard. Let the brake cleaner do the work for you. Aggressive scrubbing can scratch your wheel finish.
Get into all the crevices and around the spokes. These tight spots hide brake dust but are easy to miss. Your wheel brush is perfect for reaching these areas without damaging the finish.
Repeat this process on each wheel. You might need to apply brake cleaner two or three times on heavily soiled wheels. That’s totally normal.
Step 4: Wash with Soap and Water
Once you’ve broken down the brake dust with cleaner, wash your wheels with soapy water. Fill one bucket with warm water and wheel soap. Use your microfiber wash mitt to gently scrub the entire wheel surface. Get the front, back, sides, and those hard-to-reach areas between spokes.
The second bucket filled with plain water is for rinsing your wash mitt. This two-bucket method keeps you from reintroducing dirty water to your wheel. Rinse your mitt in the clean bucket between wheel sections.
Don’t forget the tire itself. Tires collect brake dust too and benefit from a good washing. Use the same soapy water and gentle scrubbing motion.
Step 5: Rinse Thoroughly
Spray each wheel with your hose, making sure all soap and debris wash away. Check that no soap residue remains. Soap left on your wheel can leave spots when it dries. Take time here and do a good rinse job.
Direct water into all the crevices and around the spokes. You want to flush out all the loose material. If your wheels are really dirty, it might take an extra rinse or two.
Step 6: Dry Your Wheels
Grab your microfiber drying towels and dry each wheel completely. Wet wheels look okay temporarily, but water spots will appear as they air dry. Microfiber towels absorb water quickly and prevent spots.
Dry the spokes, the inner rim, the outer lip, and the tire. Don’t miss any spots or you’ll end up with those annoying water marks.
Step 7: Apply Wheel Wax or Sealant (Optional)
Once your wheels are completely dry, consider applying a wheel wax or sealant. This protective layer keeps brake dust from sticking to your wheels so aggressively in the future. Future cleaning jobs will be faster and easier.
Follow the product instructions for application. Most wheel waxes get applied in circular motions and buffed off with a clean microfiber towel. You’ll see an immediate shine that makes all your effort worthwhile.
Tips for Tougher Brake Dust Buildup
Sometimes brake dust gets really stubborn. It hardens and sticks like glue to your wheels. Here are some tricks for handling heavy buildup:
Soak with brake cleaner longer. If the first application doesn’t work, spray the brake cleaner again and let it sit for two or three minutes. The extra time lets it dissolve more of the buildup.
Use a dedicated wheel cleaner. Brake cleaner is strong, but dedicated wheel cleaning products are formulated specifically for brake dust. They work great on stubborn deposits.
Try a clay bar. After washing and drying, use a detailing clay bar on your wheels. This gently removes contaminants that water and cleaner can’t touch. It’s the same technique professionals use.
Make a paste with baking soda. Mix baking soda with a little water to create a paste. Apply it to stubborn spots and let it sit for 15 minutes. The mild abrasive action helps break down baked-on brake dust without harming your wheel finish.
Work on a smaller section. Instead of trying to clean your entire wheel at once, divide it into smaller areas. Focus on one section until it’s completely clean, then move on. This approach lets you see better results and stay motivated.
How Often Should You Clean Your Wheels
The frequency depends on your driving habits and climate. In general, aim to clean your wheels every two to four weeks. Heavy brake dust producers should go every two weeks. Lighter dust builders can stretch it to a month.
Heavy traffic driving? Clean your wheels every two weeks. Highway driving with minimal braking? Once a month is fine. Wet climates with salt or corrosive materials? Clean more frequently to prevent corrosion.
Regular cleaning prevents buildup from getting out of hand. It’s much easier to clean brake dust monthly than to deal with baked-on, crusty deposits that have been sitting for half a year.
Protect Your Wheels Long-Term
Keeping your wheels clean is just part of wheel maintenance. Here’s how to protect them for the long haul:
Invest in quality wheel wax. A good wheel wax or ceramic coating creates a barrier that repels brake dust. This makes cleaning easier and protects your finish from corrosion.
Consider brake dust-reducing pads. Some brake pad brands generate significantly less dust than others. If you’re dealing with excessive brake dust, ask your mechanic about low-dust brake pad options during your next service.
Improve your brake cooling. Better-ventilated wheels help your brakes stay cooler and potentially reduce brake dust generation. This is more about the type of wheels you choose rather than maintenance.
Monitor your brakes. Get your brakes inspected during regular service visits. Worn brake pads work harder and generate more dust. Keeping your brake pads in good condition reduces dust production.
Park in a garage when possible. If you have covered parking, use it. This protects your wheels from environmental contaminants and UV damage.
Common Mistakes to Avoid
Learn from others’ mistakes and skip these common errors:
Don’t use a pressure washer. High-pressure water forces itself into brake components and wheel seals. This can damage sensitive parts and lead to expensive repairs. Stick with your regular hose.
Avoid steel wool or harsh brushes. Metal brushes scratch wheel finishes. Always use soft-bristled brushes made for wheel cleaning.
Don’t skip the brake cleaner step. Water and soap alone won’t cut through heavy brake dust. Brake cleaner is specifically designed to dissolve this buildup, so don’t skip it.
Never clean hot brakes. Cold brake components are less likely to be damaged by water and cleaning products. Wait at least 30 minutes after driving before you start.
Don’t leave brake cleaner residue. Always follow up brake cleaner application with water rinse and soap wash. Leaving cleaner on your wheels can damage the finish.
Avoid cheap wheel waxes. Spend a few extra dollars on quality wheel protection products. Cheap waxes wear off quickly and don’t provide real protection.
The Bottom Line
Cleaning brake dust is a straightforward task that delivers impressive results. You don’t need special skills or expensive equipment. With brake cleaner, some soapy water, and a little elbow grease, you can keep your wheels looking showroom-fresh.
Regular wheel cleaning protects your investment and keeps your car looking amazing. Clean wheels transform your vehicle’s appearance and help maintain your brake system’s performance. Start a regular wheel cleaning routine and you’ll love how your car looks.
Your wheels take a beating from the road, brakes, and weather. Give them the care they deserve with regular cleaning and maintenance. Your car will look better, your brakes will last longer, and you’ll enjoy the process knowing you’re taking great care of your vehicle. Get out there and make those wheels shine.