How to Change a Fuel Filter?
If you’ve never changed a fuel filter before, don’t worry. This task is easier than you might think. A fuel filter is a small but mighty component in your car. It keeps dirt and debris out of your engine. Over time, it gets clogged up and stops working well. When that happens, your car won’t run smoothly. The good news? You can change it yourself.
This guide will walk you through every step. We’ll talk about what a fuel filter does. We’ll cover the tools you need. Then we’ll dive into the actual process. By the end, you’ll feel confident doing this job.
What Does a Fuel Filter Do?
Before we get into the how-to part, let’s talk about the why. Your car’s fuel filter has one main job. It removes dirt, rust, and other particles from your gasoline. These tiny bits come from your fuel tank. They can damage your fuel injectors and engine if you don’t catch them.
Think of it like a coffee filter. Just like a coffee filter traps grounds and lets liquid through, a fuel filter traps bad stuff and lets clean fuel through. Your engine needs clean fuel to run right. A dirty fuel filter blocks fuel flow. This can make your car slow, rough, or hard to start.
Most cars need a new fuel filter every 20,000 to 40,000 miles. Some go longer. Check your owner’s manual for your car’s specific needs. Changing it on time keeps your engine happy.
Signs Your Fuel Filter Needs Changing
Your car will tell you when something’s wrong. You just need to listen. Here are the most common signs:
Your car won’t start easily. A clogged filter makes it hard for fuel to reach the engine. You might turn the key and hear the engine struggling. It takes a few tries to get going.
The engine sputters or stalls. This happens while you’re driving. Your car might feel like it’s running out of gas. The fuel supply is weak because the filter is blocked.
You feel less power when driving. Acceleration becomes slow. Your car feels sluggish. You press the gas pedal, but nothing happens right away.
Your car won’t start at all. In bad cases, a completely clogged filter stops all fuel flow. Your car just won’t turn on.
The fuel pump sounds loud. The pump works harder to push fuel through a clogged filter. You might hear a whining noise near the fuel tank.
If you notice any of these signs, it’s time to change that filter. Don’t wait too long. A bad fuel filter can damage other parts of your fuel system.
Types of Fuel Filters
Not all fuel filters are the same. Your car might have one or two types. Let’s break them down.
In-tank fuel filters live inside your fuel tank. Most cars have these. They’re harder to reach but last a long time. Changing them takes more work because you need to drop the fuel tank.
In-line fuel filters sit between your fuel tank and engine. You can see them. They’re easier to change. Just remove them and slip a new one in.
Spin-on fuel filters look like small oil cans. They screw on and off. These are super easy to replace.
Your car probably has an in-tank filter, an in-line filter, or both. Check your manual or look under your car. This tells you what you’re dealing with. The process is different for each type.
Tools and Supplies You’ll Need
Don’t start this job without the right gear. Here’s what to gather:
Safety glasses protect your eyes. Fuel can splash. You want protection.
Work gloves keep your hands clean. They also protect from sharp edges.
A socket set or wrench set helps you remove bolts and parts. Make sure you have the right sizes.
A fuel filter replacement kit comes with the new filter and sometimes hoses. Some kits include clamps and adapters.
Hose clamps squeeze hoses tight. You might need these depending on your car.
A container or towels catch spilled fuel. It will drip. Be ready for it.
A jack and jack stands (if needed). You might have to lift your car to reach the filter.
Your car’s manual is super helpful. It shows you exactly where the filter sits and how to remove it.
Rags or shop towels are your best friend. Keep plenty nearby.
Before you buy anything, look at your car. See what kind of filter you have. This determines what supplies you really need.
Before You Start: Safety First
Working with fuel is not dangerous if you respect it. Fuel is flammable. You need to be smart.
Kill the engine and let it cool down. Wait at least 30 minutes. This reduces fire risk.
Disconnect the negative battery terminal. This stops sparks from happening. Sparks and fuel don’t mix.
Work outside or in a well-ventilated area. Never work in a closed garage. Fuel fumes are harmful. You need fresh air.
Don’t smoke or use open flames near your work. This includes lighters, stoves, or anything hot.
Wear your safety gear. Glasses and gloves are not optional. Fuel damages skin and eyes.
Have a fire extinguisher nearby. It’s rare you’ll need it, but better safe than sorry.
Release fuel pressure. This is important. Your fuel system is under pressure. If you don’t release it, fuel will spray everywhere. Check your manual for the right way to do this on your car.
These steps might seem like a lot. They take five minutes. They’re worth it.
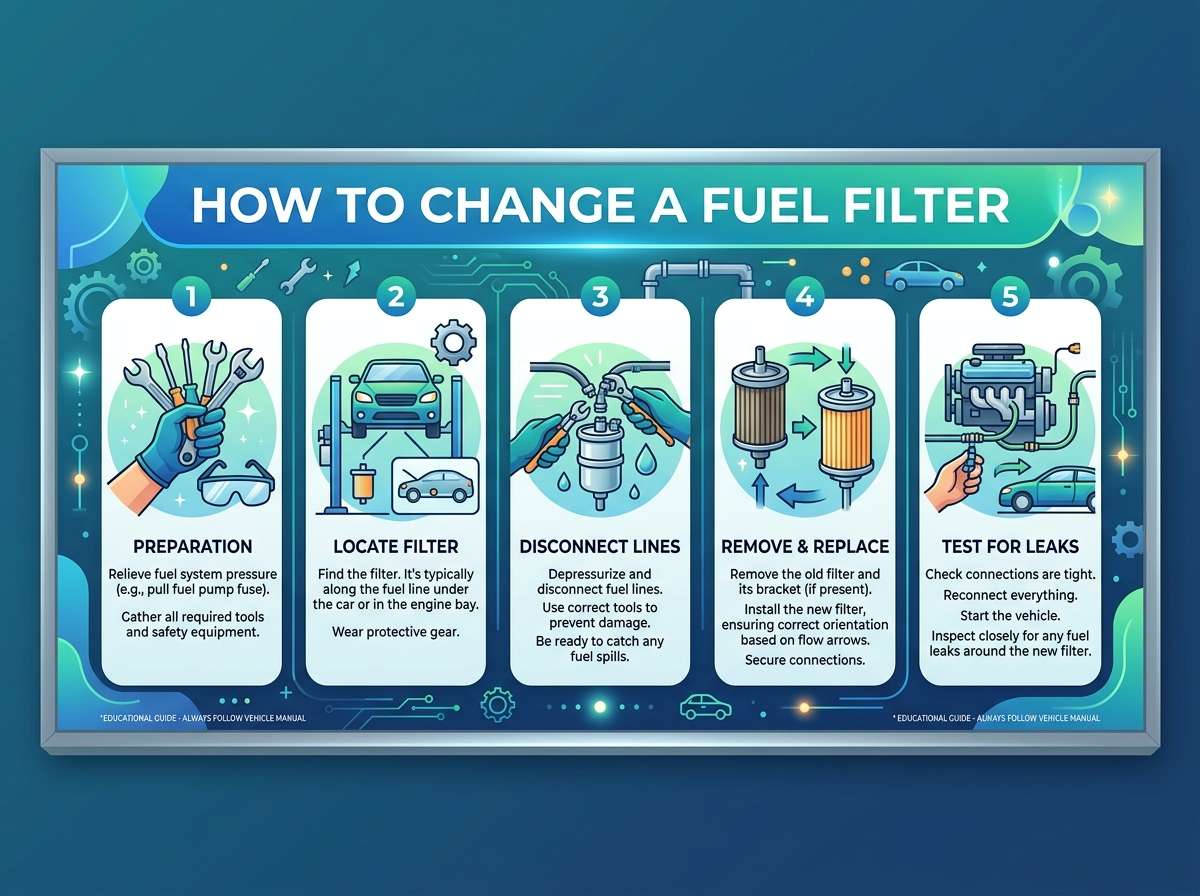
Step-by-Step: How to Change Your Fuel Filter
Step 1: Locate Your Fuel Filter
Pop open your hood. Look under the car. Your manual tells you exactly where to look. In-line filters sit near the engine or along the frame. In-tank filters require removing the fuel tank or reaching through the tank opening.
Take a photo with your phone. Mark where hoses connect. This helps when you put it back together.
Step 2: Release the Fuel Pressure
This step is crucial. Your fuel system runs under pressure. You need to let that pressure out before disconnecting anything.
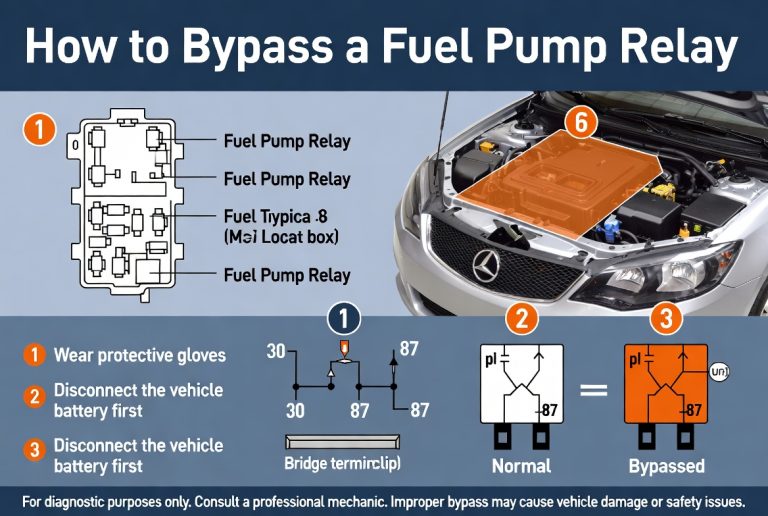
Most cars have a fuel pump fuse or relay. Your manual shows where it is. Remove it. Then start the engine. Let it run until it dies. This burns off the pressure in the system.
Another method? Find the Schrader valve on your fuel line. It looks like a tire valve. Use a small tool to press it slightly. Fuel might drip. That’s normal.
Some people find the fuel relief valve under the hood. Pressing it releases pressure too. Refer to your manual for your specific car.
Step 3: Disconnect the Hoses
Now comes the fun part. You need to disconnect hoses from your old filter.
Look closely at how they connect. Make notes. Take more photos. Mark which hose goes where.
Some hoses push on and off. Others have clamps holding them tight. Use your wrench to loosen clamp bolts. Then slide the hose off gently.
Expect fuel to drip. Put towels under the connection points. Don’t panic if fuel spills. That’s why you have towels.
Be gentle. You don’t want to damage the hoses. You might be able to reuse them.
Step 4: Remove the Old Filter
Once hoses are disconnected, the filter is loose. Remove any bolts holding it in place. Some filters just slide out. Others need a gentle wiggle.
Put it aside. Don’t throw it away yet. Some places take old filters for proper disposal.
Step 5: Prepare Your New Filter
Before installing the new filter, do this: Look at it carefully. Find the fuel inlet and outlet. These might be labeled. Your manual shows which is which.
If your new filter has a spin-on design, you might need to apply a thin coat of fresh oil to the rubber seal. This helps it seal tight. Check the box for instructions.
Step 6: Install the New Filter
Slide or bolt the new filter into place. Make sure it’s secure. It shouldn’t move around.
This is where those photos come in handy. Reference them to make sure everything lines up right.
Step 7: Reconnect the Hoses
This is the reverse of disconnecting them. Take your time here. A loose connection leaks fuel.
Slide hoses back onto the filter. Make sure they go all the way on. You should hear or feel a click on push-on connections.
Tighten clamps firmly. They should be snug but not crazy tight. You don’t want to crack anything.
Step 8: Check Your Work
Before you start the engine, do a final check. Look at every connection. Is everything tight? Are hoses in the right spots?
Get under the car if you can. Look for drips or loose parts.
Step 9: Start the Engine
Reconnect your battery terminal if you removed it. Turn the key. Your engine should start normally.
Let it run for a minute. Listen to it. Does it sound right?
Now turn it off. Check under the hood and under the car again. Do you see fuel drips? Are there leaks?
If everything looks dry, you did it right. If you see leaks, turn off the engine. Find the problem. Tighten connections. Make sure hoses are fully seated.
Step 10: Test Drive
Take a short drive around the block. Pay attention to how your car feels. Does it start easily? Does it run smooth?
Most people feel a difference right away. The engine runs better with a clean filter. It might accelerate faster. Starting becomes easier.
Common Mistakes to Avoid
Even experienced people make these mistakes. Watch out for them:
Not releasing fuel pressure first. This causes fuel to spray everywhere. Don’t skip this step.
Connecting hoses backward. Your fuel won’t flow right. Always check which hose goes where.
Using the wrong filter. A filter designed for a different car doesn’t fit. Check your manual or ask at the parts store.
Forgetting to tighten clamps. Loose clamps cause leaks. Leaks mean fuel loss and safety risks.
Ignoring the small o-rings or gaskets. These rubber parts create seals. Don’t reuse old ones. Always use new ones from your kit.
Over-tightening bolts. You might crack plastic or strip threads. Snug is good. Crazy tight is bad.
Not letting the engine cool first. Hot engines can ignite fuel. Wait. Be patient.
Working alone in an enclosed space. Always have fresh air. Always tell someone what you’re doing.
Different Filter Types: Special Instructions
Spin-On Filters
These screw on like an oil filter. They’re the easiest type.
Use a filter wrench to turn them. Turn counterclockwise to remove. Apply a thin layer of fresh oil to the rubber gasket on the new filter. Screw it on hand-tight. Give it another three-quarter turn with the wrench.
In-Line Filters with Push Connectors
These just push on and off. No clamps needed.
Push straight on. Make sure they click into place. To remove, push on the connector collar and wiggle.
In-Tank Filters
These are trickier. They sit inside your fuel tank.
You might need to drop the fuel tank. This requires getting under the car. You’ll need a jack. You might need special tools. If you’re not comfortable doing this, a mechanic can help.
Fuel Filter Maintenance Tips
Changing your filter isn’t just about replacing it. You can extend its life.
Drive smoothly. Rough driving stresses the fuel system. Smooth, steady acceleration is better.
Use quality fuel. Cheap gas has more dirt. Premium fuel is cleaner. It’s worth the extra cost.
Keep your fuel tank fairly full. A low fuel tank sucks up sediment from the bottom. Keep it at least a quarter full.
Replace your fuel filter on schedule. Don’t wait until it fails. Preventive maintenance saves money.
Have your fuel injectors cleaned every so often. A mechanic can do this. It keeps your fuel system healthy.
When to Call a Professional
Some jobs are better left to experts. Here’s when to skip the DIY approach:
You’re not comfortable working with fuel. Safety comes first. A mechanic handles fuel daily. They know the risks.
Your fuel filter is inside the tank. These jobs are complex. You need special tools and experience.
Your car is under warranty. Some warranties require factory service. Check before you start.
You don’t have the right tools. Buying tools for a one-time job doesn’t make sense. A mechanic has everything.
You’re unsure about your car’s specific design. Every car is different. When in doubt, ask a pro.
A mechanic can change your fuel filter in under an hour. The cost? Usually between $100 and $300 depending on your car. That’s worth the peace of mind.
The Cost of Changing Your Fuel Filter
Let’s talk money. If you do it yourself:
Fuel filter: $20 to $80 depending on your car Hoses and clamps: $10 to $30 if you need them Supplies: $5 to $15 for towels and containers
Total DIY cost: $35 to $125
If you go to a mechanic:
Parts: $20 to $80 Labor: $80 to $200 depending on complexity Shop supplies: $0 to $40
Total professional cost: $100 to $320
Doing it yourself saves money. But you need comfort with tools and fuel. Only you know if you’re ready.
Troubleshooting After Your Change
You changed the filter. The car still doesn’t run right. What now?
Engine won’t start: You might have air in the fuel line. Try starting it a few times. The pump primes the system. It should start.
Rough idle: This happens right after changing the filter. Drive a few miles. It usually goes away.
Fuel smell: Check all connections. Make sure everything is tight. If the smell continues, a hose might be cracked.
Leaks: Never ignore leaks. Find the source. Tighten connections. Replace cracked hoses. Drive carefully to a mechanic if needed.
Check engine light: Some cars trigger this after fuel system work. Drive for a bit. It might go away. If it stays on, have a mechanic check it.
Your Fuel System and Engine Health
Your fuel filter is just one part of the fuel system. It works with other components:
The fuel pump pushes fuel from the tank. A dying pump can feel like a fuel filter issue.
Fuel injectors spray fuel into the engine. Dirty injectors cause similar symptoms to a clogged filter.
The fuel pressure regulator keeps pressure steady. A bad regulator causes problems too.
Your fuel tank holds everything. Rust inside can create particles.
If your filter looks fine but your car still has problems, other parts might be failing. A mechanic can diagnose the real issue.
Save Money, Keep Your Car Running
Changing your fuel filter is simple. It’s also important. This one task keeps your engine happy. It improves fuel economy. It helps your car start easier.
Most people can do this job. It takes an hour or less. It costs just a few dollars in parts. The payoff? A car that runs better.
Whether you’re a DIY fan or not, knowing how to change a fuel filter is useful. You understand your car better. You save money. You stay safe.
Next time you see warning signs, you’ll know what to do. You’ll change that filter with confidence. Your car will thank you with smooth running and reliable starts.
Final Thoughts
Your car’s fuel filter works hard. It’s small but mighty. Over time, it gets dirty and tired. That’s when you step in.
Changing it yourself is rewarding. You’ll feel proud. You’ll save money. You’ll know your car better.
Start simple. Get the right tools. Follow the steps. Be safe. You’ve got this.
Your engine needs clean fuel. Your fuel needs a clean filter. Now you know how to make sure it gets one. Happy wrenching.

Peterson is an automotive enthusiast and auto parts reviewer with a passion for vehicle maintenance, upgrades, and performance. He enjoys researching and testing car parts, tools, and accessories to help drivers make informed buying decisions. Through AutoPartsTalk.com, Peterson shares honest reviews, practical maintenance tips, and expert guides to keep vehicles running safely and efficiently.