How to Get Air Out of Your Coolant System?
If your car is overheating or running hot, air might be trapped in your cooling system. This is one of the most common problems car owners face. The good news? You can fix it yourself without a mechanic. Let me walk you through everything you need to know about purging air from your cooling system.
What Is a Coolant System and Why Does It Need Air Removed?
Your car’s cooling system is like your vehicle’s air conditioner. It moves cold liquid through your engine to keep it from getting too hot. The coolant flows through hoses, the radiator, and your engine block.
When air gets stuck in these lines, it creates air pockets. These air pockets stop the coolant from doing its job properly. Your engine can overheat. Your temperature gauge climbs higher than it should. You might even see your check engine light come on.
Think of it like a water hose with an air bubble in it. The water can’t flow smoothly. The same thing happens in your cooling system.
Why Does Air Get Into Your Cooling System?
Air enters your cooling system for several reasons. Here are the most common causes:
You drained the radiator or coolant. When you open your radiator cap or disconnect hoses, air rushes in to fill the space. It’s simple physics.
Your cooling system has a leak. Hoses crack. Connections come loose. Water pumps fail. These problems let coolant leak out, and air leaks in through the same holes.
You replaced coolant hoses or the water pump. These repairs require you to open your system. Even if you’re careful, air still finds its way inside.
Your radiator cap is broken. A bad cap can’t seal properly. This lets air seep into your system slowly over time.
You recently had work done on your car. Any repair that touches your cooling system might introduce air pockets. This happens even at professional shops.
Your cooling system overheats. Extreme heat can cause coolant to boil. Boiling coolant creates bubbles that act like air pockets.
How Do You Know If Air Is Trapped in Your System?
Before you start working on your cooling system, you need to know if air is actually the problem. Here are the warning signs:
Your engine runs hot. Your temperature gauge reads higher than normal, even when you’re not driving hard or it’s not hot outside.
Your heater blows cold air. The heating system runs on hot coolant. If air blocks the coolant flow to your heater core, your vents blow cold air instead of hot.
You hear gurgling sounds. When your engine runs, you hear bubbling or sloshing sounds coming from under the hood. This is air moving through the coolant lines.
Your radiator fan runs constantly. Your cooling fan should cycle on and off. If it runs all the time, your engine thinks it’s overheating. Air pockets can trigger this.
You see the temperature gauge bouncing. The needle jumps up and down instead of staying steady. This is a classic sign of trapped air.
Your coolant level drops. You keep adding coolant, but it disappears. You might have a leak creating air pockets.
White smoke comes from under the hood. Boiling coolant creates steam. This can mean air pockets are blocking coolant flow.
Your car overheats when you stop driving. This happens because air pockets prevent proper coolant circulation when your engine speed drops.
Tools and Supplies You’ll Need
Removing air from your cooling system doesn’t require fancy tools. Here’s what you’ll need:
- A container for old coolant (if you’re draining some)
- Fresh coolant or distilled water (depending on your situation)
- A funnel (makes pouring easier and reduces air getting in)
- Your car’s owner’s manual (important for specific information)
- A wrench or socket set (to loosen bleeder screws if needed)
- Rags or towels (for spills)
- Safety glasses (to protect your eyes)
- Work gloves (coolant can irritate skin)
- A heat gun or hair dryer (sometimes helpful)
Check your owner’s manual to see if your car has any special bleeder screws or air release valves. Some vehicles have them in the thermostat housing or on top of the radiator.
The Basic Steps to Remove Air From Your Cooling System
Step 1: Let Your Engine Cool Down
Never work on your cooling system when your engine is hot. The coolant inside is boiling. It can spray out and burn you badly. Wait at least two hours after driving before you touch anything.
If you’re in a hurry, you can turn on your air conditioning. This cools the engine faster. But still wait for the engine to reach a safe temperature.
Step 2: Find Your Coolant Overflow Tank
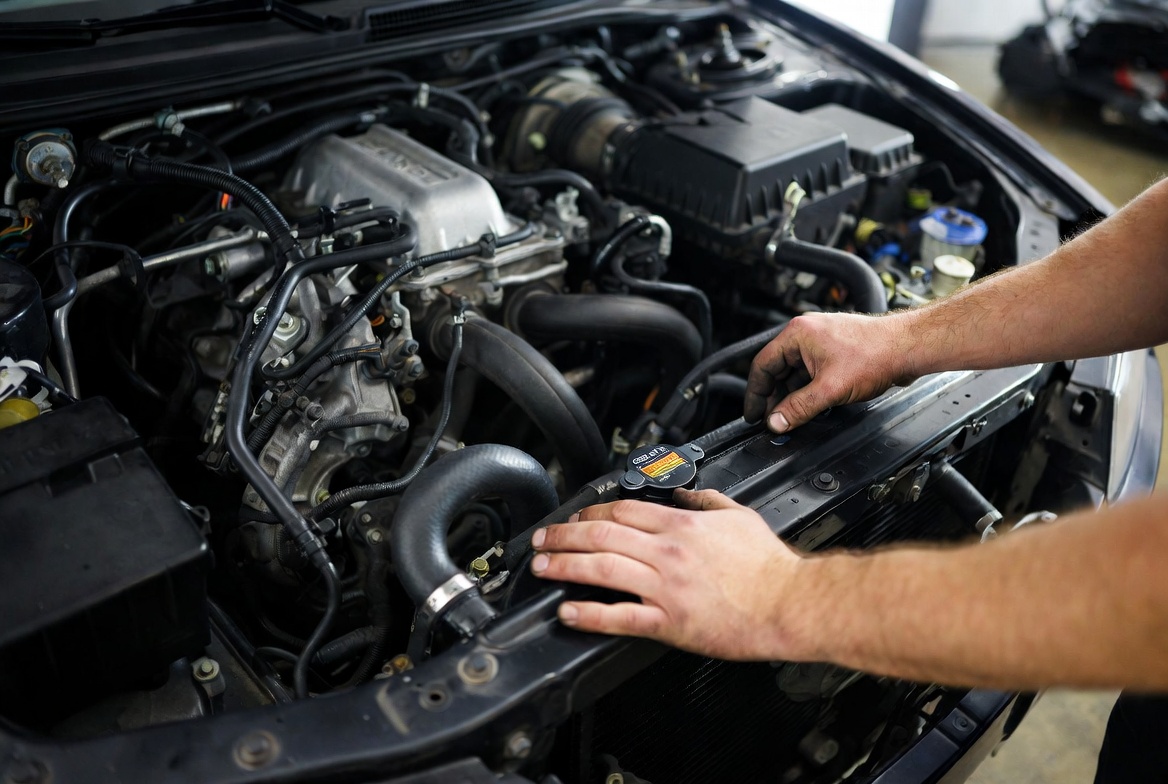
Open your hood and look for a plastic tank near the radiator. This is your coolant overflow tank or reservoir. It usually has coolant level marks on the side. Look for words like “hot” and “cold” printed on it.
Some cars have the radiator cap on top of the radiator itself. Others have it on the overflow tank. Your owner’s manual will show you exactly where it is.
Step 3: Remove the Radiator Cap Slowly
Once your engine is completely cool, place a rag over the radiator cap. Slowly turn it counterclockwise. Turn it just a quarter turn first. Let any pressure escape slowly. Then remove it fully.
Why the rag? Residual heat can still spray hot liquid out. The rag protects you.
Step 4: Check Your Coolant Level
Look inside your radiator. You should see coolant covering the core. If it’s low, you need to add coolant first.
If your radiator is empty or almost empty, you’ll definitely have air pockets. This is your main problem.
Step 5: Pour Fresh Coolant Into Your Radiator
Use a funnel and pour your coolant slowly into the radiator opening. Pour gradually and let it flow down. This helps reduce the amount of air that gets trapped during the pouring process.
Fill it until you see coolant coming out of the top. Don’t overfill it.
Step 6: Replace the Radiator Cap
Screw your radiator cap back on clockwise. Make sure it sits tight. A loose cap lets air back in.
Step 7: Start Your Engine and Let It Run
Start your engine and let it idle. Keep the hood open so you can monitor things. Watch your temperature gauge. It should start rising toward normal operating temperature.
Listen carefully for gurgling sounds. These are air bubbles moving through your system. That’s exactly what you want to hear right now.
Let your engine run until the thermostat opens. You’ll feel the upper radiator hose get hot. This usually takes five to ten minutes.
Step 8: Rev Your Engine Gently
While the engine is running, gently rev it to about 2,000 RPM. Hold it there for a few seconds. This makes the water pump work harder and pushes air through the system faster.
Rev it a few times over the next few minutes. Don’t rev too hard. Just gentle revving.
Step 9: Turn Off Your Engine
Let your engine cool down again. This usually takes about an hour. You can speed this up by parking in the shade or using a fan.
Step 10: Check Your Coolant Level Again
Once your engine cools, open the radiator cap again. Check your coolant level. If it’s gone down, you know air has worked its way out. Add more coolant to bring it back to the proper level.
This is the most important step. Coolant level dropping is proof that air pockets existed and are now gone.
Step 11: Repeat the Process
Start your engine again and run it through the same cycle. Let it reach operating temperature. Gently rev it. Then cool it down.
Most air pockets clear on the first try. But stubborn air might need two or three cycles. Keep checking your coolant level each time.
Your coolant level stabilizes once all the air is out. Then you know you’re done.
Advanced Method: Bleeding the Cooling System
Some vehicles have bleeder screws designed specifically for this job. These are small valves usually located at the highest points in your cooling system. Check your owner’s manual to find them.
If your car has bleeder screws, here’s how to use them:
Step 1: Locate all the bleeder screws on your cooling system. Common locations include the thermostat housing, heater inlet line, and top of the radiator.
Step 2: Prepare your coolant and funnel. Fill your coolant overflow tank to the proper level.
Step 3: Start your engine. Let it reach operating temperature.
Step 4: Open the highest bleeder screw using a wrench. Turn it slowly and carefully.
Step 5: Have a container ready. Coolant will drip out as air escapes.
Step 6: You’ll see air bubbles mixed with coolant coming out of the bleeder screw. Keep the screw open until coolant flows out smoothly without bubbles.
Step 7: Close the bleeder screw tightly.
Step 8: Move to the next bleeder screw and repeat the process, working from the highest point to the lowest.
Step 9: Once all bleeder screws are closed, turn off your engine and let it cool.
Step 10: Check your coolant level in the overflow tank. Top it off if needed.
Step 11: Start your engine one more time to verify everything works properly.
This method is more thorough than the basic method. It gets air out faster and more completely. Professional mechanics use this technique because it’s reliable and efficient.
Special Methods for Difficult Air Pockets
Sometimes air doesn’t want to budge. If the standard methods don’t work, try these tricks:
The Heat Method
Use a heat gun or hair dryer to warm the radiator hose. Start at the radiator and work your way toward the engine. Heat makes air expand and move more easily. You might hear gurgling as the air pocket shifts.
The Squeezing Method
With the engine running at operating temperature, gently squeeze the upper radiator hose. Be careful not to squeeze too hard or too long. The pressure change can dislodge stubborn air pockets. Do this for just a few seconds at a time.
The Thermostat Housing Method
If you have access to your thermostat housing, you can sometimes get better results by filling from there instead of the radiator. This puts coolant higher in your system. Gravity helps push air downward and out.
The Jack Method
For some vehicles, gently raising the front of your car (safely, with jack stands) helps. This tilts the radiator upward. The highest point of your system becomes the exit point for air. Air naturally moves toward the highest point.
Only use this method if you’re comfortable with vehicle jacks and safety procedures. Never go under a car supported only by a jack.
What Not to Do When Removing Air
Avoid these common mistakes that make the problem worse:
Don’t open your radiator cap when the engine is hot. Hot coolant sprays out under pressure. It will burn you. Always wait for your engine to cool completely.
Don’t mix coolant types. Different coolant colors often indicate different types. Mixing them can damage your cooling system. Use the same type your car came with.
Don’t leave your radiator cap off while the engine runs. Coolant boils out and splashes everywhere. Always replace the cap after you add coolant.
Don’t overfill your radiator. Coolant expands as it heats up. Overfilling forces coolant out through your overflow tube and all over your engine bay.
Don’t ignore leaks. If you keep adding coolant and your level keeps dropping, you have a leak. Air is getting in through that same hole. Fix the leak first.
Don’t use just water. Tap water corrodes your cooling system. Use proper coolant or distilled water mixed with coolant.
Don’t work too fast. Take your time pouring coolant and checking levels. Rushing introduces more air.
Don’t skip the cooling cycles. You need to let your engine heat up and cool down multiple times. This ensures all air works its way out.
How Long Does This Take?
Removing air from your cooling system doesn’t happen instantly. The whole process usually takes one to two hours. This includes:
- Preparation and safety cooling: 15 minutes
- Adding coolant: 10 minutes
- Running and heating cycle: 15 minutes
- Cooling back down: 45 minutes to 1 hour
- Checking levels and repeating: 20 minutes
Total time: 1.5 to 2.5 hours
If you have stubborn air pockets, add another cycle or two. Extremely stubborn cases might take three to four hours total.
Don’t rush this job. Taking your time ensures you do it right.
When Should You Call a Professional?
Some situations need a professional mechanic. Call a shop if:
Your cooling system keeps having air pockets. Repeated air pockets mean you probably have a leak. Finding and fixing leaks requires specialized equipment.
Your engine still overheats after removing air. Another problem might be causing your overheating. Could be a bad thermostat, broken water pump, or failed radiator.
You found a leak while working. Leaking hoses, cracked radiators, or broken fittings need replacement. These repairs need the right tools and parts.
Your car is still making weird noises. Gurgling that doesn’t go away might mean internal engine problems.
You’re not comfortable working on your car. That’s perfectly okay. Some people prefer having professionals handle cooling system work. It’s not cheap, but it’s done right.
Your warranty is still active. Doing cooling system work yourself might void your warranty. Check your warranty details first.
Preventing Air Pockets in Your Cooling System
Once you’ve fixed the problem, keep it fixed. Here’s how to prevent air pockets:
Check your coolant level monthly. A drop in level means something is wrong. Catch leaks early before they cause air pockets.
Replace your radiator cap every few years. It’s inexpensive and prevents slow air leaks.
Inspect your radiator hoses regularly. Look for cracks, bulges, or soft spots. Replace hoses showing signs of wear.
Keep your radiator clean. A clogged radiator works harder and gets hotter. This can cause coolant to boil and create air pockets.
Don’t skip regular maintenance. Your owner’s manual has a coolant flush schedule. Follow it. Fresh coolant works better and lasts longer.
Fix leaks immediately. Even small weeping leaks eventually cause problems. Address them quickly.
Use the correct coolant type. Your owner’s manual specifies which coolant your car needs. Don’t guess or use random coolant you find.
Understanding Your Cooling System Better
Your cooling system is actually pretty simple once you understand how it works. It’s a closed loop. Coolant starts in your engine where it absorbs heat. Then it travels to your radiator where a fan cools it down. Then it goes back to your engine to absorb more heat.
Air breaks this cycle. Air doesn’t conduct heat like coolant does. Air pockets create dead zones where heat can’t escape.
That’s why your engine overheats. That’s why your heater blows cold. That’s why your temperature gauge goes crazy.
Removing air restores the cycle. Your cooling system works as designed. Your engine runs at the right temperature. Everything functions normally.
Coolant Types Explained
Different cars use different types of coolant. Understanding the types helps you do this job right:
Green Coolant. This is the oldest type. It lasts about two years or 25,000 miles. It needs regular flushing.
Orange or Red Coolant. This is extended-life coolant. It lasts five to ten years. It’s more expensive but worth it.
Blue or Pink Coolant. Different manufacturers have their own colors. Always check your owner’s manual.
Universal Coolant. Some aftermarket brands claim to work with any car. Be careful with universal coolant. It’s not ideal for any specific vehicle.
Always use the type your owner’s manual specifies. If you don’t know what type your car uses, ask your mechanic or look it up online using your vehicle’s year, make, and model.
Final Thoughts on Removing Coolant System Air
Getting air out of your cooling system is something most car owners can do themselves. It’s not difficult. It just requires patience and attention to detail.
The basic steps are simple: add coolant, run your engine, let it cool, check levels, and repeat. Most air pockets vanish on the first try.
If you’re dealing with stubborn air, try the advanced bleeding method using bleeder screws. It’s more thorough and gets results faster.
Monitor your coolant level constantly. A drop in level tells you air is escaping. That’s your success indicator.
Remember, you’re not fighting your car. You’re just giving your cooling system the help it needs to work properly. Once the air is out, your engine runs cooler. Your heater works better. Your temperature gauge stays steady.
Take your time, follow these steps, and you’ll have your cooling system running smoothly again. Your car will thank you with better cooling performance and more reliable operation.
Good luck with your cooling system repair. You’ve got this.