How to Get Pitch Off a Car?
Pitch stains on your car can be super frustrating. You’ve worked hard to keep your vehicle clean and shiny. Then one day you notice those dark, sticky spots on the paint. They look like tar or tree sap. They won’t come off with regular soap and water. So what do you do?
Don’t worry. You’re not alone in dealing with this problem. Many car owners face pitch buildup regularly. The good news is that removing pitch from your car is totally doable. You don’t need to be a professional detailer to get great results.
This guide will walk you through everything you need to know. You’ll learn what pitch really is, where it comes from, and how to remove it safely. By the end, your car will look clean and protected.
What Is Pitch Anyway?
Let’s start with the basics. Pitch is a sticky substance that builds up on your car’s exterior. It comes from the environment, not from anything you did wrong. Pitch is often called tar staining or road tar. It’s the same thing.
Road surfaces leave behind small particles. These particles stick to your car’s paint. Over time, more and more particles collect. They form dark spots that look dirty and ugly. The spots feel rough and sticky to the touch.
Pitch comes from many sources. Asphalt roads release tar. Trees drop sap. Power plants release airborne particles. Industrial areas create more pitch buildup. Even newly paved roads shed tar residue. If you park under trees or drive in traffic-heavy areas, you’ll see more pitch on your car.
The reason pitch sticks so well is simple chemistry. The sticky particles bond to your clear coat. They don’t wash away with regular car soap. Rain doesn’t remove them. That’s why you need special techniques and products to get them off.
Why You Should Remove Pitch From Your Car
You might think pitch spots don’t matter much. Your car still runs fine, right? But leaving pitch on your paint can cause real problems over time.
Pitch eats through your clear coat. Your car’s paint has layers. The clear coat is the protective top layer. Pitch sits on the clear coat and slowly damages it. This damage gets worse as days go by. Once the clear coat is compromised, rust can start to form underneath.
Rust is a serious problem. It spreads quickly. It can ruin your car’s appearance and its structure. Fixing rust is expensive. Preventing rust is much cheaper and easier.
Pitch also makes your car look poorly maintained. Even if you wash your car every week, pitch spots make it look dirty. They draw attention because they’re dark and noticeable. Getting rid of pitch helps your car look its best.
Removing pitch now saves you money later. A little effort today prevents costly paint repairs tomorrow. It’s worth taking an hour or two to clean your car properly.
Safety First: Protect Yourself and Your Car
Before you start the pitch removal process, let’s talk safety. You need to protect yourself and your car from damage.
Work in a well-ventilated area. Some pitch removal products have strong smells. You don’t want to breathe in fumes for extended periods. If possible, work outdoors or in a garage with the door open. If you’re using products with chemicals, wear gloves. Protect your skin from direct contact.
Keep pitch removal products away from your eyes. If something gets in your eye, rinse it right away with lots of water. Some products can irritate skin. Reading the label before you start is always smart.
Make sure your car is parked on level ground. You need good stability while you work. A safe, flat surface keeps you from slipping or falling. It also keeps your car stable while you’re moving around it.
Check that the sun isn’t too bright. Working in direct sunlight can make it hard to see what you’re doing. It also makes products dry too quickly on the paint. Morning or evening work is often better than midday.
Never use pitch removal products on hot paint. Let your car cool down completely before starting. Hot paint can be damaged more easily by chemicals. Cool paint is safer to work with.
The Tools and Products You’ll Need
Good tools make the job easier and faster. You don’t need expensive equipment. Basic items work just fine.
A microfiber cloth is essential. Microfiber is soft and won’t scratch your paint. Regular towels or paper towels can cause damage. Get several microfiber cloths so you have clean ones to use.
A clay bar is one of the best tools for removing pitch. Clay bars are specially designed for this job. They’re made from a clay compound that grabs and lifts contaminants. Clay bars are cheap and incredibly effective. You can find them at any auto parts store.
A dedicated pitch removal product is very helpful. Many brands make pitch removers. These products are designed to break down and dissolve tar and pitch. They work faster than soap and water. They’re stronger than regular cleaners.
Some popular pitch remover brands include Mothers, Zep, and WD-40. Yes, regular WD-40 works on pitch. It’s not fancy, but it gets the job done. Check the label to make sure it’s safe for automotive paint.
Rubbing alcohol can work as a pitch remover. It’s cheap and probably already in your house. Pour some on a cloth and rub the pitch gently. It takes more elbow grease than specialized products, but it works.
Isopropyl alcohol is another option. It’s stronger than rubbing alcohol. Some people swear by it for pitch removal. Use a high concentration, like 90% isopropyl alcohol, for best results.
A soft-bristled brush can help with tough spots. Use it gently to avoid scratching the paint. The goal is to loosen the pitch, not to scrub aggressively.
Soap and water are still important. You’ll use them at the start and end of the process. Regular car wash soap is fine. Dish soap works too, though it’s a bit harsh on the clear coat.
A bucket is essential. Fill it with warm water and soap. You’ll use this to rinse your tools and the car.
Step-by-Step Process for Removing Pitch From Your Car
Now let’s get to the actual removal process. Follow these steps carefully for best results.
Step One: Wash Your Car
Start by giving your car a thorough wash. Use your regular car wash soap and warm water. This removes loose dirt and debris. You need a clean surface to work with. Dirty paint makes it hard to see what you’re doing.
Wash your entire car, not just the spots with pitch. Pay extra attention to areas where pitch usually builds up. The lower sides of your car get the most pitch. The back of your car collects more than the front.
Rinse thoroughly. Make sure all soap is gone. Soap residue can interfere with pitch removal products. Dry the car completely with your microfiber cloth.
Step Two: Identify All the Pitch Spots
Look closely at your car’s exterior. Run your hand over the paint. Pitch feels rough and bumpy. You might notice spots you didn’t see before.
Mark the spots mentally or even with a piece of tape. This helps you keep track of problem areas. It’s easy to miss spots if you don’t mark them first.
Common areas include:
- The hood
- The roof
- Behind the doors
- The trunk
- The rear bumper
- The sides of the car
Don’t limit yourself to these areas. Pitch can land anywhere. Take your time and inspect the whole car.
Step Three: Choose Your Removal Method
You have several options here. The method you choose depends on what you have available and how much pitch you’re dealing with.
Method One: Clay Bar Approach
Clay bars are incredibly popular for good reason. They work really well on pitch. Here’s how to use one:
Get your clay bar. If it’s dry, knead it in your hands for a few seconds. It needs to be slightly warm and pliable. Break off a chunk about the size of a small marble. You don’t need a huge piece.
Flatten the clay between your fingers. Make a small patty. Use a clay bar lubricant or soap solution. This prevents the clay from sticking to your paint. Spray the lubricant on the pitch spot.
Press the clay gently onto the pitch. Don’t rub hard. Use light pressure with small motions. You’ll feel the pitch being lifted. Keep the area wet with lubricant. Dry spots can cause the clay to stick.
Work the clay over the pitch for about 20-30 seconds. You should see the pitch transferring to the clay. Fold the clay in half to expose a fresh side. Keep using clean clay surfaces.
Wipe away any residue with a microfiber cloth. The spot should be clean. If pitch remains, repeat the process with fresh clay.
Method Two: Specialized Pitch Remover
Pitch removal products are formulated specifically for this job. They dissolve pitch effectively. Here’s the basic process:
Read the product instructions first. Different brands have slightly different directions. Follow what the manufacturer recommends.
Spray or apply the pitch remover directly onto the spot. Make sure the area is wet with product. Let it sit for a few minutes. The product needs time to break down the pitch. Check the label for exact timing.
Use a soft cloth to gently rub the pitch. The cloth should remove the pitch as the product dissolves it. Work in small circles. Don’t scrub aggressively.
Reapply the product if needed. Some tough spots need multiple applications. That’s totally normal. Just keep going until the pitch is gone.
Wipe clean with a microfiber cloth. Use fresh cloths so you’re not spreading pitch around. Rinse the area with water.
Method Three: WD-40 or Household Products
WD-40 actually works for pitch removal. Many people don’t realize this. Here’s how to use it:
Spray WD-40 directly onto the pitch spot. Let it sit for a minute or two. WD-40 needs time to penetrate and loosen the pitch.
Gently rub the area with a microfiber cloth. Use light pressure. The pitch should start breaking up. You might need to apply more WD-40 and keep rubbing.
Once the pitch is loose, wipe it away completely. Use a fresh cloth to make sure you get all the residue.
Wash that area with soap and water afterward. WD-40 leaves an oily residue. You want to clean it off so your paint looks its best.
Method Four: Isopropyl Alcohol
Rubbing alcohol or isopropyl alcohol works on pitch. It’s a budget-friendly option.
Dampen a cloth with isopropyl alcohol. Higher concentrations work better. Try 90% isopropyl alcohol if you can find it.
Rub the pitch spot gently. This takes more effort than specialized products. You’ll feel the pitch breaking down as you work.
Keep applying more alcohol and rubbing. Eventually, the pitch will come off. This method requires patience but costs very little.
Step Four: Handle Tough Spots
Some pitch spots are stubborn. They don’t come off easily. Don’t get frustrated. Tough spots just need more time and effort.
Reapply your chosen product. Let it sit longer before rubbing. Sometimes pitch needs extra time to soften up.
Use a soft-bristled brush for very tough spots. Gently brush the pitch. The bristles help loosen it. Never use a hard brush or abrasive material. You’ll damage the clear coat.
Try a different method if one isn’t working. Switch from a clay bar to a specialized product. Sometimes the combination of methods works better than one alone.
Be patient with stubborn spots. Rushing leads to damage. Take your time and let products do their work.
Step Five: Final Wash and Protection
After all the pitch is removed, give your car another complete wash. Use soap and water to remove any product residue. Rinse thoroughly until the water runs clear.
Dry your car with clean microfiber cloths. Make sure no water spots are left behind. These are just as noticeable as pitch spots.
Now is a great time to apply a coat of wax or sealant. These products protect your paint. They create a barrier that makes future pitch removal easier. Wax also makes your car look shiny and new.
Let any wax or sealant cure according to product directions. Usually this takes a few hours. Avoid driving or exposing your car to water during this time.
Special Situations and Problem Areas
Different areas of your car need different approaches sometimes.
Plastic trim and trim pieces can also get pitch. Plastic is softer than painted metal. Be extra gentle when working on trim. Use less aggressive methods. Specialized plastic cleaners work well for trim pieces.
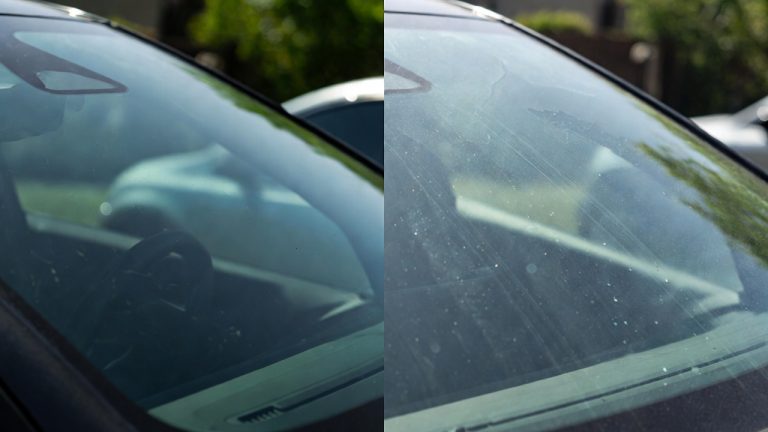
Windshields and windows sometimes get pitch too. Don’t use clay bars on glass. Glass cleaner and a squeegee work better. Be careful not to let pitch remover run onto your rubber seals.
Bumpers and trim often need extra attention. These parts sit lower and collect more pitch. Use the same methods you use on the paint. Just be careful around seams and crevices.
Wheels and tires can have pitch buildup. Use tire-safe cleaners on these areas. Avoid regular pitch removers which might damage rubber.
Prevention Tips for the Future
Preventing pitch is easier than removing it. These tips help keep your car cleaner longer.
Park smartly. Avoid parking under trees when possible. Trees drop sap and loose debris. Parking in shaded areas helps protect your paint from sun damage too.
Regular washing is your best defense. Wash your car every two weeks if you live in an area with lots of pitch. Regular washing removes contaminants before they get stuck.
Apply protective coatings. Wax creates a barrier between your paint and contaminants. Reapply wax every three months. This is one of the best investments you can make.
Use a car cover. If you park outside regularly, a car cover protects your paint. It keeps pitch, bird droppings, and other contaminants off your car.
Park away from traffic. Heavy traffic areas have more road tar. Park on side streets when possible. This reduces your exposure to pitch.
Maintain your clear coat. A healthy clear coat resists contaminants better. Regular waxing and protective treatments keep your clear coat strong.
Common Mistakes to Avoid
Learning what NOT to do is just as important as knowing what to do.
Don’t use hot water. Hot water can damage your paint and clear coat. Use warm water instead. Hot weather also affects how products work.
Don’t scrub aggressively. Your clear coat is tough but not indestructible. Gentle scrubbing works better than harsh rubbing. Let products do the work instead of relying on elbow grease.
Don’t use abrasive tools. Steel wool, harsh brushes, and scouring pads scratch paint. Stick with soft cloths and soft-bristled brushes.
Don’t leave products on too long. Some pitch removers can damage clear coat if left too long. Follow product instructions exactly.
Don’t skip the rinse. Product residue left on your paint looks bad and can cause damage. Always rinse completely after using any product.
Don’t ignore small spots. Pitch gets worse over time. Deal with it early before it becomes a bigger problem.
Don’t use the wrong products. Industrial degreasers and harsh chemicals can ruin your clear coat. Stick to products designed for automotive use.
How Often Should You Remove Pitch?
The frequency depends on where you live and how often you drive.
If you live in an urban area with heavy traffic, you might see pitch buildup every two to three weeks. Regular washing helps. Removing buildup before it gets bad takes less effort.
If you live in a rural area or don’t drive much, pitch might accumulate more slowly. You might only need to do pitch removal once or twice per year.
The best approach is to stay on top of it. Don’t wait until your car looks terrible. Regular maintenance prevents big problems.
Cost Comparison: DIY vs. Professional Detailing
Doing this yourself is much cheaper than paying a professional.
A clay bar costs about five dollars. You can use multiple bars before it’s completely worn out. A container of clay bars with lubricant costs about fifteen to twenty dollars. You can do dozens of cars with one container.
Specialized pitch removers cost ten to twenty dollars per bottle. One bottle handles a lot of pitch spots.
WD-40 and isopropyl alcohol are even cheaper. Most people have these items already.
Your total DIY cost is probably under twenty dollars. You’ll have supplies left over for future use.
Professional detailing services charge fifty to two hundred dollars for pitch removal. Some charge more depending on severity and location.
Doing it yourself saves hundreds of dollars per year. The time investment is minimal compared to the money saved.
When to Call a Professional
Most pitch removal is completely manageable as a DIY project. Sometimes professional help makes sense though.
If your car has severe paint damage under the pitch, a professional should handle it. They can assess whether clear coat repair is needed.
If you’ve tried everything and pitch still won’t come off, a professional has stronger tools and products. They also have experience with stubborn situations.
If you’re not comfortable working on your own car, paying a professional is reasonable. It’s better to pay than to accidentally damage your paint.
If your car has specialty paint or ceramic coating, professional service is safer. These special finishes need careful handling.
The Bottom Line
Getting pitch off your car is totally doable. You don’t need special skills or expensive equipment. Basic tools and products work great. An hour or two of work makes a huge difference.
Regular maintenance is your best defense. Keep your car clean. Apply protective coatings. Address pitch spots quickly before they become problems.
Your car will look better. Your paint will last longer. You’ll feel good knowing you’re taking care of your vehicle. Plus, you’ll save money by avoiding professional services.
Start with a gentle method like clay bars. If that doesn’t work, try a specialized pitch remover. Be patient and don’t rush the process. Your car will thank you.
Take care of your paint today. Enjoy a clean, shiny car tomorrow. It’s that simple.
Frequently Asked Questions About Pitch Removal
Does vinegar remove pitch from cars?
Vinegar doesn’t work well on pitch. It’s too weak. Stick with clay bars or specialized removers. Vinegar works better for water spots and light stains.
Can I use acetone to remove pitch?
Acetone is very strong. It can damage your clear coat. Avoid acetone unless it’s specifically mentioned on a product label. There are safer options available.
How long does pitch removal take?
It depends on how much pitch you’re dealing with. Light buildup might take thirty minutes. Heavy buildup could take an hour or two. Patience pays off with good results.
Will pitch removal damage my paint?
No, if you use gentle methods and the right products. Be careful not to scrub aggressively. Follow product directions. Your paint will be fine.
What’s the best product for pitch removal?
Clay bars and specialized pitch removers are both excellent. WD-40 works too. The best product is the one you’re comfortable using. Try different options to find your favorite.
Can I remove pitch in winter?
Yes, but work in a sheltered area. Cold temperatures affect how products work. Let your car warm up before starting. Work in a garage if possible.
Is pitch removal safe for new cars?
Absolutely. Pitch removal is safe for any car. New cars actually benefit most from early pitch removal. Prevent problems before they start.
How often should I use clay bars on my car?
You can use clay bars monthly or as needed. They’re gentle enough for regular use. Most people use them quarterly for maintenance.
Final Thoughts
Your car deserves to look its best. Pitch doesn’t have to ruin its appearance. With the right approach, you can remove it easily. The process is straightforward. The results are worth it. Your car will look cleaner and shinier. You’ll feel proud driving it. Best of all, you’ll save money and protect your investment. Get started today. Your paint will thank you.