How to Tune Up a Nissan Altima?
Your Nissan Altima is a dependable sedan that can give you years of reliable driving. But like any vehicle, it needs regular maintenance to stay healthy and run at its best. A tune-up is one of the most important things you can do to keep your car in good shape. In this guide, we’ll walk you through everything you need to know about tuning up your Altima so you can handle this job with confidence.
What Exactly Is a Tune-Up?
Before we jump into the how-to part, let’s talk about what a tune-up really means. A tune-up is a set of routine maintenance tasks that keep your engine running smoothly and efficiently. Think of it like a health checkup for your car. You’re not fixing what’s broken. Instead, you’re doing preventive work to stop problems before they start.
A proper tune-up for your Altima includes checking and replacing several key parts and fluids. You’ll look at spark plugs, air filters, oil and oil filters, fuel filters, belts, and hoses. You’ll also inspect your battery, coolant system, and brake fluid. Some people add transmission fluid checks to the mix as well.
The goal is simple: keep your engine clean, cool, and well-lubricated so it runs at peak performance. When you do this regularly, your car starts easier, uses fuel more efficiently, and you avoid costly repairs down the road.
How Often Should You Tune Up Your Altima?
The first question most people ask is how often they really need to do this work. Your owner’s manual is your best friend here. Nissan recommends a tune-up every 30,000 to 60,000 miles, depending on which components you’re maintaining.
For spark plugs, many modern Altimas can go longer between replacements than older models. Some newer versions have spark plugs rated for 100,000 miles, while older ones might need replacing every 30,000 miles. Your manual will tell you exactly what your car needs.
Air filter replacements usually happen every 15,000 to 30,000 miles. Oil changes are more frequent, typically every 3,000 to 5,000 miles, though synthetic oils can stretch this further. If you drive in dusty conditions or tow heavy loads, you’ll want to do these jobs more often.
Pay attention to your driving habits. If you spend a lot of time idling in traffic, do short trips around town, or drive in severe weather, your Altima needs more frequent tune-ups. Check your oil level every time you fill up with gas.
Get Your Tools and Supplies Ready
You don’t need a full garage full of expensive equipment to tune up your Altima. A basic set of tools will get the job done. Here’s what you’ll need:
Start with a socket set that includes the right sizes for your engine. You’ll also want a wrench set, both open-end and adjustable wrenches work fine. Grab a ratchet with extensions and a spark plug socket. A jack and jack stands are essential for safely lifting your vehicle. Never work under a car that’s only supported by a jack.
Get yourself a good flashlight or headlamp because you’ll be working in dark engine compartments. You’ll need screwdrivers, both flathead and Phillips head. An oil drain pan is crucial for catching used oil, and you’ll want some rags or paper towels for cleanup.
For supplies, gather new spark plugs, an air filter, an oil filter, the correct grade of motor oil, and coolant for your Altima. Pick up some dielectric grease to protect your spark plug connections. Buy a new engine air filter if yours looks dirty. Keep a shop manual handy. You can find digital versions online, and they show you exactly where everything sits on your engine.
Step 1: Start by Checking Your Oil
Oil is the lifeblood of your engine. It keeps parts lubricated and running smoothly. Start your tune-up by checking your oil level, condition, and then changing it if needed.
To check your oil, park on level ground and wait a few minutes after turning off the engine. Pop the hood and locate the dipstick. Pull it out completely and wipe it clean with a rag. Stick it back in all the way, then pull it out again to get a true reading.
Look at where the oil level sits on the stick. It should be between the minimum and maximum marks. If it’s low, you need to add oil. If it’s dark and dirty, you definitely need to change it. Fresh oil looks amber or golden colored.
To change your oil, you’ll drain the old stuff first. Locate your oil drain plug underneath the engine. You might need to jack up the front of the car safely and remove the wheel. Position your drain pan under the plug, loosen it with a wrench, and let it drain completely. This takes about five to ten minutes.
Once the oil stops dripping, wipe off the drain plug and reinstall it. Don’t overtighten it. Now locate your oil filter. Spin it off by hand and let any remaining oil drain into your pan. Check the rubber gasket on the old filter to make sure it didn’t stick to the engine.
Before installing the new filter, rub a thin layer of fresh oil around the rubber gasket. This creates a proper seal. Screw the new filter on by hand until the gasket touches the engine, then turn it three-quarters of a turn more. Now you’re ready to add fresh oil.
Remove the oil filler cap on top of the engine. Use a funnel to pour in the correct amount and type of oil for your Altima. Check your manual for the exact amount and oil grade. Replace the cap, start your engine, and let it run for a minute. Turn it off and wait a few minutes, then check the level again with the dipstick.
Step 2: Replace Your Spark Plugs
Spark plugs ignite the fuel in your engine’s cylinders. Over time, they wear down and don’t create a spark as strong. This makes your engine run rough and wastes fuel. Replacing them is one of the best things you can do in a tune-up.
First, let your engine cool completely. Hot engines burn hands fast. Locate your spark plugs. They sit under thick wires or coils on top of the engine. Your manual shows you exactly where.
Before you remove anything, take a photo with your phone. This helps you remember what goes where. Remove one wire or coil by twisting it gently and pulling it off. Never yank on the wire itself. Twist the boot and pull the boot off.
Use a spark plug socket to unscrew the old spark plug. Keep track of which cylinder you removed it from. Look at the gap on your new spark plug. The gap is the space between the two electrodes. Your manual tells you what it should be. Use a gap tool to adjust it if needed.
Insert the new spark plug by hand first, then use your ratchet to tighten it snugly. Don’t overtighten or you’ll crack the ceramic insulator. Reconnect the wire or coil, twisting it until you hear a click. Repeat this process for each spark plug on your engine.
Most four-cylinder Altimas have four spark plugs. Some V6 models have six. Take your time with each one and make sure you do them one at a time so you don’t mix up the wires.
Step 3: Check and Replace Air Filters
Your engine needs clean air just like you do. Air filters prevent dirt and debris from getting into your combustion chambers. When they get clogged, your engine works harder and burns more gas.
Your engine has two air filters. The engine air filter sits in a plastic box at the top of the engine. The cabin air filter is usually behind your glove box and keeps dust out of your interior.
Pop open the plastic air filter housing and look at the engine filter. If it’s white or light colored, it’s clean. If it’s dark gray or black, it needs replacing. Remove the old one and install a new one, making sure the rubber seal sits properly.
For the cabin filter, open your glove box and look for a plastic access panel. Unhook the clips or latches and slide the filter out. Note which direction the airflow arrow points. Install your new filter in the same direction. Close everything back up.
Changing air filters is simple, takes just a few minutes, and makes a real difference in how your Altima runs.
Step 4: Inspect Your Belts and Hoses
Rubber belts and hoses carry fluids and power key engine components. When they crack, split, or leak, you’ve got serious problems. Catching damage early saves you money and hassle.
Look for the serpentine belt, which is the main belt that drives your alternator, water pump, and other parts. It’s usually easy to spot on the front of the engine. Spin it and look for cracks, fraying, or chunks missing. If you see damage, replace it. If it’s fine, measure its width and thickness. Check that it has proper tension by pressing on it. It should move about half an inch with firm thumb pressure.
Check all your hoses. Squeeze them gently to feel if they’re hard and brittle or still flexible. Look for cracks, bulges, or leaks. Your coolant hose connects to your radiator and heater. Your power steering hose carries fluid to your steering system. Your brake lines are metal tubes that shouldn’t show cracks.
If you find a bad hose, replace it. If everything looks good, you’re golden for the next few thousand miles.
Step 5: Top Off Your Fluids
Your Altima runs on more than just gasoline. It needs coolant, brake fluid, power steering fluid, and transmission fluid. Check all of them regularly.
Open your hood and locate your coolant overflow reservoir. It’s usually a translucent plastic tank. The fluid level should sit between the minimum and maximum lines. If it’s low, add coolant that matches your vehicle’s type. Never open the radiator cap when the engine is hot. The pressure can cause serious burns.
Find your brake fluid reservoir. It’s also plastic and sits near the back of the engine compartment. Brake fluid should stay between the lines. If you need to add fluid frequently, you probably have a leak and should get it checked.
Power steering fluid is in another reservoir. Some are plastic, some are metal. Check the level and add fluid if needed. Keep your hands away from the power steering belt when the engine runs.
Transmission fluid is trickier because you usually need to check it while the engine runs and the transmission is in neutral. Some Altimas have a dipstick for this, others don’t. Consult your manual for the exact process for your model.
Step 6: Clean Your Battery and Connections
Your battery gives your engine the spark it needs to start. Corrosion on battery terminals can prevent proper electrical flow. Cleaning them is quick and makes a difference.
With the engine off, look at your battery terminals. They’re the two metal connectors on top. If you see white, blue, or green fuzzy corrosion, you need to clean them. Disconnect the negative terminal first (black cable) by loosening the bolt. Then disconnect the positive terminal (red cable).
Mix baking soda and water to make a paste. Use an old toothbrush or small wire brush to scrub the corrosion off the terminals. Rinse with distilled water and dry everything completely. Reconnect the positive terminal first, then the negative terminal. Make sure they’re tight.
While you’re there, look at your battery. If it’s more than five years old and you’re having trouble starting your car, it might be time for a new one. Battery terminals should be shiny metal, not crusty and corroded.
Step 7: Run a Visual Inspection
Now that you’ve done the main tasks, walk around your engine and look for anything unusual. Check for leaks under the car. Oil leaks show up as dark spots. Coolant leaks are often green, orange, or pink. Brake fluid is clear to light brown.
Look at your hoses again and make sure none of them are dripping. Inspect any belts you can see for wear and tear. Check that all your caps and covers are screwed on tight and not cracked.
Listen to your engine as it idles. It should sound smooth and regular. If you hear knocking, pinging, or grinding noises, something’s wrong and needs attention.
Start your engine and let it run for a few minutes. Check that all your warning lights turn off. Watch your temperature gauge. It should climb to the middle of the scale and stay there. If it keeps climbing, you have a cooling system problem.
Step 8: Check Your Belts and Battery
Take a close look at your serpentine belt one more time. It should sit flat and square in its pulleys. A belt that looks glazed or shiny has slipped and might need replacing. Cracks or chunks missing definitely mean replacement time.
Test your battery under load. Wiggle the terminals to make sure they’re tight. Turn on your headlights and dash lights. They should be bright and steady. If they flicker or dim, you might have a charging issue. Start the engine and rev it gently. The lights should get brighter, showing your alternator is charging.
Step 9: Change Your Engine Oil Filter
You might have already done this when you changed your oil, but it’s worth emphasizing. The oil filter traps dirt and debris that would otherwise damage your engine. It’s cheap insurance to replace it during every tune-up.
A clogged filter makes your engine work harder and can starve it of the oil it needs. That’s why you see all those oil change places pushing filter replacements. They’re right to do it.
If you skipped the oil change and only want to replace the filter, that works too. Locate it, loosen it by hand, drain any remaining oil into your pan, and install a new one with the gasket already oiled.
Step 10: Test Drive and Listen
After you’ve done all this work, take your Altima for a test drive. Drive around your neighborhood for ten to fifteen minutes at different speeds. Listen closely to how your engine sounds.
It should feel responsive and smooth. Acceleration should be quick and strong. Your steering should feel tight and responsive. Your brakes should grab firmly without any squeal or grinding.
If you notice any rough idling, hesitation, or strange noises, you might have missed something. Pull over safely and go back through your work.
What About More Advanced Tune-Up Work?
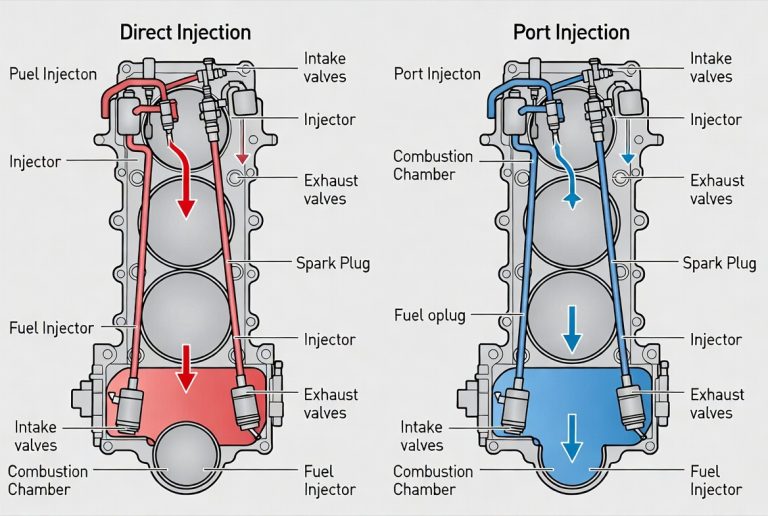
If you want to go deeper, there are a few more things you can do. You can have your fuel system cleaned. Over time, deposits build up inside your fuel injectors and intake valves. A professional cleaning removes these deposits and helps your engine run better.
You can have your transmission fluid flushed and replaced. This removes old fluid and any dirt inside. It helps your transmission shift smoother and last longer.
You can inspect your ignition system and have the timing checked if you have tools for it. Some advanced work requires a computer diagnostic scan to spot problems a human eye might miss.
Common Problems You Might Find
Sometimes during a tune-up, you discover problems that need fixing. A bad spark plug might have a broken electrode or be heavily fouled. If your engine misfires, bad plugs could be the culprit.
You might find a air filter so clogged that your engine’s choking. You might discover coolant leaks from a cracked hose or a battery so dead it barely cranks the engine.
You could find oil sludge coating your dipstick, which means the oil went too long between changes. You might spot metal shavings in your oil, which suggests internal engine damage.
These problems need attention. Don’t ignore them hoping they’ll go away. Address them quickly to prevent bigger, more expensive damage.
Tips for Success
Take your time. Rushing leads to mistakes. Lay out all your tools and parts before you start. Work in a clean, well-lit space. Keep your manual handy and refer to it often.
Take photos before you disconnect anything complicated. This helps you remember how things go back together. Label things if you need to. Use masking tape and a marker.
Be gentle with plastic parts. They crack easily. Don’t force anything. If something doesn’t want to come apart, stop and think about what you’re missing. Sometimes a stuck bolt needs penetrating oil or a different tool.
Wear safety glasses to protect your eyes from falling debris. Wear work gloves to keep your hands clean and protected. The oil and other fluids can irritate your skin if you’re sensitive.
Dispose of old oil and filters properly. Many auto parts stores will take them for free when you buy new ones. Never pour old oil down the drain or in the trash. It’s toxic and illegal.
Final Thoughts
Tuning up your Nissan Altima is one of the best investments you can make in your vehicle. It keeps your car running strong, improves fuel economy, and helps prevent expensive repairs later. You don’t need a fancy shop or expensive tools to do this work yourself.
Start with the basics. Change your oil, replace your spark plugs, swap out your air filters, and top off your fluids. These simple tasks keep your engine happy. As you gain confidence, you can tackle more advanced maintenance.
Your Altima is built to last a long time when you take care of it. Regular tune-ups are a key part of that care. Your car will run better, you’ll save money on repairs, and you’ll feel great knowing you did the work yourself.
Keep your manual close, work carefully, and don’t hesitate to ask for help if you get stuck. Your Altima will reward you with years of reliable, smooth running. Happy tuning!

Peterson is an automotive enthusiast and auto parts reviewer with a passion for vehicle maintenance, upgrades, and performance. He enjoys researching and testing car parts, tools, and accessories to help drivers make informed buying decisions. Through AutoPartsTalk.com, Peterson shares honest reviews, practical maintenance tips, and expert guides to keep vehicles running safely and efficiently.