How to Polish Aluminum Rims?
You love your car. And you want those wheels to shine like mirrors. But your aluminum rims look dull, scratched, or just plain dirty. That happens to everyone.
The good news? You don’t need to take your car to a shop. You don’t need to spend a lot of money. You just need the right steps, the right products, and a little elbow grease.
This guide breaks it all down. Simple steps. Easy words. No confusion.
Let’s get those rims sparkling.
Why Aluminum Rims Lose Their Shine
Before you start polishing, it helps to know what you’re dealing with.
Aluminum rims look great when they’re new. But over time, they face a lot of punishment. Road grime sticks to them. Brake dust builds up. Salt from roads eats into the surface. Heat from braking causes oxidation.
Oxidation is the big one. It’s what makes aluminum look foggy and dull. When aluminum reacts with oxygen and moisture, a thin layer of aluminum oxide forms on the surface. That layer blocks the natural shine underneath.
Brake dust is another enemy. It comes from your brake pads grinding against the rotors. Tiny metal particles fly off and land on your rims. They bake on over time and become really hard to remove.
The good news is all of this is fixable. Polishing cuts through oxidation, removes brake dust, and brings back that deep, mirror-like shine.
What You’ll Need
You don’t need a lot of fancy gear. Most of these items are easy to find at any auto parts store or even online.
Here’s your basic supply list:
- Wheel cleaner (aluminum-safe formula)
- Car wash soap
- Aluminum rim polish (also called metal polish or wheel polish)
- Microfiber cloths (several of them)
- Soft-bristle brush or wheel brush
- Fine steel wool (0000 grade) or aluminum-specific sandpaper
- Drill with polishing pad (optional but helpful)
- Rubber gloves
- Bucket of water
- Garden hose or pressure washer
- Wheel wax or sealant (for the final step)
If your rims are mildly dull, you might only need polish and microfiber cloths. If they’re heavily oxidized or scratched, you’ll need the sandpaper or steel wool too.
Step 1: Park in the Shade and Let the Rims Cool Down
This sounds too simple, but it matters a lot.
Never work on hot rims. If you just drove your car, the wheels are hot from friction and braking. Applying chemicals to hot aluminum can cause them to evaporate too fast. That leaves streaks and doesn’t give them time to work properly.
Park in a shaded spot. Let the car sit for at least 30 minutes before you touch the wheels.
Also, direct sunlight dries products too fast. Shade gives you time to work without rushing.
Step 2: Rinse the Rims First
Grab your garden hose and rinse off all four rims completely.
This knocks off loose dirt, mud, and grit. If you skip this step and start scrubbing dry, you’ll drag that grit across the aluminum surface and create tiny scratches.
A pressure washer works even better if you have one. Use a regular setting — you don’t need the highest pressure for wheels.
Spray inside the wheel well too. Grime hides up in there and drips down onto your work later if you ignore it.
Step 3: Apply Wheel Cleaner
Now spray your aluminum-safe wheel cleaner directly onto the rim surface.
Read the label first. Some wheel cleaners are very strong and not safe for aluminum. Avoid anything that says “acid-based” unless the label specifically says it’s safe for aluminum or anodized wheels. Strong acid cleaners can pit and damage your rims.
Spray the cleaner generously. Let it sit for about 30 to 60 seconds. You’ll often see it start to foam or turn purple — that’s it breaking down the brake dust.
Don’t let it dry on the rim. If it starts drying, spray a little more.
Step 4: Scrub With a Wheel Brush
Take your soft-bristle wheel brush and scrub the rim thoroughly.
Work in sections. Scrub the face of the rim, the spokes, and especially the barrel (the inside edge where brake dust really builds up). A long, flexible brush helps you get deep into tight spots between spokes.
For really stubborn brake dust spots, use a small detailing brush or even an old toothbrush. Those little bristles get into grooves and crevices that a bigger brush misses.
Rinse with water and check your progress. If the rim looks clean but still dull, that’s normal. Clean and shiny are two different things. You’ve handled the dirt — now it’s time to deal with the oxidation.
Step 5: Wash With Car Soap
After using the wheel cleaner, wash the rim again with regular car wash soap and water.
This removes any leftover cleaner residue. You don’t want chemical residue under your polish. It can interfere with the bonding and leave an uneven finish.
Use a clean sponge or microfiber wash mitt. Work in circular motions. Rinse clean and let the water sheet off.
Then dry the rim completely with a clean microfiber towel. Polish works best on a dry surface. Water left on the rim can dilute the product and reduce its effectiveness.
Step 6: Deal With Heavy Oxidation (If Needed)
If your rims are badly oxidized — they look milky, chalky, or have a white powdery coating — you need to do a light sanding step before polishing.
This is where 0000-grade steel wool or 400 to 600 grit aluminum-safe sandpaper comes in.
Wet the steel wool or sandpaper slightly. Work in small circular motions across the surface. Apply gentle, even pressure. You’re not trying to remove metal — just that top layer of oxidation.
This step can feel scary, but go slow. Keep the steel wool or sandpaper wet. Keep your motions consistent and light.
After sanding, wipe the surface clean with a damp microfiber cloth. Dry it again. Now you’re ready for polish.
If your rims only have light oxidation, skip this step entirely and go straight to polishing.
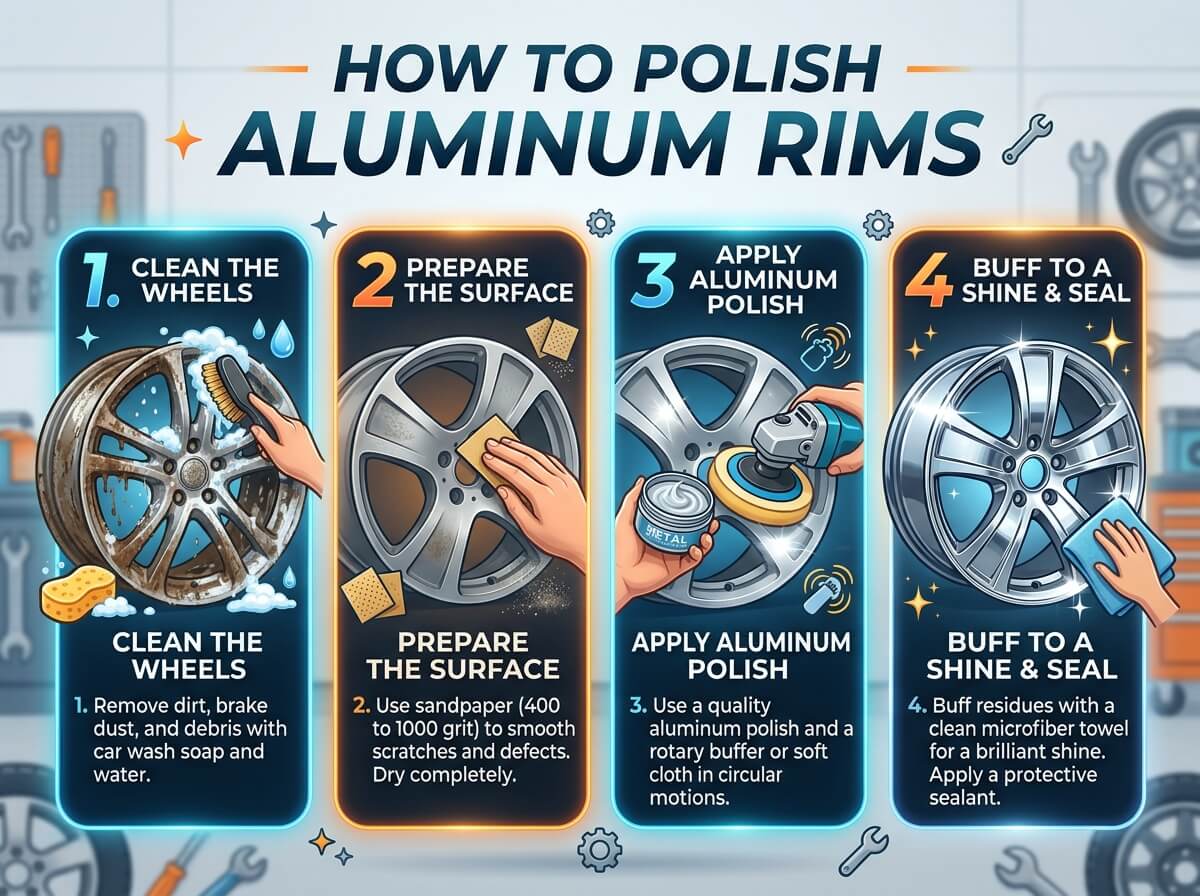
Step 7: Apply Aluminum Polish
This is the main event. Polishing is what brings back the shine.
Put a small amount of aluminum polish on a clean microfiber cloth or foam applicator pad. You don’t need a lot — a dollop about the size of a coin is plenty for one rim.
Work the polish into the surface using small, overlapping circular motions. Apply medium pressure. Keep rubbing until the polish starts to look dark or gray — that’s the oxidation and grime lifting off the surface and mixing with the polish.
Work one section at a time. Don’t try to do the whole rim at once. Do the face, then the spokes, then the barrel.
Keep adding small amounts of polish as needed. If the cloth feels dry and is just sliding around without doing anything, add more product.
Step 8: Buff It Off
Once the polish has done its job and looks dark or hazy, it’s time to buff it off.
Grab a fresh, clean microfiber cloth. Use fast, circular motions to buff off all the polish residue.
The shine will start to appear as you buff. It’s a satisfying moment — you’ll see the rim transform right in front of you.
If some spots still look dull after the first buffing, apply more polish and repeat. Two or three rounds of polish and buff can make a huge difference on heavily oxidized rims.
Pro tip: A drill with a foam polishing attachment speeds this up a lot. Attach the foam pad to your drill, add a bit of polish, and run the drill at low to medium speed across the rim. It does the work for you and gets a more consistent result. Just keep the pad moving — don’t hold it in one spot or you risk heat buildup.
Step 9: Clean Up the Polish Residue
After buffing, there will often be leftover white polish residue in the grooves, lug nut holes, and tight corners.
Use a small detailing brush or cotton swab to clean those out. It’s the finishing touch that makes your work look professional.
You can also spray a bit of quick detailer spray and wipe with a clean cloth to get any remaining haze off the surface.
Stand back and look at the rim. It should be noticeably brighter and more reflective now.
Step 10: Apply Wheel Wax or Sealant
Polishing cleans and shines. But it doesn’t protect.
After polishing, apply a wheel wax or a dedicated wheel sealant. This step creates a barrier over the aluminum. It slows down oxidation, repels brake dust, and makes future cleanings much easier.
Put a thin, even layer of wax on an applicator pad. Wipe it across the rim surface. Let it haze for a few minutes. Then buff it off with a clean microfiber cloth.
Some sealants spray on and wipe off even faster. Either works well.
This protective layer is what keeps your rims looking great for longer. Skip this step and the shine fades faster. Do this step and your rims stay bright much longer between polishing sessions.
Tips for Different Types of Aluminum Rims
Not all aluminum rims are exactly the same. Here’s a quick breakdown.
Bare Polished Aluminum
These are the most reflective type — true mirror-finish wheels. They have no coating on top. They oxidize fastest. They need polishing most often. Use a high-quality metal polish and a good wheel sealant. Polish these every few months to keep them mirror-bright.
Clear-Coated Aluminum
Most factory wheels are aluminum with a clear protective coating on top. The coating protects against oxidation but can peel or chip over time.
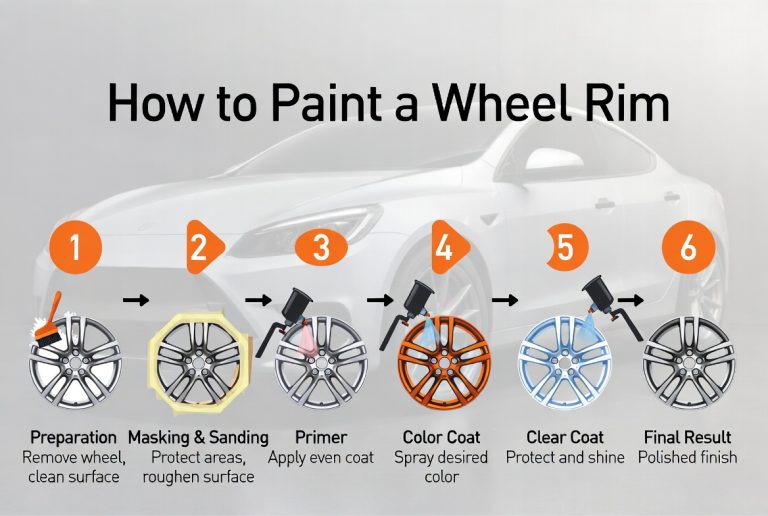
For clear-coated rims, you don’t need heavy polishing. Use a milder polish or just a quality wheel cleaner and wax. Aggressive polishing can scratch or remove the clear coat.
If the clear coat is already peeling, you have two options. You can strip it completely and polish to bare aluminum. Or you can have the rims professionally recoated. Polishing over a peeling clear coat looks patchy and makes things worse.
Anodized Aluminum
Anodized rims have a hardened surface layer created by an electrochemical process. They come in different colors — black, bronze, and others.
Be careful with these. Aggressive polishing can remove the anodized layer and change the color of your rim. Use a very gentle, non-abrasive polish or just stick to cleaning and waxing.
How Often Should You Polish Aluminum Rims?
That depends on how you drive and where you live.
If you drive in harsh conditions — lots of road salt, dusty roads, or heavy stop-and-go traffic — your rims pick up more grime and oxidize faster. In that case, polish every two to three months.
If you drive mostly on clean roads and garage your car, you can get away with polishing twice a year.
For maintenance between polish sessions, wash your wheels every time you wash your car. Apply a quick spray wax or tire and wheel spray after washing. This keeps brake dust from building up and protects the surface.
The more consistently you maintain your rims, the less hard work you need to do each time.
Common Mistakes to Avoid
A lot of beginner mistakes come from rushing or using the wrong products. Here are the big ones to watch out for.
Using the wrong cleaner. Acid-based wheel cleaners can damage aluminum. Always check the label. Look for “aluminum safe” or “pH balanced.”
Skipping the pre-rinse. Scrubbing dry rims drags grit and creates scratches. Always rinse first.
Working on hot rims. Products evaporate too fast. Always let wheels cool down first.
Using too much polish. More is not better. A little polish applied thoroughly works better than a lot applied sloppily.
Skipping the sealant. Polishing without sealing is like showering without drying off. The shine fades fast. Always finish with wax or sealant.
Circular machine polishing on clear coat. A drill polisher is great for bare aluminum but can burn through clear coat. Use hand polishing on coated rims.
Quick Product Recommendations
You don’t need to spend a fortune. Here are some types of products that work well.
- Wheel cleaners: Look for non-acid, aluminum-safe formulas. Purple or iron-reactive formulas are especially good at dissolving brake dust.
- Polish: Metal polishes designed for aluminum work great. Some popular types include liquid aluminum polish and paste-style wheel polish.
- Microfiber cloths: Buy a pack of quality cloths. Cheap ones scratch more than they help.
- Wheel wax/sealant: Dedicated wheel sealants last longer than regular car wax because they’re built to handle the heat that rims generate from braking.
Read reviews before buying. Products that work for steel wheels don’t always work as well on aluminum.
How to Keep Rims Clean Longer
After putting in all this work, you want the shine to last. Here’s how to protect it.
Wash your wheels every week or two. Brake dust is easier to remove when it’s fresh. The longer it sits, the harder it bakes on.
Use a wheel spray after every wash. A quick detailer or wheel spray creates a thin protective layer in seconds. It’s a two-minute step that pays off big.
Avoid automatic car washes with stiff brushes. Those brushes can scratch your rims. Hand washing or touchless washes are much safer.
Park away from industrial areas when possible. Factories and certain industrial zones put more airborne contaminants in the air that land on your paint and wheels.
Check lug nuts for rust. Rust from steel lug nuts can transfer onto your aluminum rims. Keep them clean and consider stainless steel or aluminum lug nut caps.
Final Thoughts
Polishing aluminum rims is not complicated. It just takes the right products, a little patience, and a clear step-by-step process.
Start with a good clean. Remove the oxidation. Polish in sections. Buff off the product. Seal the surface. That’s really all there is to it.
The first time takes the longest. Once you know the process and have your supplies ready, a full four-wheel polish session gets faster and easier every time.
And there is nothing quite like stepping back and looking at a set of freshly polished aluminum rims gleaming in the sunlight. It makes the whole car look better. It makes the drive feel better.
So grab your supplies, find some shade, and get to work. Your rims are waiting.
Got questions about polishing your specific type of wheel? Drop them in the comments below. Happy to help.