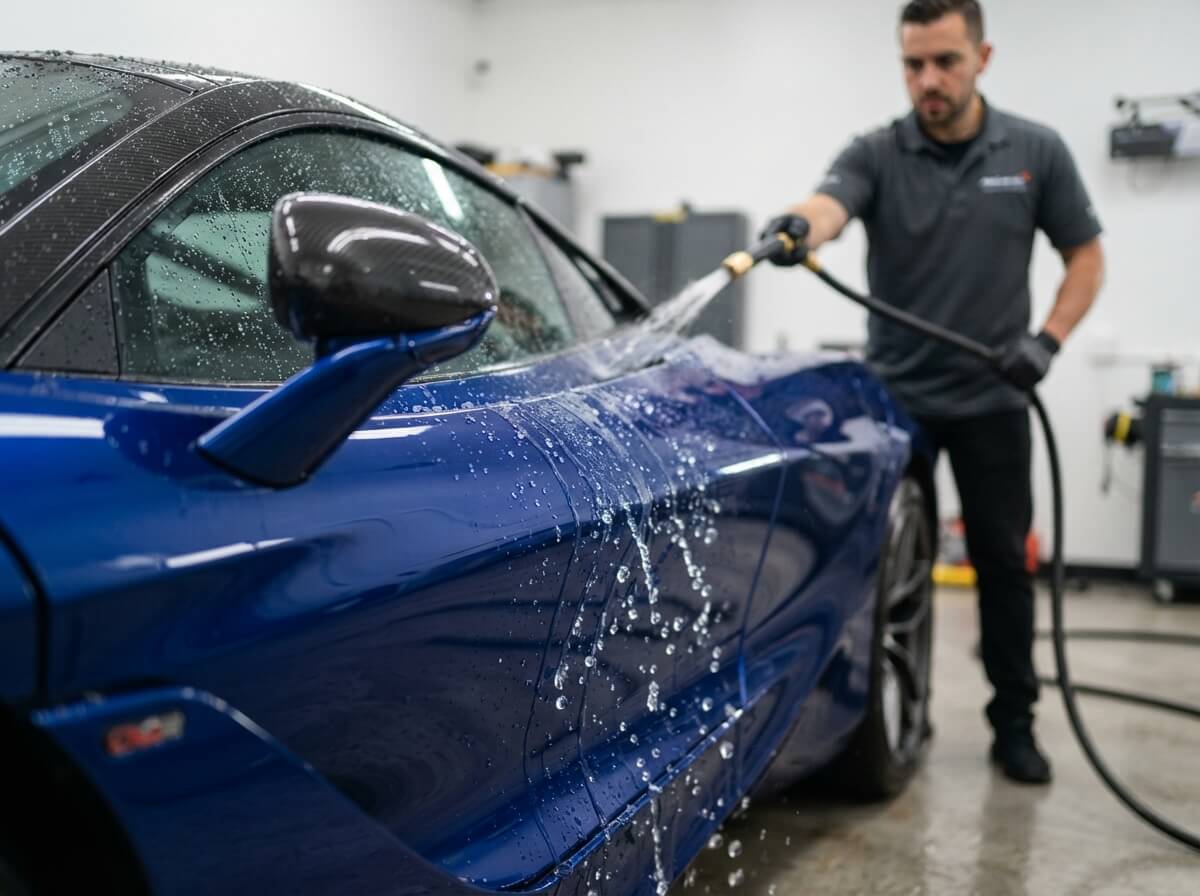
How to Wash a Car with Ceramic Coating?
If you just got a ceramic coating on your car, congratulations! You made a smart choice. But now you might be wondering: how do I keep this thing looking perfect? The good news is that washing a ceramic-coated car isn’t rocket science, and I’m here to walk you through every single step. This guide will help you protect your investment and keep that shiny, glossy finish looking brand new for years to come.
Why Ceramic Coating Needs Special Care
Before we jump into the washing routine, let’s talk about why ceramic coating care matters so much. A ceramic coating creates a hard, protective layer on your car’s paint. This layer shields your vehicle from UV rays, dirt, bird droppings, tree sap, and other nasty stuff that can damage the paint underneath.
The ceramic coating doesn’t wash away easily, but it does need proper maintenance. If you wash it wrong, you can accidentally reduce its water-repellent properties or create swirl marks that make your car look dull. Think of your ceramic coating as a premium shield—you want to keep it strong and effective. When you use the right washing technique, you protect your coating’s ability to work hard for your paint job.
What Exactly Is Ceramic Coating?
Let’s get on the same page first. Ceramic coating is a liquid polymer that bonds to your car’s clear coat. Once it cures, it becomes a hard, transparent layer that sits on top of your paint. This protective layer is hydrophobic, which means water beads up and rolls right off instead of sitting on your car’s surface.
The coating makes your car easier to clean because dirt and contaminants don’t stick as hard to the smooth surface. It also makes your car’s color pop and gives it that wet, glossy look that makes everyone stop and stare. That’s why you need to wash it correctly—you want to keep that impressive shine and water-beading ability going strong.
Gather Your Tools Before You Start
You can’t wash your ceramic-coated car with just any supplies. Regular car washing products and techniques can actually harm your coating. Here’s what you need to grab before you start:
The Must-Have Items
A two-bucket washing system is essential. You need one bucket for your soapy water and another bucket for rinsing your wash mitt. This keeps dirt out of your soap and prevents you from dragging grit across your paint. Fill each bucket with water and add car wash soap to the soap bucket.
Get yourself a quality car wash soap designed for ceramic coating protection. Regular dish soap or generic car wash products can strip the coating and leave dull spots. Look for a pH-neutral car wash soap that won’t harm your protective layer. These soaps are specifically formulated to clean your car while preserving the coating’s effectiveness.
You’ll want a soft microfiber wash mitt, not a sponge. Microfiber is gentle on ceramic coatings and does a better job of trapping dirt particles away from your paint. A soft-bristled brush can help with wheels and tires, but never use a hard brush on your coated paint.
Grab some high-quality microfiber drying towels. Regular bath towels are too rough and can create swirl marks. Microfiber drying towels are specifically designed to absorb water without damaging your coating. Get at least two or three so you have enough coverage.
A pressure washer or garden hose with a spray nozzle helps rinse away soap and loose dirt. If you use a pressure washer, keep it at a low setting to avoid damaging the coating. A standard garden hose works perfectly well too.
Nice-to-Have Items
A foam cannon makes the washing process easier and gives your car an extra layer of protection. You attach it to your pressure washer or hose, and it sprays a thick layer of foam that helps loosen dirt before you scrub.
A car drying aid or spray sealant makes the final drying step faster and adds extra protection. These products help water sheet off your car and leave a perfect finish.
Wheel cleaner designed for ceramic coating keeps your wheels spotless without harming any coating that might be on your wheels. Some people apply ceramic coating to their wheels too, so use a gentle cleaner that won’t strip it.
Step 1: Rinse Your Car Thoroughly
Start by rinsing your entire car with water. This first rinse removes loose dirt, dust, and debris from the surface. Use a gentle spray pattern on your hose nozzle—don’t blast the car with water pressure. Think of this as a gentle wake-up call for your car’s surface, not an attack.
Pay special attention to areas that collect the most dirt: the wheel wells, the lower sections of your doors, and the undercarriage areas. These spots often hide the most grime and contaminants. Spend a good minute or two just rinsing from top to bottom, working your way down your car’s body.
The goal here is to remove as much loose stuff as you can before you touch the paint with your wash mitt. This approach prevents you from grinding dirt into the ceramic coating when you wash. Every bit of loose dirt you remove now means less risk of swirl marks later.
Step 2: Prepare Your Wash Buckets
Fill your two buckets with clean water. Add your ceramic-coating-safe car wash soap to one bucket according to the directions on the bottle. Most car wash soaps need just a small amount—usually around one-quarter cup for a five-gallon bucket. Read the bottle to be sure.
Don’t skimp on the water. You need enough water to fully submerge your wash mitt and rinse it clean. A five-gallon bucket is perfect for this job. If you only have smaller buckets, that’s okay, but make sure you have enough volume to actually rinse your mitt without stirring up dirt again.
Place your two buckets next to each other in a spot where you can easily access both. Some people put them on the side of the driveway or near a garage. The closer they are to where you’re washing, the easier your job becomes. You don’t want to walk back and forth across your yard ten times carrying a soaking wet wash mitt.
Add a grit guard to the bottom of your rinse bucket if you have one. This plastic insert sits at the bottom and lets dirt settle below it while your mitt rinses above it. Even without a grit guard, your rinse bucket still works—the water just helps remove soap and loose dirt from your mitt before you dip it back in your soap bucket.
Step 3: Wash Your Car from Top to Bottom
This is the main event. Start at the very top of your car—your roof is the best place to begin. Dip your wash mitt in the soapy bucket, then gently rub the roof in straight lines. Don’t use circular motions. Straight lines are better for ceramic coatings because they’re less likely to create swirl marks if dirt is trapped between your mitt and the paint.
Use light to medium pressure. You’re not trying to scrub dirt off with force. Let the soapy water and the mitt do the work together. Think of it like gently coaxing the dirt to let go, not forcing it away.
After a section is covered with soapy water, rinse your mitt in the rinse bucket. Swish it around a few times to release the dirt. Then dip it back in the soap bucket and move to the next section. This constant rinsing prevents dirt from building up on your mitt.
Work your way down your car systematically: roof, hood, windshield (if you want), then the left side from front to back, the right side from front to back, and finally the back. This method ensures you don’t miss any spots and keeps you organized.
When you reach the sides, use the same straight-line motion. Wash horizontal sections working from top to bottom. Your door area, quarter panel, and rear quarter panel all get the same gentle treatment. Remember that your ceramic coating has made the surface extra smooth and slippery—don’t let that fool you into thinking you need more force. The coating’s smoothness is actually your friend because dirt releases more easily from a smooth surface.
Save your wheels and tires for last. Use a separate wash mitt or brush for your wheels because they’re the dirtiest part of your car. Even if your wheels have ceramic coating, they collect brake dust and dirt, and you don’t want that grit on your microfiber wash mitt that touches your paint.
Step 4: Rinse Everything Completely
After you finish washing, it’s time to rinse away all the soap. Start at the top and work your way down, just like you did with the washing. Use your hose or pressure washer on a gentle setting to remove every bit of soap.
Don’t leave soap sitting on your ceramic coating. Soap residue can leave spots and streaks that make your car look dirty even after you’ve rinsed it. Spend extra time on the areas where soap tends to pool: around trim pieces, in grooves, and around your windows.
When you think you’ve rinsed enough, rinse again. Then rinse one more time for good measure. This sounds excessive, but soap residue is one of the main things that makes freshly washed cars look less than perfect. Complete rinsing takes just a couple of extra minutes and makes a huge difference in your final result.
Pay special attention to areas where water pools, like the gap between your hood and windshield, or along your roofline. These spots hold water and soap that can run back onto your freshly cleaned panels while you’re drying.
Step 5: Dry Your Car Properly
This step is just as important as the washing. Improper drying can leave water spots and reduce the glossy appearance of your ceramic coating.
Grab your microfiber drying towel and start at the top of your car. Use light to medium pressure and pat or gently wipe the water away. Some people like to use a blotting motion—just pressing the towel against the surface to absorb water rather than sliding it around. Both methods work, but avoid scrubbing motions on the paint.
Work systematically from top to bottom, just like you did during washing. Your roof, hood, and windshield come first. Then move to the sides, then the back. When your first towel gets saturated, grab a second one. Wet towels can’t absorb more water effectively, so using multiple towels speeds up the process.
Don’t forget about the hard-to-dry areas: your window sills, the gap between your doors and your body, and the space under your spoiler. A second towel that’s semi-wet works great for these spots because you can squeeze water out of crevices more effectively.
For your wheels, you can use an older microfiber towel since they get dirtier. Pat them dry just like you did your painted surfaces.
Step 6: Apply a Drying Aid (Optional but Recommended)
After your car is mostly dry, you can apply a ceramic coating-safe drying aid or spray sealant. These products add extra gloss and water-beading properties. They also help pull any remaining water drops off your car and leave an even more impressive finish.
Spray the drying aid according to the directions on the bottle. Usually, you spray a light mist on a section, then buff it with a microfiber towel until it’s completely clear and glossy. Work section by section—roof, hood, sides, back—just like the drying process.
The result is a car that looks freshly detailed and has enhanced water-beading properties. Your ceramic coating becomes even more hydrophobic and easier to keep clean until your next wash.
Washing Frequency: How Often Should You Wash?
Ceramic coating reduces how often you need to wash your car. Because it’s hydrophobic and smooth, dirt doesn’t stick as well. Most people with ceramic coating wash their cars every two to three weeks, depending on conditions. If you live in a dry, dusty climate or park under trees, you might wash more frequently. If you park in a garage and drive mostly on clean roads, you might go longer between washes.
Don’t go too long between washes. Your ceramic coating works best when you maintain it regularly. Regular washing prevents dirt, bird droppings, and tree sap from bonding to your coating and causing damage. Think of washing as preventive maintenance rather than a chore you have to do.
Common Mistakes People Make
Using the Wrong Soap
This is the biggest mistake. Regular dish soap or cheap car wash products can strip your ceramic coating or leave residue. Stick with ceramic-coating-specific car wash soaps. Your coating is too valuable to take shortcuts with soap.
Scrubbing with Circular Motions
Circular motions trap dirt between your mitt and the paint, creating swirl marks even with ceramic coating. Always use straight lines or gentle back-and-forth motions. Your coating is hard and protective, but it’s not immune to swirl marks if you use the wrong technique.
Skipping the Rinse Bucket
Washing without rinsing your mitt between passes grinds dirt into your coating. Use that rinse bucket consistently. It takes just seconds and prevents damage.
Drying with Regular Towels
Bath towels and old t-shirts are too rough. Microfiber towels are specifically designed for this job and cost just a little bit more. The difference in results is huge.
Waiting Too Long Between Washes
Your ceramic coating doesn’t wash away, but it still needs regular maintenance. Letting dirt pile up for months makes your coating work harder and can reduce its lifespan.
Using a Pressure Washer on High Setting
High-pressure water can damage your coating or force water into seams where it can cause problems. Keep your pressure washer on low or use a regular garden hose instead.
What About Clay Bars and Polishing?
You don’t need to clay bar or polish your car as often as you would without ceramic coating. The smooth coating surface doesn’t harbor as many contaminants. However, some people do a light clay bar treatment every six months or once a year to remove any bonded contaminants.
If you do use a clay bar, choose one designed for ceramic-coated cars and follow the directions carefully. Skip polishing your car unless your coating’s shine really starts to fade. Polishing can wear through your coating faster than normal, so it’s best to avoid it unless absolutely necessary.
Protecting Your Ceramic Coating During Winter
Winter presents special challenges for ceramic coatings. Road salt and sand can be harsh on your coating. Wash your car more frequently during winter—about every one to two weeks. Use a ceramic-coating-safe car wash soap that can handle the extra grime.
Pay special attention to your lower body panels and wheels where salt accumulates most. These areas need extra attention during winter months to prevent damage to your coating. Don’t let salt sit on your coating for weeks at a time.
Frequently Asked Questions About Ceramic Coating Washing
Can I wash my ceramic-coated car every week?
Yes, you can. Frequent washing is actually good for your coating. It removes contaminants before they bond to the surface. Just use proper technique and ceramic-safe soap.
Do I need special equipment to wash ceramic coating?
You don’t need expensive equipment, but you do need quality microfiber towels and ceramic-coating-safe soap. Everything else you probably already have—buckets, a hose, and a wash mitt. These basics are all you need.
What if my coating starts to look dull?
Dullness usually means you need to wash more frequently or switch to a better car wash soap. If regular washing doesn’t restore the shine, you might have soap residue or water spots. A ceramic-coating-safe spray sealant often brings the shine right back.
Can I wash my car in direct sunlight?
It’s better to avoid washing in direct sun. Heat makes water and soap dry too quickly, leaving spots and streaks. Wash in the shade or on a cloudy day if possible. Early morning or evening is ideal.
How long does ceramic coating last?
Quality ceramic coatings last between two and five years with proper maintenance. Regular washing is the biggest factor in how long your coating lasts. Neglect it, and your coating won’t perform as well. Care for it properly, and you get years of protection and shine.
Do I need to wax my ceramic-coated car?
No, you don’t. Your ceramic coating replaces wax. Actually, applying wax can interfere with your coating’s water-beading properties. Stick with ceramic-coating-safe products only.
Final Thoughts: Keep That Shine Going
Washing your ceramic-coated car isn’t complicated. You need the right products, proper technique, and consistency. Start with a gentle initial rinse, use a two-bucket system with ceramic-safe soap, wash from top to bottom with straight-line motions, rinse thoroughly, and dry with microfiber towels.
Your ceramic coating is an investment in your car’s appearance and paint protection. By following these steps every couple of weeks, you keep that investment working hard for you. Your car will look amazing, and you’ll enjoy that perfect glossy finish and water-beading action that makes everyone jealous.
The techniques you’ve learned in this guide work whether you have a brand new ceramic-coated car or one that’s been coated for years. Consistency is the real secret. Get into a regular washing routine, use the right products, and your ceramic coating will repay your efforts with years of outstanding protection and shine.
So grab your buckets, head to your car, and wash it like a pro. Your ceramic coating is ready to work with you, not against you. With the right approach, you’ll keep that beautiful finish looking fresh and new for a long time to come.