How to Clean Your Coolant Reservoir?
Your car’s engine gets hot. Really hot. That’s where your cooling system steps in to save the day. At the heart of this system sits your coolant reservoir, a simple but super important part that holds your engine’s lifeblood. Over time, this reservoir collects dirt, rust, and debris that can mess with how well your cooling system works. The good news? Cleaning it yourself is totally doable, even if you’re brand new to car maintenance.
Why Your Coolant Reservoir Needs Cleaning
Let’s talk about what your coolant reservoir actually does. This clear plastic tank holds extra coolant (also called antifreeze) that your engine needs to stay cool. As your engine runs, the radiator and water pump push coolant through the engine block to absorb all that intense heat. The hot coolant then flows to your radiator where it cools down before heading back for another round.
Here’s the thing: dirt finds its way in. Over time, sediment builds up at the bottom of the reservoir. Your coolant breaks down. Rust particles settle in. Algae can even grow in there if you’re not paying attention. All of this gunk makes your cooling system work harder than it should.
When your cooling system gets gunked up, several bad things happen. Your engine temperature creeps upward. Heat transfer becomes less efficient. Your water pump has to work overtime. The radiator can’t cool things down as fast. In the worst cases, you end up with an overheated engine, blown head gaskets, and repair bills that hurt.
Cleaning your coolant reservoir gives your whole cooling system a fresh start. Better heat dissipation means better engine performance. Your engine runs cooler. Your fuel economy improves. You stop worrying about overheating on hot days or during traffic jams.
What You’ll Need Before You Start
Grab these supplies before you get under the hood. Having everything ready makes the job go faster and keeps you from making unnecessary trips to the store.
Safety gear matters first. Get yourself a pair of thick work gloves. Engine coolant isn’t something you want on your skin. Grab some safety glasses too. You don’t want coolant splashing in your eyes. A respirator mask is smart if you have respiratory issues, though it’s not always necessary.
Tools and containers come next. You need a socket set or wrench set to remove bolts and hose clamps. A bucket holds old coolant that you’ll drain out. Get yourself a turkey baster or old syringe for small jobs. Rags and paper towels do cleanup. Compressed air helps blast out stubborn gunk.
Cleaning supplies round out your kit. Distilled water gets the job done perfectly. Some people use a coolant flush product designed for this exact job. White vinegar works in a pinch for light cleaning. Antifreeze disposal bags come in handy for old fluid storage.
New coolant is essential. Don’t reuse the old stuff you drain out. Fresh coolant has better additives and corrosion inhibitors. Pick the right type for your car. Most vehicles need either green, orange, pink, or blue coolant. Check your owner’s manual to be sure.
Preparing Your Vehicle for Cleaning
Safety first, always. Park your car on a level surface. Let your engine cool completely. Hot coolant burns like crazy. Never work on your cooling system when the engine is warm. Wait a minimum of an hour after your last drive.
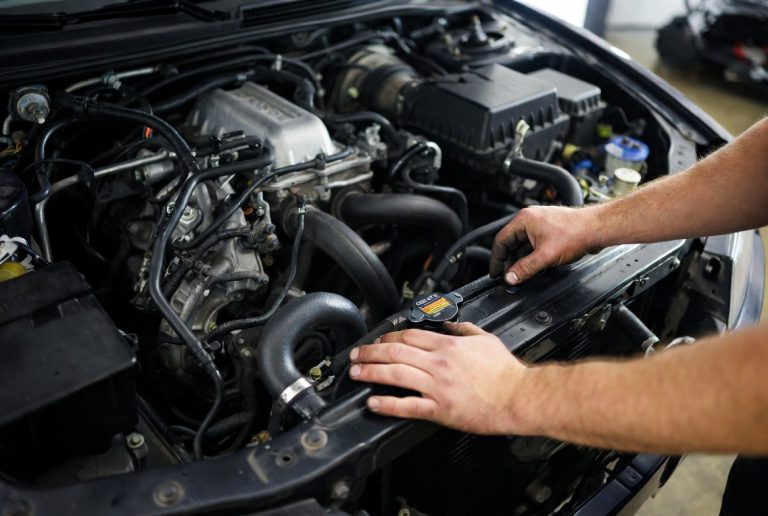
Locate your coolant reservoir in the engine bay. It’s usually a white or translucent plastic tank near the radiator. You can see the fluid level through the sides. Most reservoirs have a cap with a little vent hole. Some have a pressure valve built in.
Open your hood and look around. Trace the hoses connected to the reservoir. Follow them to see where they lead. Notice the clamps that hold everything together. You’ll need to work with these later.
Take a photo with your phone before you start draining anything. Seriously. This reference shot helps you remember exactly how everything connects. It’s super useful when you’re putting things back together.
Read your owner’s manual for your specific car. Different vehicles have slightly different setups. Some have drain plugs on the reservoir itself. Others require you to loosen hose clamps and pull hoses off. Knowing your car’s design saves you from fumbling around.
The Draining Process
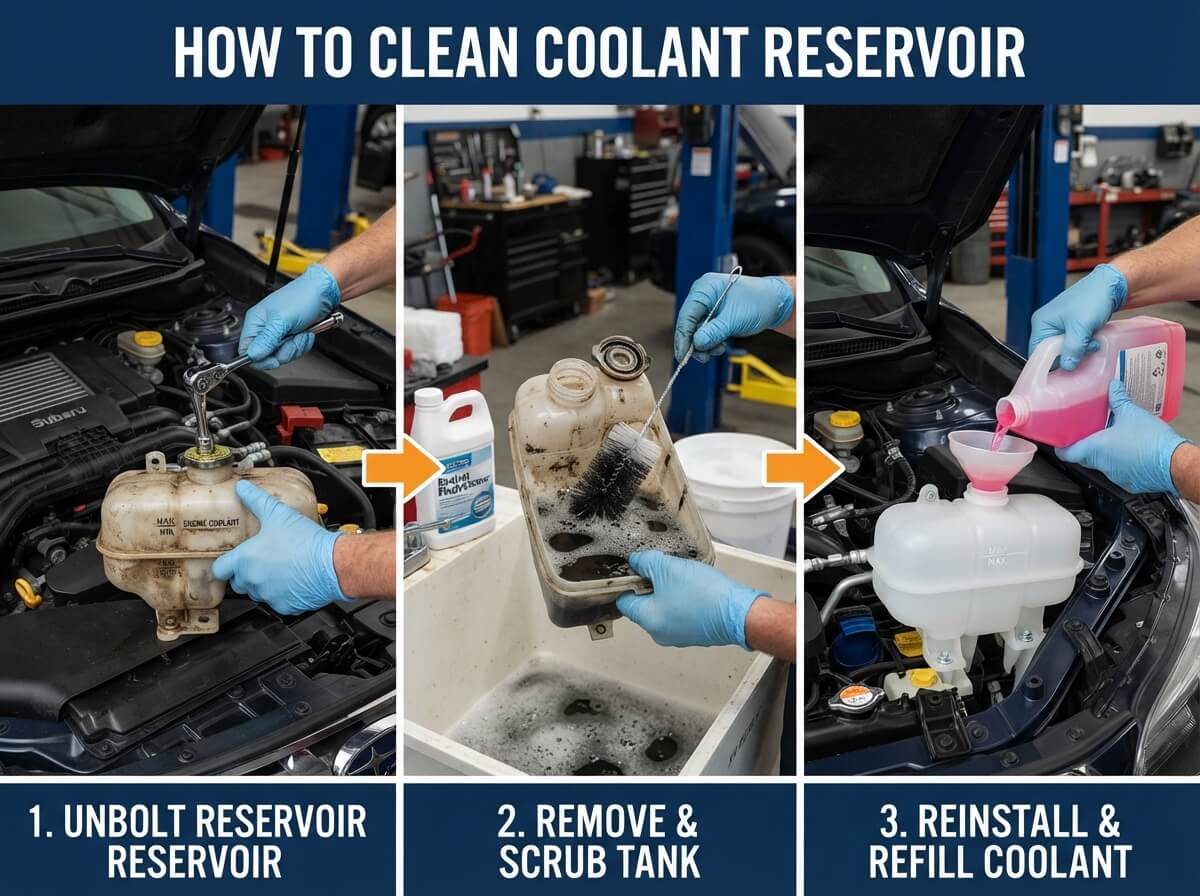
This step gets messy, so dress for it. Put on your work gloves and position your bucket underneath the reservoir. Take your time here.
If your reservoir has a drain plug at the bottom, unscrew it slowly. Let all the old coolant flow into the bucket. Don’t rush this. The cooler fluid flows out first. Then the sediment and gunk come pouring out. That gross stuff is exactly why you’re doing this.
If your reservoir doesn’t have a drain plug, you’ll loosen the hose clamps at the top or bottom of the tank. Grab your socket wrench and turn the clamp bolts counterclockwise. Once the clamp loosens, gently pull the hose away. Coolant flows out into your bucket. Have plenty of rags ready.
Some vehicles have a coolant drain on the radiator itself, separate from the reservoir. You might need to drain that too. Check where all your hoses go. The goal is getting out every drop of old coolant.
Let everything drain for several minutes. Tilt the reservoir gently if you can to get the last of the fluid out. Patience pays off here because you want to remove as much of the gunk as possible.
Rinsing Out the Reservoir
Now comes the actual cleaning part. Pour distilled water into the empty reservoir through the top opening. Fill it halfway. Screw the cap back on or have a friend hold a rag over the opening.
Shake the reservoir vigorously. Get the water splashing around inside. This agitation breaks up settled sediment and washes away rust particles. Shake hard for at least thirty seconds. You’ll feel the debris swirling inside.
Pour out all the water into your bucket. You’ll probably see murky, discolored water. That’s the crud coming out. Repeat this rinsing process until the water comes out clear. Most cars need three to five rinses. Some really gunked-up reservoirs might need more.
For stubborn buildup, use the white vinegar trick. Pour vinegar into the reservoir with some water. Let it sit for fifteen minutes. The acidity helps dissolve rust and mineral deposits. Then shake and rinse as before. This works wonders on discolored interiors.
Once the water runs crystal clear, you’re done rinsing. The inside should look bright and clean. Any remaining sediment has been flushed away. Your cooling system is ready for fresh coolant.
Cleaning the Reservoir Cap and Overflow Tube
Don’t forget these small but important parts. The reservoir cap contains a pressure valve that regulates cooling system pressure. Over time, mineral buildup clogs this vent hole. A clogged cap messes with your entire cooling system.
Remove the cap and look inside. Use your turkey baster to spray distilled water through the vent hole. Blast out any debris. If it’s really stuck, soak the cap in white vinegar for thirty minutes. Then rinse thoroughly.
Check the overflow tube while you’re at it. This small rubber hose sits between the reservoir cap and the engine. Sometimes sediment clogs this tube. Run distilled water through it using your baster. You want water to flow freely.
Dry everything with clean rags before reassembly. Moisture sitting inside causes rust to return faster than you’d like.
Putting Everything Back Together
This is where that reference photo you took becomes your best friend. Look at it and start reconnecting hoses in the exact same order.
Reconnect your hoses to the reservoir if you removed them. Push them firmly onto the fittings. They should click or seat fully. Then tighten your hose clamps. Use your socket wrench to turn the clamp bolts clockwise. Tighten them snug but not crazy tight. You can crack plastic if you over-tighten.
If your reservoir had a drain plug, screw it back in. Tighten it by hand first, then use your wrench for a final quarter turn. You don’t want leaks starting immediately after all your hard work.
Reattach any wires or sensor connectors you disconnected. Screw the reservoir cap back on. Sit back and look everything over. Does it look like the photo you took? Everything connected properly? Good.
Filling with Fresh Coolant
Now for the good stuff: new, clean coolant. Grab the correct type for your vehicle. Remember, colors matter. Green, orange, pink, and blue aren’t just for looks. They have different chemical formulas.
Open the reservoir cap. You can usually just twist it counterclockwise. Some cars have a secondary coolant overflow bottle separate from the main reservoir. Fill both.
Pour slowly and steadily. Watch the level rise toward the fill line. There’s usually a MIN and MAX mark on the side. Fill it to the MAX line. You want plenty of coolant available for the engine to use.
Leave the cap off for now. Start your engine and let it run at idle. Watch as the thermostat opens and coolant flows through the engine. The level will probably drop. Let it cool, then add more coolant until you reach the MAX line again.
Some air gets trapped in the cooling system. This air gets pushed out as the engine warms up. That’s totally normal. After your engine cools completely, check the level one more time and top off if needed.
Screw the cap back on once you’re satisfied with the level. You’re done!
Testing Your Work
Drive your car and watch the temperature gauge. It should stabilize right in the middle of the hot and cold zones. No sudden spikes. No warnings lights on your dashboard.
After ten minutes of driving, pull over carefully and feel the radiator hose. It should be hot but not scalding. The heat should feel even. Any cold spots mean coolant isn’t flowing properly.
Let your engine cool and check the fluid level again. It should stay right where you left it. Leaks show up immediately. Look under your car when parked. Any puddles? Any drips? If yes, retighten your hose clamps or drain plug.
After a few days of regular driving, pop the hood again and inspect everything. Make sure your connections are still tight. Your cooling system should be running smoothly now.
Disposal of Old Coolant
Never dump old coolant down the drain or in the garbage. Engine coolant is toxic to humans and animals. It’s also bad for the environment. Most places have laws against this.
Call your local automotive shop or recycling center. Many accept old coolant for free or a small fee. Some places actually want it since it can be recycled and reused. Your turkey baster doesn’t have to go in the trash either. Rinse it thoroughly and let it dry.
Common Mistakes to Avoid
Don’t mix coolant types. Mixing green with orange creates chemical reactions. These reactions produce sludge and reduce cooling system efficiency. Always drain completely and use one type throughout.
Don’t skip the rinsing step. People rush this and put fresh coolant into a still-dirty reservoir. The new coolant gets contaminated immediately. Takes weeks for problems to show up.
Don’t work on a hot engine. Seriously. Hot coolant under pressure can spray out and burn you badly. Always wait for everything to cool first.
Don’t forget to dispose of old coolant properly. Environmental damage isn’t worth saving a few bucks. Do the right thing.
When to Call a Professional
Some cars have complicated cooling systems. Hybrid vehicles often have extra water pumps and electric cooling fans. Luxury cars might have multiple reservoirs and custom configurations.
If your car is under warranty, check your manual before doing this yourself. Some warranties get voided by DIY maintenance. It’s not worth the risk.
If you find leaks after refilling, stop and call a mechanic. Leaks mean bigger problems than just a dirty reservoir. Gaskets might be worn. Hoses might need replacing. Professional help saves you from making things worse.
Maintenance Tips Going Forward
Your cooling system isn’t a one-and-done thing. Keep it healthy long term. Check your coolant level every month when your engine is cold. Look for color changes. Coolant should stay its original color. Discoloration means breakdown is happening.
Every few years, do this cleaning process again. The exact interval depends on your car and driving conditions. Hot climates cause faster degradation. Stop-and-go city driving creates more buildup than highway cruising.
Use quality coolant from trusted brands. Cheap coolant fails faster. You’ll be doing this job again sooner than you’d like.
Pay attention to temperature warning lights. Your dashboard tells you when something’s wrong. A creeping temperature gauge means your cooling system is struggling. Clean that reservoir before you have serious problems.
The Final Word
Cleaning your coolant reservoir isn’t complicated or expensive. You don’t need special training or fancy tools. Beginners can totally do this job successfully. The process takes a couple hours, and you save money that mechanics would charge.
Your engine will thank you for the attention. A clean cooling system means lower engine temperatures, better performance, and fewer worries on the road. You get the satisfaction of doing the work yourself and the knowledge that you understand your car better.
Get your supplies together. Follow these steps carefully. Take your time. Your vehicle’s cooling system will run smoothly for years to come. That’s a win for you and your car.