How to Fix Your Vehicle Stability Control System?
Your vehicle’s stability control system keeps you safe when things get slippery on the road. When this system fails, you lose an important safety feature that helps prevent accidents. The good news? You can fix many stability control issues yourself by learning what causes them and how to troubleshoot the problem.
What Is Vehicle Stability Control and Why Does It Matter?
Vehicle stability control is an active safety system that helps prevent your car from skidding or sliding out of control. This system works by monitoring how your vehicle moves and automatically applies brakes to individual wheels when it senses a loss of traction.
Your stability control system goes by different names depending on your vehicle’s manufacturer. Some call it Electronic Stability Program (ESP), Traction Control System (TCS), or Vehicle Stability Assist (VSA). No matter what name your vehicle uses, the job stays the same: keeping you stable and safe.
The system works behind the scenes using sensors and computers. These components talk to each other constantly, monitoring your speed, steering angle, and wheel rotation. When the computer detects that your wheels are sliding or your vehicle is spinning, it springs into action. It tightens up brake pressure on specific wheels and sometimes even reduces engine power to help regain control.
This system saves lives every single day. When you hit black ice or take a turn too fast, stability control steps in to prevent a crash. Without it, you’re much more likely to lose control on slippery roads.
Common Signs Your Stability Control System Has Problems
Your vehicle sends you warning signs when something goes wrong with the stability control system. Learning to recognize these signs helps you catch problems early before they become dangerous.
The most obvious sign is when the stability control warning light appears on your dashboard. This amber or yellow light looks like a car with skid marks or the letters ESP. When this light comes on, your stability control system has detected a problem that needs attention.
Sometimes the light blinks on and off while you’re driving. A light that flashes occasionally might mean the system is doing its job, applying corrective braking when traction is lost. But if the light stays on all the time, something is definitely wrong.
You might also notice that your vehicle doesn’t handle as smoothly as it used to. The car could feel less responsive when turning or more prone to sliding. Some drivers report that their vehicles feel “weird” or unstable, even on perfectly dry roads.
Another sign is when your traction control light stays on. The traction control system and stability control system work together, so problems in one often show up in the other. If you see the traction control light, your stability control might have issues too.
Listen for unusual sounds coming from under the hood. Sometimes you’ll hear whirring, clicking, or grinding noises when the system activates. While some noise is normal, excessive or strange sounds could indicate a mechanical problem.
The Most Common Causes of Stability Control Failures
Understanding what causes these failures helps you know whether you can fix it yourself or need professional help.
Faulty Wheel Speed Sensors
Wheel speed sensors monitor how fast each wheel is turning. The stability control computer relies on this information to do its job. When a sensor fails, the computer loses critical data and can’t function properly.
Wheel speed sensors live inside or near your wheel wells. They take a lot of abuse from dirt, moisture, and temperature changes. Over time, they wear out and send incorrect signals to the computer. The computer then triggers the warning light because it can’t trust the sensor data.
You might notice this problem when your ABS light comes on along with the stability control light. These two systems share wheel speed sensors, so sensor failures often trigger both warning lights.
Low or Contaminated Brake Fluid
Your stability control system uses brake fluid to apply corrective braking. When your brake fluid level drops too low, the system can’t function properly. Low brake fluid usually means you have a leak somewhere in your brake system.
Contaminated brake fluid is another problem. Brake fluid absorbs moisture over time, especially in humid climates. Too much moisture in the fluid causes corrosion inside the brake system and makes the fluid less effective. This can prevent the stability control system from working correctly.
Problems with the Brake Master Cylinder
The brake master cylinder creates pressure in your brake system. When it fails or develops internal leaks, your brake pressure drops, and your stability control system can’t get the power it needs to apply corrective braking.
A failing master cylinder usually produces a soft or spongy brake pedal. You might need to pump the pedal multiple times to get full braking power. Sometimes you’ll see brake fluid leaking from under the car.
Damaged Wheel Speed Sensors or Wiring
Beyond faulty sensors, physical damage to the sensor itself or its wiring can disable the stability control system. Hitting a pothole hard or driving over a large object might damage the sensor or its connector. Road salt and moisture can corrode the sensor wires over time.
If you examine a wheel speed sensor and see visible damage, corrosion, or broken wires, that’s your problem right there.
Failing Stability Control Module
The stability control module is the computer that runs the whole system. This unit processes information from multiple sensors and sends commands to the brakes. When the module fails, the entire system shuts down.
Module failures can happen from electrical problems, water damage, or internal circuit failures. These are more expensive to fix because you usually need to replace the entire unit.
Issues with the Steering Angle Sensor
The steering angle sensor tells the stability control computer which direction you’re steering and how much. When this sensor fails, the computer doesn’t know what you’re trying to do, so it can’t provide appropriate corrections.
A faulty steering angle sensor often causes the stability control light to stay on. Sometimes the sensor becomes misaligned after you rotate your tires or have suspension work done.
Problems with the Lateral Acceleration Sensor
The lateral acceleration sensor detects sideways motion in your vehicle. It works with other sensors to help the computer understand whether your car is stable or starting to slip. When this sensor fails, the stability control system loses vital information.
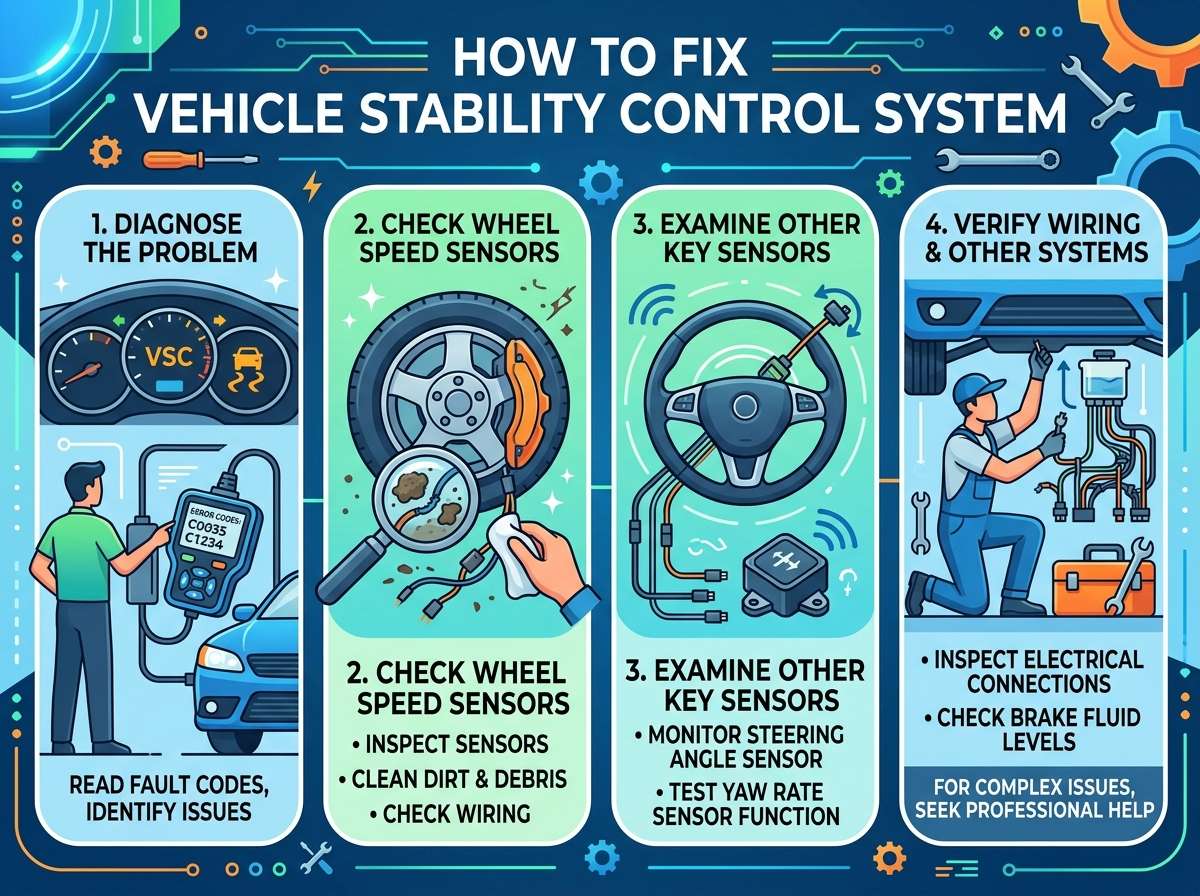
How to Troubleshoot Stability Control Problems
Before you take your vehicle to a repair shop, you can do some basic troubleshooting yourself. Many simple fixes are completely free and take just minutes.
Check Your Brake Fluid Level
Pop open your hood and locate the brake fluid reservoir. It’s usually a clear plastic container with a “Min” and “Max” line marked on the side. If the fluid level is below the minimum line, you’ve found your problem.
Top off the brake fluid with the correct type for your vehicle. Check your owner’s manual to find the right specification. Don’t just add any brake fluid you find. Different types can’t mix and can damage your brake system.
If your brake fluid keeps dropping after you refill it, you have a leak. This is a safety issue that requires professional repair.
Inspect Your Wheels and Sensors
Get down on your hands and knees and look at each wheel. Look for the wheel speed sensor, which is usually a small device mounted near the wheel bearing. Look for dirt, mud, or corrosion covering the sensor.
If the sensor is just dirty, you can clean it carefully with a soft brush and a little bit of brake cleaner. Don’t use high-pressure water or aggressive scrubbing, as you could damage the delicate sensor.
Check the sensor’s wiring for visible damage, cuts, or corrosion. If the connector looks corroded or oxidized, spray it with electrical contact cleaner and let it dry completely.
Examine Your Brakes for Problems
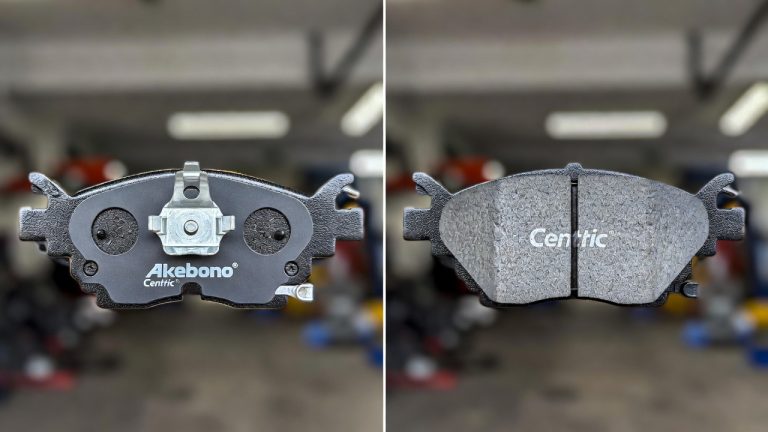
Look at your brake pads and rotors. Worn brake pads or damaged rotors can affect your brake system’s function, which impacts stability control. If your brake pads are nearly gone or your rotors look warped or grooved, plan to have them serviced soon.
Check the color and smell of your brake fluid. Fresh brake fluid is clear and nearly colorless. Old or contaminated fluid looks dark brown or black. If your fluid looks dark, you need a brake fluid flush. This is important for both brake safety and stability control function.
Look for Loose Connections
The stability control system connects many components with electrical cables and connectors. Vibration from driving can loosen these connections over time.
Check under the hood and around your wheels for any loose wires or connectors. Gently push on any connectors you see to make sure they’re seated firmly. Sometimes just reseating a loose connector fixes the problem entirely.
Step-by-Step Repair Guide for Common Issues
Once you’ve diagnosed the problem, you might be able to fix it yourself. Here are the most common repairs that DIY mechanics can handle.
Replacing a Wheel Speed Sensor
If you’ve identified a faulty wheel speed sensor, you can replace it yourself with basic tools.
What You’ll Need:
- Jack and jack stands
- Lug wrench
- Socket set
- Screwdrivers
- A replacement wheel speed sensor for your specific vehicle
The Process:
Start by safely raising your vehicle and removing the wheel. Consult your vehicle’s repair manual to find the exact location of the wheel speed sensor at that corner.
Locate the sensor’s electrical connector and gently pull it apart. Some connectors have a small release tab you need to press before pulling.
Remove the mounting bolt that holds the sensor in place. The bolt usually requires a socket wrench. On some vehicles, the sensor slides out of its hole after you remove the bolt. On others, you need to twist it counterclockwise like a light bulb.
Pull the old sensor out and set it aside. Clean the sensor hole with a dry cloth to remove any dirt or debris.
Insert the new sensor into the hole and push it all the way in. Install the mounting bolt and tighten it securely without over-tightening, which can damage the sensor.
Reconnect the electrical connector by pushing it together until you hear a click.
Repeat this process for any other bad sensors, then reinstall your wheel and lower the vehicle.
Flushing Your Brake Fluid
Old or contaminated brake fluid can cause stability control problems. Flushing the system yourself saves you money.
What You’ll Need:
- New brake fluid of the correct type
- Brake fluid bleeder bottles or a turkey baster
- Jack and jack stands
- Open-end wrenches
- Containers to catch old fluid
The Process:
Start at the wheel farthest from the brake master cylinder. This is usually the right rear wheel. Raise that corner of the vehicle safely.
Locate the brake bleeder screw on the brake caliper or wheel cylinder. Place your container under the screw to catch dripping fluid.
Insert a rubber tube over the bleeder screw. Open the screw about half a turn with your wrench. Press the brake pedal several times to push old fluid through the tube into your container.
Have a helper press the brake pedal and hold it while you open the bleeder screw. When the pedal reaches the floor, close the screw. Tell your helper to release the pedal.
Repeat this press-and-hold procedure until new, clean fluid comes through the bleeder tube instead of dark old fluid. You know you’re done when the fluid looks the same color as the new fluid from the bottle.
Move to the next wheel, typically the left rear, then the right front, and finally the left front. Always work from the wheel farthest from the master cylinder toward the closest one.
Once you’ve bled all four wheels, top off your brake fluid reservoir with new fluid.
Replacing the Brake Master Cylinder
A failing brake master cylinder is a more involved repair, but experienced DIYers can handle it.
What You’ll Need:
- A replacement master cylinder for your vehicle
- Brake fluid of the correct type
- Tubing wrenches
- Screwdrivers
- A drain pan
- Brake line wrench
The Process:
Disconnect the negative battery terminal first. This prevents electrical issues during the repair.
Position your drain pan under the brake master cylinder to catch spilling fluid.
Locate the brake lines connected to the master cylinder. These metal tubes carry brake fluid to the wheels. Carefully disconnect them using your brake line wrench. Don’t force them or you could damage the lines.
Locate the mounting bolts that hold the master cylinder to the brake booster. These are usually on the engine side of the firewall. Remove these bolts and carefully pull the cylinder away from the booster.
Install your new master cylinder in reverse order. Push it back onto the brake booster and install the mounting bolts. Reconnect the brake lines by screwing them in by hand first, then tightening them firmly with your wrench.
Fill the reservoir with new brake fluid and bleed your brake system as described above.
After you’ve bled the system, test your brakes carefully in a safe area before driving normally. Make sure your brake pedal feels firm and responsive.
When to Call a Professional
Some stability control problems require professional help. Knowing when to throw in the towel saves you frustration and prevents safety issues.
Call a professional mechanic if you discover electrical problems you don’t understand. If your stability control module is faulty, you need someone with specialized diagnostic equipment to reprogram it or replace it properly.
If you don’t feel confident working on brake system components, stop and call a professional. Brake system repairs are critical for your safety. One small mistake can lead to brake failure.
Problems with the ABS pump system require specialized equipment to diagnose and repair. A professional should handle these issues.
If you’ve diagnosed a failing steering angle sensor or lateral acceleration sensor, you might be able to replace it yourself if you’re mechanically inclined. However, these sensors sometimes need recalibration after replacement, which requires a professional scan tool.
When you see the stability control light and can’t figure out why, it’s time for professional diagnostics. A professional mechanic can connect a diagnostic scanner to your vehicle and read the exact trouble codes. These codes point directly to the problem, making the repair much easier.
Preventing Stability Control System Problems
The best way to deal with stability control issues is to prevent them in the first place.
Keep Your Brakes Maintained
Regular brake inspections catch problems early. Have your brake pads, rotors, and master cylinder inspected annually. Replace pads before they wear completely through. These preventive steps keep your entire brake system healthy, including the stability control components that depend on it.
Stay on Top of Sensor Maintenance
Keep your wheels clean, especially the areas where sensors are mounted. When you wash your car, rinse the wheel wells thoroughly to remove dirt and salt. This keeps sensors clean and prevents corrosion.
After driving in deep water or flooded conditions, inspect your wheel wells and sensor areas. Dry them completely to prevent corrosion.
Maintain Proper Tire Condition
Your stability control system depends on your tires to do their job. Bald or unevenly worn tires reduce traction, which makes the stability control system work harder and can trigger false warnings.
Check your tire tread depth regularly. The penny test works well for this. Stick a penny into your tire tread with Lincoln’s head pointing down. If you can see the top of his head, your tread is too worn.
Maintain proper tire pressure as specified in your owner’s manual. Underinflated or overinflated tires don’t grip the road properly and can cause stability control system issues.
Replace Your Brake Fluid on Schedule
Brake fluid gets old and absorbs moisture over time. Most manufacturers recommend flushing your brake fluid every two to three years, depending on driving conditions. Humid climates need more frequent flushes.
Regular brake fluid flushes prevent contamination and keep your entire brake system, including stability control, working properly.
Address Warning Lights Immediately
The moment you see the stability control light, take your vehicle seriously. Don’t just ignore it hoping it goes away. That light means something is broken, and the longer you wait, the worse it gets.
Schedule a diagnostic appointment as soon as possible. The sooner you find the problem, the easier it is to fix and the less damage you’ll do to related systems.
Drive Carefully in Slippery Conditions
While this doesn’t prevent mechanical failures, it does reduce the stress on your stability control system. Drive slowly and carefully when roads are wet, icy, or snowy. This gives your stability control system an easier job and reduces the chance of triggering problems.
Avoid sudden steering inputs and aggressive acceleration. Smooth, controlled driving keeps all your vehicle’s systems happy.
Understanding Your Vehicle’s Diagnostic Codes
When a professional mechanic hooks up a diagnostic scanner, they’ll pull trouble codes. These codes help identify exactly what’s wrong with your stability control system.
Common codes include C1233, which indicates a wheel speed sensor problem. Code C1235 usually means there’s an issue with the steering angle sensor. Code C1237 points to a lateral acceleration sensor failure.
Understanding these codes helps you communicate better with your mechanic and understand the repair that needs to happen. Ask your mechanic to explain what the code means and why your vehicle is setting it.
Final Thoughts on Fixing Your Stability Control System
Your vehicle’s stability control system is one of the most important safety features you own. When it fails, you lose critical protection on slippery roads. The good news is that many stability control problems are fixable with basic mechanical knowledge and the right tools.
Start by learning to recognize the warning signs. Pay attention to dashboard lights and changes in how your vehicle handles. Perform basic troubleshooting like checking brake fluid levels and inspecting sensors for corrosion. Many simple problems have simple solutions.
For repairs within your skill level, tackle them yourself and save money. Replacing a wheel speed sensor or flushing your brake fluid are tasks many DIY mechanics can handle. But don’t hesitate to call a professional when you’re dealing with electrical problems, module failures, or brake system issues you don’t understand.
Most importantly, address stability control problems as soon as you notice them. Driving with a faulty stability control system is dangerous, especially in wet or slippery conditions. Take your vehicle to a mechanic if you can’t figure out the problem yourself.
Your safety depends on this system working correctly. Give it the attention it deserves, and it will keep you safe on the road for years to come.

Peterson is an automotive enthusiast and auto parts reviewer with a passion for vehicle maintenance, upgrades, and performance. He enjoys researching and testing car parts, tools, and accessories to help drivers make informed buying decisions. Through AutoPartsTalk.com, Peterson shares honest reviews, practical maintenance tips, and expert guides to keep vehicles running safely and efficiently.