How to Replace Car Tail Light?
Why You Should Know How to Replace Your Tail Light
Your car’s tail lights do more than just make your vehicle look complete. They’re critical safety features that tell other drivers when you’re stopping, slowing down, or turning. When a tail light burns out, you’re not just breaking traffic laws. You’re putting yourself and everyone else on the road at serious risk.
Here’s the thing though. Replacing a tail light isn’t rocket science. You don’t need to be a mechanic. You don’t need fancy tools. Most people can replace a broken tail light in less than 30 minutes. All you need is basic knowledge and a little bit of patience.
This guide will walk you through every step of the tail light replacement process. By the time you finish reading, you’ll be confident enough to do this repair yourself and save some money while you’re at it.
What You’ll Need Before You Start
Let’s talk about what you need to gather before you begin. The good news? Most of these items are things you probably already have at home.
Tools and supplies:
- A screwdriver (usually Phillips head, but check your car’s manual)
- A new replacement bulb (the right type for your vehicle)
- A flashlight or work light
- Maybe a pair of work gloves
- Your car’s manual (optional but helpful)
That’s it. You don’t need anything fancy. You don’t need a full tool kit. You don’t need expensive equipment. A basic screwdriver and a new bulb will get the job done.
The trickiest part is getting the right replacement bulb. Different cars use different bulb sizes and types. Your owner’s manual will tell you exactly what you need. You can also ask someone at an auto parts store. Just tell them your car’s make and model, and they’ll help you pick the right one.
Finding Your Tail Light Assembly
Before you can replace your tail light bulb, you need to access the tail light assembly. This is the housing that holds the bulb in place.
Here’s how to find it:
Go to the back of your car and look at the light that’s not working. You’ll see a plastic or metal cover that holds the bulb. This is your tail light assembly.
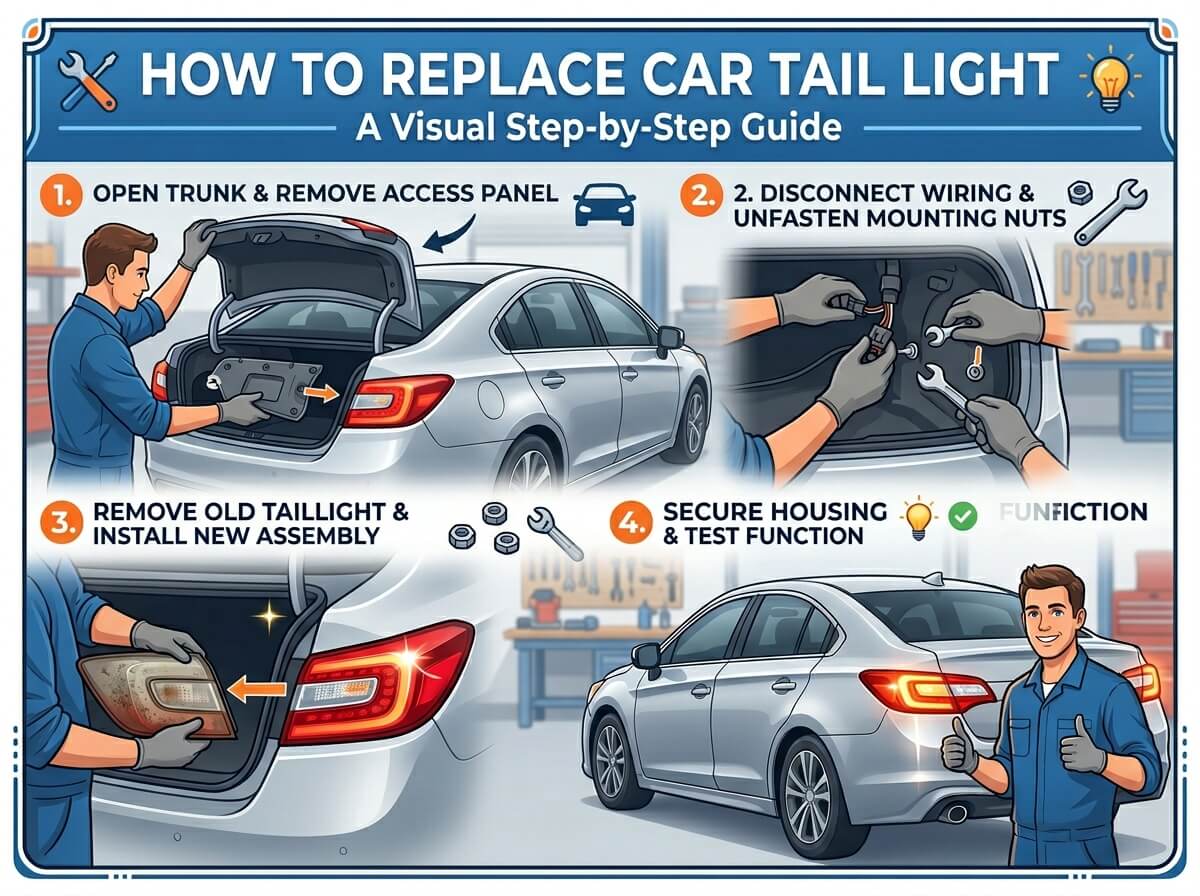
Some vehicles make this super easy. You can access the bulb from inside your car’s trunk. Just open the trunk and look for the tail light assembly from the inside. You might see a panel that you can remove. Other cars require you to get to the assembly from the outside.
Check your owner’s manual if you’re not sure. The manual will have a diagram showing exactly where your tail light assembly is and how to access it.
The Step-by-Step Replacement Process
Step 1: Safety First
Before you do anything else, park your car somewhere safe. Turn off the engine. Make sure your car is parked on level ground and won’t roll. If you’re working on the side of a road, turn on your hazard lights to warn other drivers.
Safety comes first. Always.
Step 2: Locate the Access Point
Now find the tail light assembly. As I mentioned, this might be inside your trunk or outside the vehicle. Some cars have screws that hold the entire light assembly in place. Other cars have the bulb accessible from the inside.
Open your trunk if you need to. Look for any panels or covers that might be blocking your access. If you see screws, that’s usually what’s holding the assembly in place.
Step 3: Remove Any Blocking Components
You might need to remove something to get to your tail light. This could be a plastic panel, a trim piece, or a cover. These pieces usually come off easily.
If there are screws, use your screwdriver to remove them. Don’t force anything. If something doesn’t want to come off, stop and look more carefully. You might be missing a screw or clip.
Some vehicles have plastic fasteners instead of metal screws. These snap into place and come off with a gentle tug. Just be patient and work carefully.
Step 4: Find the Bulb Socket
Once you have access to the tail light assembly, look for the bulb socket. This is a plastic or rubber piece that holds the bulb in place. The socket usually twists or pulls straight out.
Turn on a flashlight so you can see what you’re doing. The bulb socket is typically a rounded piece that’s connected to wires.
Step 5: Remove the Old Bulb
To take out the bulb, you need to remove the socket. Most sockets twist counterclockwise. Grab the socket gently and turn it to the left. It should come out without much effort.
Some sockets pull straight out. Just give it a gentle tug straight toward you.
Once the socket is out, you’ll see the old bulb. Push it in gently while twisting it counterclockwise. The bulb should pop right out. It might be burned out, so don’t be shocked if it looks dark or damaged.
Step 6: Install the New Bulb
Take your new replacement bulb and insert it into the socket. Line up the bulb’s base with the socket’s grooves. Push the bulb in and turn it clockwise until it locks into place. You’ll feel it catch when it’s properly installed.
Don’t force it. The bulb should slide in smoothly. If you’re meeting resistance, check that you have the right bulb type. Stop and triple-check before you push harder.
Step 7: Put the Socket Back
Now insert the socket back into the tail light assembly. Push it in straight and turn it clockwise. You’ll hear or feel a click when it locks in place. This tells you the socket is secure.
Step 8: Test Your Work
Before you put anything back together, test your new bulb. Ask a friend or family member to step on the brake pedal while you watch the tail light. You should see it light up bright and red.
If it doesn’t light up, pull the socket back out and check the bulb. Make sure it’s seated properly in the socket. Try again.
Step 9: Reassemble Everything
Once your new tail light is working, put back any panels or covers you removed. Screw things back in place. Make sure everything is tight and secure.
Don’t overtighten screws. This can crack plastic. Just make them snug.
Step 10: Final Check
Take a final look at your work. The tail light assembly should be completely reassembled. No parts should be sticking out. No screws should be loose.
Test the light one more time by having someone press the brake pedal. Everything should work perfectly.
Different Types of Tail Light Bulbs
Not all tail lights are the same. Your car might use different types depending on the year and model. Let me break down the most common ones.
Incandescent bulbs are the traditional choice. These are the ones that have a filament inside that glows when electricity passes through it. They’re inexpensive and easy to replace. Most older cars use these.
LED bulbs are becoming more popular. LED stands for light-emitting diode. These bulbs use less power and last much longer than incandescent bulbs. They also produce a brighter light. If your car has LED tail lights, the replacement process is almost the same, but the bulb itself looks different.
HID bulbs are high-intensity discharge bulbs. These are expensive and use special technology. Some newer luxury vehicles have these. Replacing HID bulbs is a bit more complicated, and you might want to take your car to a professional.
Your owner’s manual will tell you exactly which type your car uses. You can also look at the bulb itself if it’s still in place. The packaging from your old bulb will also tell you the type.
Common Problems and How to Fix Them
The Bulb Won’t Go In
If your new bulb won’t fit into the socket, stop immediately. You might have the wrong bulb type. Check the part number on the package and compare it to what your manual says. Don’t force a bulb into the socket. This will break it.
The Light Still Won’t Work
If you install the new bulb and it still doesn’t work, several things could be wrong. First, make sure the bulb is completely seated in the socket. Push it in and twist it clockwise firmly.
Next, check if other lights on that side of your car work. Does the brake light work? Does the turn signal work? If nothing works on that side, you might have a wiring problem or a blown fuse. This is beyond a simple bulb replacement.
Look at your fuse box. Your owner’s manual shows you where it is and which fuse controls the tail lights. A blown fuse looks burned or dark inside. If the fuse is blown, replace it with a new one of the same amperage.
Moisture Inside the Light Assembly
If you see water or condensation inside your tail light assembly, your seal might be broken. This is more serious than a burnt-out bulb. The seal keeps water out of the electrical components.
You might need to replace the entire light assembly. This is a bigger job, and you might want to take your car to a professional.
The Whole Assembly Seems Stuck
If you can’t get the light assembly out or can’t access the bulb, stop and check your manual again. You might be missing a hidden screw or clip. Sometimes trim pieces need to come off first.
If you really can’t figure it out, there’s no shame in taking your car to a mechanic. They deal with this every day and can show you how it’s done.
Tail Light Maintenance Tips
Once you’ve replaced your tail light, you want to keep it working for as long as possible. Here are some tips to help your new bulb last.
Check your lights regularly. Do a walk-around of your car once a month. Look at all your lights. Make sure nothing is burned out. Catching a problem early is always better than having a light fail when you’re driving at night.
Keep your lights clean. Dirt and grime can reduce how bright your lights are. Wash your car regularly. Wipe down your light assemblies with a soft cloth.
Avoid water exposure. Try not to park your car where it will be submerged in water. Standing water can get into your light assembly and cause electrical problems. If you do splash through water, try to dry the light assembly when you can.
Drive carefully. Severe bumps and collisions can damage light assemblies. Drive smoothly and avoid potholes when you can. This protects your entire vehicle, not just your lights.
When Should You Replace Your Tail Light?
You need to replace your tail light bulb whenever it stops working. Here are the signs:
- The light doesn’t come on when you brake or signal
- The light is very dim compared to the other side
- The bulb looks broken or dark inside
- You see water inside the light assembly
Don’t wait to replace a burnt-out tail light. It’s illegal to drive with a non-functioning tail light. You could get pulled over and ticketed. You’re also putting yourself at risk.
Replacing a tail light bulb is such a quick and easy job that there’s no reason to put it off.
Tail Light Replacement Cost
If you do this yourself, you’re only paying for the replacement bulb. A new tail light bulb typically costs between $5 and $20. This is incredibly cheap.
If you take your car to a mechanic or dealership, you’ll pay for labor. Labor costs vary widely depending on where you live and which shop you go to. You could pay anywhere from $50 to $150 just for the bulb replacement.
That’s why learning to do this yourself is worth your time. You’ll save money and feel good about doing your own car maintenance.
Special Cases: Back-up Lights and Side Markers
Your car has several types of lights on the back. Your tail lights are just one kind. You might also have backup lights, side marker lights, and turn signals.
The replacement process for these lights is almost identical to replacing tail lights. The main difference is the bulb type. Each light uses a different bulb designed for that specific purpose.
If you need to replace a backup light or side marker light, follow the same steps outlined in this guide. The only difference will be which bulb you buy.
Tools That Make the Job Easier
While you don’t need many tools for this job, a few items can make it easier:
A work light or headlamp helps you see what you’re doing. Working on a car at night can be dark and frustrating. A light makes everything clearer and safer.
Needle-nose pliers can help remove clips or fasteners if your hands aren’t small enough. This is optional, but handy to have around.
Trim removal tools are plastic tools designed to remove panels without damaging them. You can buy a set cheaply. They’re not necessary, but they make the job easier if you have stubborn panels.
A camera or phone can help you document how things came apart. Take photos as you remove pieces. This helps you remember how to put them back together.
Tail Light Assembly Replacement
Sometimes the entire light assembly fails and can’t be repaired. You might need to replace the whole thing.
This is a more involved job than replacing a bulb. It requires removing more parts and possibly working with electrical connectors. You might need multiple screwdrivers and other tools.
If you need to replace an entire light assembly, check YouTube for a video specific to your car’s make and model. Videos are incredibly helpful for visual learners. You can see exactly how the job is done.
Alternatively, take your car to a professional. Assembly replacement is more complex and requires more expertise.
Frequently Asked Questions About Tail Light Replacement
How long does it take to replace a tail light?
Most people can replace a tail light bulb in 15 to 30 minutes. The time depends on how easy it is to access your specific light assembly.
Can I replace a tail light while it’s raining?
You can, but it’s not ideal. Water could get into the light assembly or electrical connectors. Try to wait for dry weather if possible.
Do I need to disconnect my car battery?
No. Tail lights use low voltage electricity. You don’t need to disconnect the battery. Just make sure the engine is off.
What if I drop the bulb and it breaks?
Don’t touch it with your bare hands. Oils from your skin can get on the bulb and cause it to burn out quickly. Use a clean cloth or your gloved hand to handle the bulb. If it’s broken, just buy another one.
Will I need a special tool to remove the socket?
Usually not. Most sockets come out by twisting or pulling. Check your manual if you’re unsure.
Can I use any bulb in my tail light?
No. You must use the correct bulb type for your vehicle. Using the wrong bulb could cause problems. It might not fit. It might not be bright enough. It might even cause electrical issues.
Final Thoughts on Replacing Your Tail Light
Replacing a car tail light is one of the easiest DIY car maintenance tasks you can do. It requires almost no tools. It takes just a few minutes. And it saves you money compared to going to a professional.
The hardest part is usually getting the right bulb and figuring out how to access your specific light assembly. Once you’ve got those two things figured out, the rest is simple.
Don’t be intimidated by working on your car. Start with easy jobs like this one. Build your confidence. Learn how your vehicle works. Soon you’ll be tackling bigger repairs with the same confidence.
Your safety on the road depends on your lights working properly. Taking the time to replace a burnt-out tail light quickly is worth it. You’ll protect yourself and other drivers. You’ll also save money and gain valuable knowledge about your vehicle.
The next time your tail light burns out, you’ll know exactly what to do. You’ll do it yourself. And you’ll do it right.
Now get out there and replace that tail light. You’ve got this.