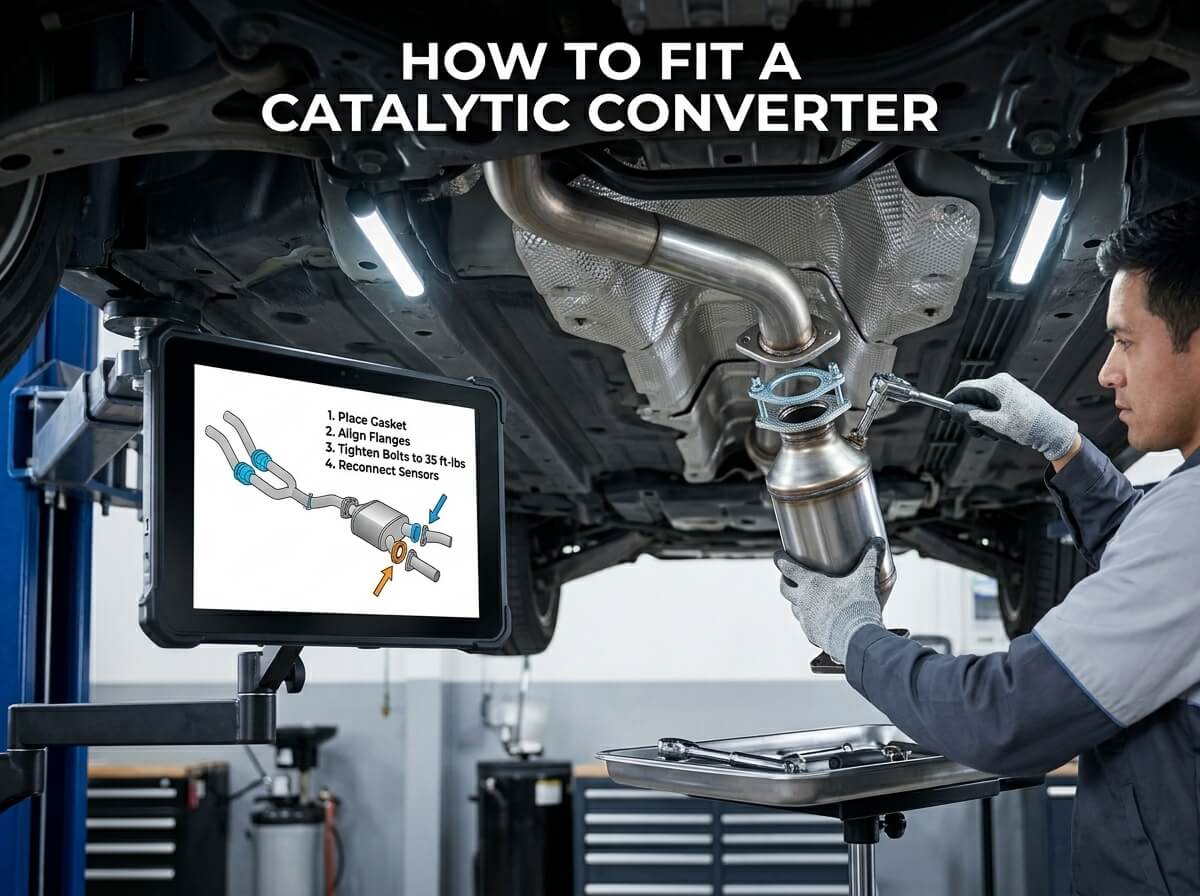
How to Fit a Catalytic Converter?
Let’s Talk About Your Car’s Catalytic Converter
Your car has a part called a catalytic converter. It sits under your vehicle and does something pretty important. This part helps clean up bad gases from your engine before they go into the air. When it starts to wear out or break, your car won’t run right and you’ll see a check engine light pop up on your dashboard.
The good news? You can actually replace this part yourself if you’re willing to spend a few hours. You don’t need to be a professional mechanic. This guide will walk you through the whole process, step by step.
What Is a Catalytic Converter and Why Does It Matter?
Let me break this down in simple terms. Your engine burns fuel to make your car move. This burning process creates gases. Some of these gases are bad for the environment. The catalytic converter catches these bad gases and changes them into cleaner stuff. It’s like a air cleaner for your car’s exhaust.
Over time, the inside of your catalytic converter can get clogged or damaged. When this happens, your car doesn’t run smoothly. Your fuel efficiency drops. You might notice your car feels sluggish or won’t start right away.
A broken catalytic converter can be expensive to replace at a shop. That’s why a lot of people choose to do it themselves and save money.
Signs Your Catalytic Converter Needs Replacement
Before you jump into fitting a new one, let’s talk about how to know if yours is actually broken.
Your check engine light is on. This is the biggest sign. Your car has sensors that check your exhaust system. When something goes wrong, that light comes on.
Your car won’t start easily. If your car is hard to start or takes a long time to turn on, your catalytic converter might be the problem.
You feel a loss of power. When you press the gas, your car feels slow and weak. It won’t accelerate like it should.
You hear rattling sounds from under your car. A broken catalytic converter can rattle when you drive. You’ll hear this noise coming from under the vehicle, not from the engine itself.
Your fuel economy is really bad. If you’re filling up way more often than normal, something’s wrong with your catalytic converter.
You smell rotten eggs coming from your exhaust. This smell means your catalytic converter isn’t working right. The chemicals inside aren’t doing their job.
If you have any of these signs, it’s time to replace your catalytic converter.
What You’ll Need to Get Started
Let’s talk about the tools and parts you need before you start. Having everything ready before you begin makes the job go much faster.
Tools you’ll need:
- A jack to lift your car
- Jack stands to hold your car up safely
- Wrenches in the right sizes for your specific car
- A wrench set or socket set
- Penetrating oil like WD-40
- A wrench for the bolts
- Ramps as an option instead of a jack
- A flathead screwdriver
- A creeper to lie on under your car
- A work light so you can see what you’re doing
- Eye protection and work gloves
- A drill or impact driver for stuck bolts
Parts you’ll need:
- The new catalytic converter for your car model
- Exhaust gasket or seal
- New bolts or hardware
Picking the Right Catalytic Converter for Your Car
Not all catalytic converters are the same. You need to get the right one for your specific car.
Check your vehicle’s owner manual or look online for your car’s make, model, and year. Many parts stores have websites where you can type in your car info and find the exact catalytic converter that fits.
You have two main options when getting a new catalytic converter:
OEM catalytic converters come from the car manufacturer. They cost more money but they fit perfectly and last a long time.
Aftermarket catalytic converters are made by other companies. They cost less money than OEM parts. Many of them work just as well, but you need to read reviews and buy from a trusted brand.
For your first time doing this job, an OEM part is usually the better choice. It fits easier and you won’t run into surprise problems.
Getting Your Car Ready and Lifted
Safety comes first. You’re about to get under your car, so you need to make sure it stays up and doesn’t fall on you.
Step 1: Park on a flat surface. Find a level concrete area. Don’t work on grass or dirt. Your car needs to sit on solid ground.
Step 2: Let your engine cool down. Your exhaust system gets super hot. Wait at least an hour after you last drove your car. If you touch the catalytic converter when it’s hot, you’ll get burned.
Step 3: Lift the car safely. Put your jack under the car frame, not plastic parts. Lift it slowly. Once it’s high enough, place jack stands under the frame to hold it up. Never work under a car that’s only held by a jack. Jacks can fail.
Step 4: Use ramps as an option. Some people prefer to drive their car slowly up on ramps instead of using a jack. This works well too, but make sure the ramps are solid and won’t slip.
Finding Your Catalytic Converter
Now that your car is lifted and safe, it’s time to find the catalytic converter. It sits under your vehicle between your engine and your muffler. You’re looking for a metal canister that’s bigger than your muffler but smaller than your main exhaust pipe.
Crawl under your car with a work light. Follow the exhaust pipe from the engine toward the back. The catalytic converter is the first big round part you’ll find.
Take a photo with your phone so you can remember what it looks like. This helps when you’re putting the new one in.
Disconnecting the Oxygen Sensors
Many cars have oxygen sensors hooked up to the catalytic converter. These sensors measure gases in the exhaust. You need to disconnect them before you remove the old part.
Look at the wires coming out of or near the catalytic converter. Follow these wires up to find where they plug in. You’ll see a connector.
Press the tab on the connector and pull it apart gently. Don’t yank the wires. Be slow and careful so you don’t break anything.
If the connectors are stuck, spray some penetrating oil and let it sit for a few minutes. Then try again.
Put the connectors somewhere safe. You’ll plug them back in when you put the new catalytic converter in.
Loosening and Removing Old Bolts
This is where things get tricky. The bolts holding your catalytic converter in place get really tight from heat and rust. They can be stubborn.
Look at where the catalytic converter bolts to the exhaust pipe coming from the engine. You’ll see bolts on both sides.
Spray penetrating oil on all the bolts. Wait five to ten minutes. This oil helps them loosen up.
Try to loosen the bolts with your wrench. Turn slowly. If a bolt won’t budge, spray more oil and wait longer. Don’t force it. You might break the bolt, and then you’ve got a real problem.
If a bolt is really stuck, tap it gently with a hammer. Sometimes this helps loosen it.
Once you get the bolts loose, unscrew them the rest of the way by hand.
Now look at where the catalytic converter connects to the muffler or tailpipe. You’ll see more bolts here. Loosen these the same way.
Taking Off the Old Catalytic Converter
Once all the bolts are loose, it’s time to pull the old catalytic converter out.
The catalytic converter connects to your exhaust system in a few places. Wiggle it gently back and forth. Pull it down and out.
Be careful not to break any hangers or brackets. Your catalytic converter sits on these rubber hangers that suspend it under your car.
Once you get it out, set it aside. Don’t touch it right away because it might still be warm even if your car has been sitting for a while.
Cleaning the Connection Points
Now you have a chance to clean up the area where the old part was attached.
Use a wire brush to clean off rust and old gasket material from the connection points. You want these surfaces to be clean so your new catalytic converter seals properly.
Spray some brake cleaner on a rag and wipe down the connections. This removes any oil or dirt.
Let everything dry for a minute.
Getting the New Catalytic Converter Ready
Take your new catalytic converter out of the box. Look it over to make sure it didn’t get damaged during shipping.
Check the gaskets and seals. These are rubber or metal rings that create an airtight seal. Make sure they’re in good condition.
Some catalytic converters come with new gaskets included. If yours didn’t, and you don’t have new gaskets, buy them now before you continue.
Installing the New Catalytic Converter
This is the main job. Take your time and do it right.
Position the catalytic converter. Hold it up and line up the bolt holes. You need to connect it to the exhaust pipe from the engine and the muffler or tailpipe below it. Wiggle it into position.
Install the gasket. Place the gasket or seal between the catalytic converter and the exhaust pipe. This creates an airtight seal that prevents exhaust leaks.
Start the bolts. Insert the bolts by hand first. You want to make sure they’re going in straight. Hand-tighten them a little bit. If you force them in the wrong way, you’ll strip the threads.
Tighten all bolts. Once all the bolts are started, tighten them. Use your wrench and make them snug, but don’t over-tighten. You’re not trying to crush anything. Hand-tight plus a little extra with your wrench is perfect.
Connect the lower bolts. Now tighten the bolts that connect the catalytic converter to the muffler or tailpipe the same way.
Support the catalytic converter. Make sure the rubber hangers are holding it properly. The converter should sit on these hangers and not put stress on the bolts.
Reconnecting the Oxygen Sensors
Now you need to plug the oxygen sensors back in. This is pretty simple.
Find the connectors you disconnected earlier. Bring them back to the catalytic converter area.
Push the connectors together firmly until you hear a click. They should lock into place.
Make sure the connectors are secure. Give them a gentle tug to confirm they’re plugged in.
Double-Checking Your Work
Before you lower your car and drive away, spend a few minutes checking everything.
Look at all the bolts. Are they all tight? Give each one a tug with your wrench to make sure.
Check the hangers. Is the catalytic converter sitting properly on its rubber hangers? It shouldn’t be hanging from the bolts alone.
Inspect the connections. Are there any gaps between the gasket and the pipes? Everything should look sealed up.
Look at the oxygen sensors. Are the connectors tight? Are the wires routed away from hot surfaces?
Lowering Your Car Back Down
Once you’re happy with your work, it’s time to carefully lower your car.
Remove the jack stands first. Slowly lower the car using the jack. Keep your hands clear in case something goes wrong.
Once all four wheels are on the ground, remove the jack completely.
Let your car sit for a few minutes before you start it up.
Starting Your Car for the First Time
Now comes the moment of truth. You’re going to start your car and listen for any problems.
Get in and turn the key slowly. Does it start normally? Good.
Let it idle for a few minutes. Listen for any rattling or strange noises coming from underneath. The car should run smoothly.
Look under the car from the side. Do you see any exhaust leaks? There should be no smoke or leaks coming from the catalytic converter area.
Rev the engine a little bit. Nothing strange should happen.
Let the car cool down for a few minutes.
Taking a Test Drive
Now it’s time to actually drive the car and see how it performs.
Drive slowly around your neighborhood first. Listen for any unusual sounds. Feel how the car accelerates. Does it feel normal?
Drive a little bit faster. The car should accelerate smoothly without any hesitation.
After you’ve driven for about ten or fifteen minutes, find a parking lot and stop. Let the car sit for a minute, then look under it again. There should be no leaks at all.
If everything feels good, you’re done. Your new catalytic converter is working.
What to Do If Your Check Engine Light Still Comes On
Sometimes the check engine light stays on after you replace your catalytic converter. This doesn’t always mean something went wrong.
Your car’s computer needs to run through some tests to confirm the new catalytic converter is working. This can take several hundred miles of driving.
Drive your car normally for a few hundred miles. The light usually goes away on its own.
If the light stays on after several hundred miles of driving, you might have a problem. Double-check all your connections and bolts. Make sure the oxygen sensors are plugged in tight.
If you can’t figure it out, you might need to take it to a mechanic to scan the error code. But nine times out of ten, the light goes away once the computer confirms your new catalytic converter is working right.
Common Problems and How to Fix Them
The bolts won’t loosen. Spray more penetrating oil and wait overnight. Sometimes patience is the answer. You can also try tapping the bolt gently with a hammer or using a longer wrench for more leverage.
You broke a bolt. This happens. You’ll need to drill out the old bolt and install a new one. Use a drill bit the same size as the bolt and carefully drill straight through.
The new catalytic converter doesn’t fit. Double-check that you ordered the right part for your car. Call the parts store and confirm. You might have gotten the wrong one. Sometimes you can modify a bracket or hanger slightly, but usually it means the wrong part.
You hear a rattle after installation. Make sure all the bolts are tight. Check that the catalytic converter is sitting on the rubber hangers and not hanging from bolts. A rattle usually means something’s loose.
Your car won’t start. You probably have a connection problem. Check your oxygen sensor connectors. Make sure they’re plugged in all the way. Start the car and see if it works.
Exhaust is leaking. This means your gasket didn’t seal properly. You might need to remove the catalytic converter again and install a new gasket. Sometimes the surfaces weren’t clean enough before installation.
Tips to Make the Job Easier
Work when you have time. Don’t rush this job. Give yourself at least four to six hours so you’re not stressed.
Have a helper. It’s nice to have someone hand you tools and hold a light. This makes everything easier.
Keep bolts organized. Use a small box or cup to keep bolts and small parts from different connections separate. Label them so you know which bolts go where.
Take photos as you go. Use your phone camera to take pictures at each step. You can look back at these photos if you forget how something was connected.
Don’t force anything. If something doesn’t want to fit or move, stop and think about why. Something might be wrong. Forcing things breaks them.
Read your manual. Your car’s owner manual might have specific notes about your catalytic converter replacement. Check it before you start.
When to Call a Professional
Sometimes you should just pay a mechanic to do this job.
If you don’t feel confident. If you’re nervous about working on your car, let a professional handle it. It’s not worth hurting yourself.
If you don’t have the right tools. You need a jack, jack stands, and the right wrenches. If you don’t have these or can’t borrow them, go to a shop.
If your car is really old. Older cars sometimes have complicated exhaust systems. If yours is weird or unusual, a professional will know how to handle it.
If something goes wrong. If you break a bolt, strip a thread, or damage something else, stop and take it to a mechanic.
The Cost Comparison: DIY vs. Professional
Let’s talk money. This is why a lot of people do this job themselves.
A new catalytic converter costs between $500 and $1,500 depending on your car. Sometimes they cost even more.
If you go to a repair shop, they’ll charge you the cost of the part plus labor. Labor usually costs $500 to $1,000 more.
If you do it yourself, you only pay for the part and maybe some tools if you don’t already have them. You save that big labor charge.
Even if you need to buy a few tools like a jack and jack stands, you’re usually ahead of the game. These tools you can use for other car projects later.
Final Thoughts on Fitting Your Own Catalytic Converter
Replacing your catalytic converter is a big job, but it’s doable for most people. You don’t need to be a mechanic. You just need patience, the right tools, and a willingness to take your time.
The feeling of finishing this job and having your car run smoothly again is awesome. You’ll save money and you’ll learn something about how your car works.
Start with the right part for your car. Take your time. Don’t rush. Follow each step carefully. If you run into a problem you can’t solve, ask for help or call a professional.
Your car will thank you when it’s running clean and efficient again. You’ve got this.