How To Install Passenger Side Mirror?
Replacing a damaged or broken side mirror is a task many car owners can handle at home. Learning how to install a passenger side mirror can save you a trip to the repair shop and help you get back on the road safely. In this guide, we will walk you through the necessary tools and the step-by-step process for a successful replacement. By the end, you will have the confidence to swap out your mirror assembly without needing professional assistance.
Key Takeaways
- Confirm your vehicle’s make, model, and specific mirror features before buying a replacement part.
- Most side mirror installations require basic hand tools like screwdrivers and plastic pry tools.
- Take care when removing interior door panels to avoid damaging delicate plastic clips.
- Always test electrical functions like power adjustment and heating before fully securing the door panel.
Preparation and Tools You Will Need
Gathering Your Equipment
Before starting the job, organize your workspace and gather the required tools. Having everything within reach prevents unnecessary delays. You will typically need a set of flathead and Phillips head screwdrivers. A plastic trim removal tool is also essential for prying off interior panels without scratching the paint or plastic surfaces. If your door panel uses specific fasteners, you might need a socket wrench set. Keep a clean towel or mat nearby to place your tools and the removed mirror assembly on.
Finding the Right Replacement Mirror
Compatibility is the most important factor when buying a new mirror. Check your vehicle’s owner manual or the car manufacturer website for the exact part number. Passenger side mirrors come with different features such as heat, turn signal lights, or blind-spot sensors. If you purchase a mirror without these features, your car’s electrical system may trigger warning lights. Verify that the housing color matches your car if you prefer a finished look, or buy a paintable version. Buying a high-quality aftermarket part ensures the bolt pattern aligns with your vehicle’s door frame.
Accessing the Door Panel
Removing Interior Trim Pieces
The mirror assembly is usually held in place by bolts hidden behind the interior door panel or a small corner cover. Start by identifying the small plastic trim piece located directly across from the mirror on the inside of the door. Use your plastic pry tool to gently pop this cover off. Some vehicles require you to remove the entire door panel to reach the mounting bolts. If this is the case, look for screws hidden in the door handle, the armrest, or the pocket area. Carefully unscrew these fasteners and store them in a small container so they do not get lost.
Safely Detaching the Door Panel
Once the screws are removed, the door panel is usually held by plastic clips around the edges. Pull the panel away from the door frame with firm, steady pressure. Start from the bottom and work your way up toward the window. Do not pull too hard or too fast, as this can snap the plastic clips. After the clips release, lift the panel slightly to clear the window ledge. Be mindful of any cables connected to the door handle or window switches that may still be attached.
Replacing the Side Mirror Assembly
Disconnecting the Electrical Wiring
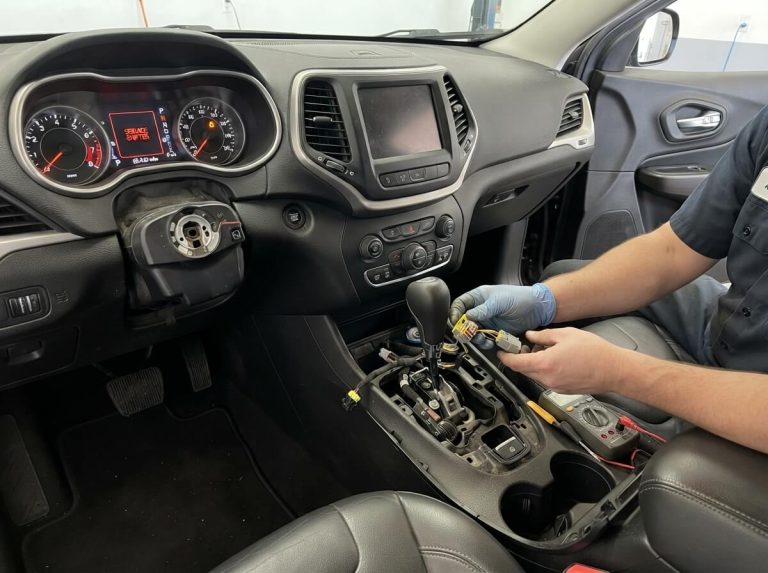
Before removing the mirror, you must disconnect the wiring harness. This is the plastic plug that provides power to the mirror features. Gently squeeze the release tab on the connector and pull the two halves apart. If the connector is stubborn, avoid pulling on the wires themselves, as this can damage the internal copper strands. You might need to use a small flathead screwdriver to gently depress the locking tab. Once unplugged, the mirror assembly is ready to be unbolted from the door.
Unscrewing the Old Mirror
Locate the three or four bolts securing the mirror to the door frame. Use your socket wrench or screwdriver to loosen these bolts slowly. Hold the mirror firmly from the outside with one hand so it does not fall when the last bolt is removed. Once the bolts are out, pull the mirror away from the door. You might need to pull slightly on the rubber weather stripping to release the mirror base. Clean the area around the mounting surface with a cloth to remove any dirt or debris before installing the new unit.
Mounting the New Assembly
Align the new mirror with the holes in the door frame. Feed the electrical connector through the opening carefully. Press the base of the mirror flush against the door so the foam gasket creates a tight seal against the metal. Insert the mounting bolts by hand at first to ensure they are not cross-threaded. Tighten them firmly with your wrench, but do not overtighten, as this can crack the plastic base or damage the door metal. Reconnect the electrical wiring harness until you hear a clear click.
Testing Your New Mirror
Before you put the door panel back on, you must verify the new mirror works correctly. Reconnect your window switch if you had to unplug it. Turn your vehicle’s ignition to the accessory position. Test the power mirror adjustment buttons to ensure the glass moves in all directions. If your mirror includes heat or turn signals, test those functions as well. If everything works as expected, proceed to snap the door panel back into place and replace all the screws.
Frequently Asked Questions
Do I need to remove the entire door panel to replace the mirror?
It depends on the vehicle design. Some cars have a small access cover that allows you to reach the bolts, while others require removing the entire interior panel. Always check a repair manual for your specific model to save unnecessary work.
Can I replace just the glass instead of the whole assembly?
Yes, if only the glass is cracked or missing, you can often buy a replacement mirror glass that sticks onto the existing backing plate. This is much cheaper and easier than replacing the entire mirror housing. However, this only works if the motor and housing are in good condition.
Will I need to calibrate my new mirror after installation?
Most standard side mirrors do not require calibration. If your vehicle has advanced features like blind-spot monitoring or cameras, these systems might need a reset. Consult your owner manual or a professional if you notice warning lights after installation.
How do I know if the replacement mirror is compatible with my vehicle?
The most reliable way is to use your vehicle identification number (VIN) when searching for parts. Compare the wiring connector on the new mirror to your old one to ensure they match perfectly. Do not rely solely on generic photos, as many mirrors look similar but have different internal wiring.
Is it difficult to plug in the power mirror electrical connector?
It is usually straightforward, but the space inside the door can be tight. Ensure the connector is oriented correctly before pushing it together. If it does not slide in easily, check for any bent pins or debris inside the plastic housing.
Final Tips for a Smooth Installation
Take your time throughout the process to avoid mistakes. If a piece of trim feels stuck, look for a hidden screw you might have missed rather than forcing it. Using a soft cloth to protect your paint while working is a simple step that prevents scratches. Keep your workspace clean and organized to track your hardware effectively. If you feel unsure about the electrical connections, take a clear photo of the original setup before unplugging anything. In short, preparation and patience are the best tools for any home car repair project.

Peterson is an automotive enthusiast and auto parts reviewer with a passion for vehicle maintenance, upgrades, and performance. He enjoys researching and testing car parts, tools, and accessories to help drivers make informed buying decisions. Through AutoPartsTalk.com, Peterson shares honest reviews, practical maintenance tips, and expert guides to keep vehicles running safely and efficiently.