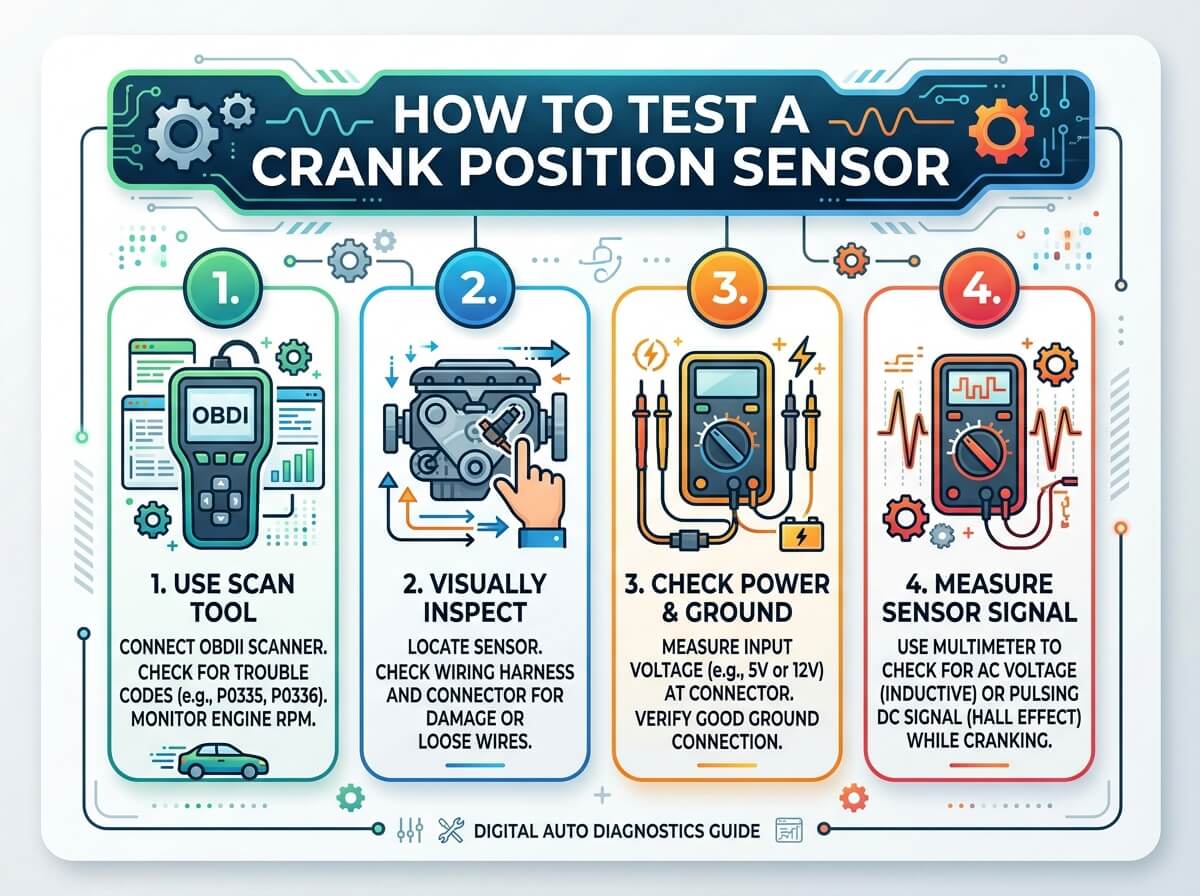
How to Test a Crank Position Sensor?
Your car engine is a complex machine with many parts working together. One small component plays a huge role in keeping everything running smoothly. That component is the crank position sensor, often called the crankshaft position sensor or CPS.
If your car won’t start or the engine runs rough, this little sensor might be the problem. Testing it doesn’t require special skills or expensive tools. You can learn how to do it yourself and save money on mechanic fees.
Let’s dive into everything you need to know about testing a crank position sensor.
What Is a Crank Position Sensor?
Before you test something, you should know what it does. A crank position sensor is a small device that monitors your crankshaft’s rotation. The crankshaft is a metal shaft that converts the up-and-down movement of pistons into rotation.
Your engine’s computer needs constant information about this rotation. The crankshaft position sensor sends signals to the engine control module (ECM). The ECM then uses this data to control fuel injection, spark timing, and many other engine functions.
Think of it like a clock for your engine. The sensor tells the engine’s brain exactly when to fire the spark plugs and inject fuel. Without accurate information from this sensor, your engine can’t run properly.
Why Testing Your Crankshaft Position Sensor Matters
A failing crank position sensor causes real problems. Your car might not start at all. The engine could stall while you’re driving. You might see a check engine light on your dashboard.
Some cars with a bad sensor will limp along in a safe mode. Others just quit completely. You don’t want to find out which type you have when you’re in the middle of traffic.
Testing the sensor early helps you catch problems before they get worse. A bad sensor can cause your car to run poorly and waste fuel. Getting it fixed quickly saves you money.
Common Signs of a Bad Crankshaft Position Sensor
You should get to know the warning signs. A failing crank position sensor shows itself in several ways:
Engine Won’t Start: The most obvious sign is a car that refuses to start. You turn the key, and nothing happens. The starter might crank, but the engine never ignites.
Rough Idle: Your engine shakes or vibrates when you’re sitting still. The idle feels uneven or unstable.
Check Engine Light: Your dashboard lights up with that dreaded check engine warning. This light comes on when the sensor fails or sends wrong information.
Engine Stalling: Your engine dies while you’re driving. This is dangerous and demands immediate attention.
Poor Acceleration: When you step on the gas, the car doesn’t respond right away. You feel hesitation or lag.
Reduced Fuel Economy: Your car suddenly uses more gas than normal. A faulty sensor makes the engine work harder.
Misfires: Your engine runs rough and sounds like it’s skipping. You might hear popping or backfiring.
If you notice any of these signs, testing your crankshaft position sensor should be your next step.
Tools You’ll Need for Testing
Good news: you don’t need a lot of tools. Here’s what you should have:
Digital Multimeter: This is the most important tool. You’ll use it to check voltage and resistance. A basic multimeter costs between fifteen and thirty dollars.
Socket Set: You need this to remove the sensor. Standard socket sets work fine.
Wrench Set: Keep both metric and standard wrenches handy.
Screwdrivers: Have both Phillips and flathead screwdrivers ready.
Safety Glasses: Always protect your eyes when working under the hood.
Gloves: Mechanics gloves keep your hands clean and protected.
Car Manual: Your specific vehicle’s manual is invaluable. It tells you exactly where the sensor is and what values to expect.
Flashlight or Work Light: Good lighting helps you see what you’re doing.
Jack and Jack Stands: You might need to lift your car to reach the sensor safely.
Most of these tools sit in any basic toolbox. If you don’t have a multimeter, that’s your only real purchase.
Where to Find the Crank Position Sensor
Location varies by car make and model. On some vehicles, it’s easy to reach. On others, you’ll work in tight spaces.
The sensor usually mounts near the crankshaft. Common locations include:
- Behind the crankshaft pulley
- Near the timing cover
- Inside the engine block itself
- On the side of the engine block
- Close to the oil pan
Your car’s service manual shows the exact location. If you don’t have the manual, search online for “crank position sensor location” plus your car’s year and model. You’ll find diagrams and videos.
Take time to locate it before you start work. Rushing this step wastes time and causes frustration.
Safety First: Preparing Your Car
Never work on your car’s engine while it’s running. Turn off the engine and let it cool for at least thirty minutes.
Disconnect the negative battery terminal. This prevents electrical shocks and accidental starting. Use a wrench to loosen the nut on the negative cable. Pull the cable away from the battery post.
Engage the parking brake and put the car in park or neutral if it has a manual transmission. You want zero chance of the car moving.
Put on your safety glasses and gloves. Take a moment to look at the engine and get your bearings. Know where you’re working before you start.
Testing Method One: Visual Inspection
Start with a simple visual check. This catches obvious problems without any tools.
Pop the hood and locate the crank position sensor. Look at the connector and sensor itself.
Check for:
- Loose wires or connectors
- Broken connector clips
- Corrosion or rust on the metal contacts
- Physical damage to the sensor body
- Oil or coolant leaks around the sensor
- Signs of burning or melting on the plastic connector
A loose connector causes many problems. Push it firmly onto the sensor. Listen for a click that indicates a solid connection.
Clean any corrosion with a wire brush or small tool. Gently scrape away rust and white powdery buildup. A clean connection sometimes fixes issues without further work.
If you see obvious damage, cracks in the plastic, or melted connectors, the sensor needs replacement. You’ve found your problem.
Testing Method Two: Using a Multimeter
This method uses your multimeter to check the sensor’s electrical health. It takes about fifteen minutes.
Start by setting your multimeter to resistance mode. This reads ohms, which measure electrical resistance.
Disconnect the sensor’s electrical connector. You might need to squeeze a tab or release a clip. Be gentle and patient.
Touch your multimeter’s probes to the sensor terminals. You’re measuring resistance across the sensor itself. Different sensor types have different normal ranges, but they typically fall between 200 and 900 ohms.
Check your car’s manual for the exact resistance value. If your reading is way off, the sensor has failed internally.
Next, set your multimeter to voltage mode. This tests the sensor’s output while running.
Reconnect the sensor to its connector. Attach your multimeter’s probes to the sensor’s signal wire. Have someone crank the engine while you watch the multimeter. The voltage should pulse as the engine cranks.
The exact voltage changes depending on your sensor type. You might see readings from 0.2 to 4.8 volts. Your manual has the specific numbers you’re looking for.
If you see no voltage changes or the voltage stays flat, the sensor isn’t working right.
Testing Method Three: Checking with an Oscilloscope
An oscilloscope is a more advanced tool that shows your sensor’s signal as a wave pattern. Most home mechanics don’t own one, but some auto parts stores will let you borrow or use one.
Attach the oscilloscope to the sensor’s signal wire. Start the engine and watch the pattern on the screen.
A healthy sensor shows a clean wave pattern. Bad sensors show broken waves, flat lines, or no signal at all.
Oscilloscopes cost a lot of money, so this method works best at a shop. Don’t buy one just to test your sensor.
Testing Method Four: Spark Timing Test
This method checks if the sensor timing is right. You’ll need a timing light, another tool most auto parts stores rent.
Connect the timing light to your car’s first spark plug wire or coil pack, depending on your engine type.
Have someone start and run the engine at idle. Point the timing light at the timing marks on your crankshaft. These marks are usually on the crankshaft pulley.
Watch where the timing light marks appear. Compare them to your car’s specs in the manual.
If the timing is far off or jumps around, your sensor isn’t feeding correct information to the engine.
Testing Method Five: The Scan Tool Test
Modern cars have on-board diagnostic computers. A scan tool reads the codes and data from this computer.
Many auto parts stores will scan your car for free. Tell them you suspect a crank position sensor problem.
The scan tool checks the sensor’s live data and pulls any trouble codes. Codes like P0335 point directly to crankshaft position sensor problems. Other codes might indicate a related issue.
The tech will show you the sensor’s signal in real time. A healthy sensor shows steady, consistent values. A bad sensor might show missing data, jumps, or no signal.
This test gives you solid information. Store-bought basic scan tools cost thirty to fifty dollars if you want your own.
When to Replace Instead of Just Test
Sometimes testing confirms the sensor works fine. Other times, testing shows it’s definitely bad. Replacement is the only solution.
Signs that replacement is necessary:
- Multimeter readings are way outside normal range
- No voltage signal appears when the engine runs
- Physical damage is visible on the sensor
- Scan tools show the sensor failing
- The sensor connector is melted or burned
Don’t try to fix a damaged sensor. Replace it. A new sensor costs between twenty and one hundred fifty dollars depending on your car. Labor costs add several hours of shop time if you don’t do it yourself.
Replacing Your Crankshaft Position Sensor
If testing shows you need a new sensor, replacement isn’t difficult.
First, disconnect the battery’s negative terminal again. This protects you from electrical problems.
Remove the sensor’s connector by squeezing or unclipping it.
Use your socket set or wrench to unbolt the sensor from the engine. Most sensors use a single bolt. Some have two.
Gently pull the sensor out. It usually slides free without force.
Clean the area where the old sensor was. Wipe away any dirt or debris.
Insert the new sensor into the same position. Make sure it seats fully before bolting it down.
Install the bolt and tighten it firmly. Don’t strip it by over-tightening, though.
Push the connector back onto the sensor until you hear a click.
Reconnect the battery’s negative terminal.
Start your car and make sure everything works. The check engine light should disappear after a few driving cycles if that’s what brought you here.
DIY Testing vs. Professional Testing
Testing at home saves money. You learn about your car. The work only takes an hour or two.
Professional testing has advantages too. Mechanics have expensive diagnostic tools. They see hundreds of cars and know common problems. They can check other things that might cause similar symptoms.
Cost matters to your decision. A shop visit might cost fifty to one hundred dollars in diagnostic fees. Doing it yourself costs nearly nothing if you own a multimeter.
Time is also a factor. You might spend half a day testing. A pro does it in thirty minutes.
Many home mechanics start with basic testing. If that doesn’t give clear answers, they go to a shop for advanced testing.
Common Testing Mistakes to Avoid
Don’t work on a hot engine. You’ll burn yourself and might damage components.
Don’t force connectors or bolts. Broken plastic and stripped bolts create bigger problems.
Don’t ignore your car’s manual. Different vehicles have different specs. What’s normal for one car might be wrong for another.
Don’t test with the engine running unless your procedure specifically requires it. Keep the engine off most of the time.
Don’t forget to disconnect the battery before starting work. This protects both you and your car’s electrical system.
Don’t assume the sensor is bad without testing. Sometimes symptoms point to a different problem. A bad alternator, weak battery, or faulty starter can cause similar issues.
Understanding Sensor Signals and Readings
Your sensor sends signals to the engine computer. These signals use different methods depending on the sensor type.
Magnetic sensors create voltage pulses as the crankshaft rotates. Hall effect sensors use magnetic fields to switch voltage on and off. Optical sensors use light to detect rotation.
Your multimeter reads voltage pulses from any of these types. Watch the numbers change as the engine cranks. Steady, regular changes mean the sensor works. Erratic readings or no changes mean failure.
Different vehicles expect different voltage ranges. A sensor that produces five volts might be perfect for one car and broken for another. Always check your specific car’s manual.
What Happens When You Drive with a Bad Sensor
Driving with a failing crankshaft position sensor is risky. Your car might cut out suddenly. Your engine might stall on the highway.
Some cars won’t start at all once the sensor fails completely. Others limp along with reduced power. You never know which will happen and when.
Bad fuel economy drains your wallet. Poor performance makes driving frustrating. Most importantly, sudden stalling puts you and others at risk.
Don’t drive a car with a confirmed bad sensor. Test it, fix it, and get back on the road safely.
Sensor Maintenance and Prevention
Regular maintenance helps prevent sensor problems. Keep your engine clean. Dirt and debris can damage sensors over time.
Check your battery condition. A weak battery causes erratic signals that might fool you into thinking the sensor is bad.
Use quality oil and change it on schedule. Clean oil reduces engine stress on all components, including sensors.
Inspect connectors during routine maintenance. Push them to make sure they’re tight. Clean any corrosion away.
Avoid driving through deep water. Water can damage electrical connectors and cause premature sensor failure.
Keep spark plugs in good shape. Bad spark plugs sometimes cause symptoms that mimic sensor problems.
Troubleshooting When Testing Doesn’t Give Clear Answers
Sometimes your testing shows nothing obviously wrong, but your car still acts broken. What do you do?
Check the wiring between the sensor and the engine control module. Broken wires cause signal loss. Look for pinched, melted, or corroded wiring.
Test the sensor more than once. Bad sensors sometimes produce inconsistent results.
Have the engine scanned again. New codes might appear after several driving cycles.
Check the fuel system. A bad fuel pump creates symptoms similar to a failed sensor.
Examine the ignition system. Weak spark plugs or coil packs cause starting and running problems.
Don’t give up after one test. Sometimes you need multiple tests to find the real problem.
Tools for the Serious DIY Mechanic
As you gain confidence, you might want better tools.
A quality digital multimeter gives more accurate readings. Spend fifty to one hundred dollars for professional-grade equipment.
A handheld scan tool lets you read your car’s computer codes yourself. Mid-range tools cost one hundred to three hundred dollars.
An oscilloscope shows signal patterns clearly. Basic models start around two hundred dollars.
A compression tester helps rule out engine problems. These cost thirty to fifty dollars.
These tools have uses beyond sensor testing. They help diagnose many problems, making them good investments for serious home mechanics.
Conclusion: You Can Do This
Testing a crank position sensor seems intimidating at first. But it’s actually one of the more approachable repairs for home mechanics.
You don’t need fancy tools or special training. A multimeter and basic hand tools are all you need. Your car’s manual and a little patience take care of the rest.
Start with visual inspection. Look for loose connectors and obvious damage. Move on to multimeter testing if you need more information. If those tests don’t answer your questions, visit a shop with a scan tool.
Remember that you’re not just fixing a car. You’re learning about how your vehicle works. That knowledge serves you well throughout car ownership.
Whether your sensor is fine or needs replacement, you’ll know exactly what’s happening. You’ll understand what your mechanic tells you if you end up at a shop. That’s real power in your hands.
Don’t be afraid to test your crank position sensor. Take your time, work safely, and follow your manual. You’ve got this.
Quick Reference: Testing Checklist
- Disconnect the battery’s negative terminal
- Locate the crank position sensor with your manual
- Visually inspect the sensor and connector
- Clean any corrosion from the connector
- Use a multimeter to test resistance
- Check voltage while the engine cranks
- Compare results to your manual’s specifications
- Have the engine scanned at a parts store if needed
- Replace the sensor if testing confirms failure
- Reconnect the battery and test-drive the car
Frequently Asked Questions
How much does a crank position sensor cost? Sensors range from twenty to one hundred fifty dollars. Labor adds more if you use a shop.
Can a bad sensor cause the check engine light? Yes, absolutely. This is one of the most common reasons for this light.
Is it safe to drive with a bad sensor? No. Your car might stall suddenly, which is dangerous.
How long does sensor replacement take? Most home mechanics finish in one to two hours. Shops might charge for one to three hours.
Can the sensor fail intermittently? Yes, some sensors work fine then fail randomly. Your testing might show normal one moment and failed the next.
What’s the difference between a crankshaft position sensor and a camshaft position sensor? The crankshaft sensor monitors crankshaft rotation. The camshaft sensor monitors cam rotation. They’re different devices with different jobs.
Do I need a computer to test this sensor? No. A multimeter works fine for basic testing without any computer.
Why does my sensor keep failing? repeated sensor failure points to a deeper problem. Check your wiring, connectors, and engine condition. Something else might be damaging the sensor.
Can I clean a sensor instead of replacing it? Sometimes, if it’s just dirty. Usually, failed sensors need replacement.
How often do crank position sensors fail? It depends on your car and how you drive. Some last the lifetime of the vehicle. Others fail after years of use. There’s no set schedule.