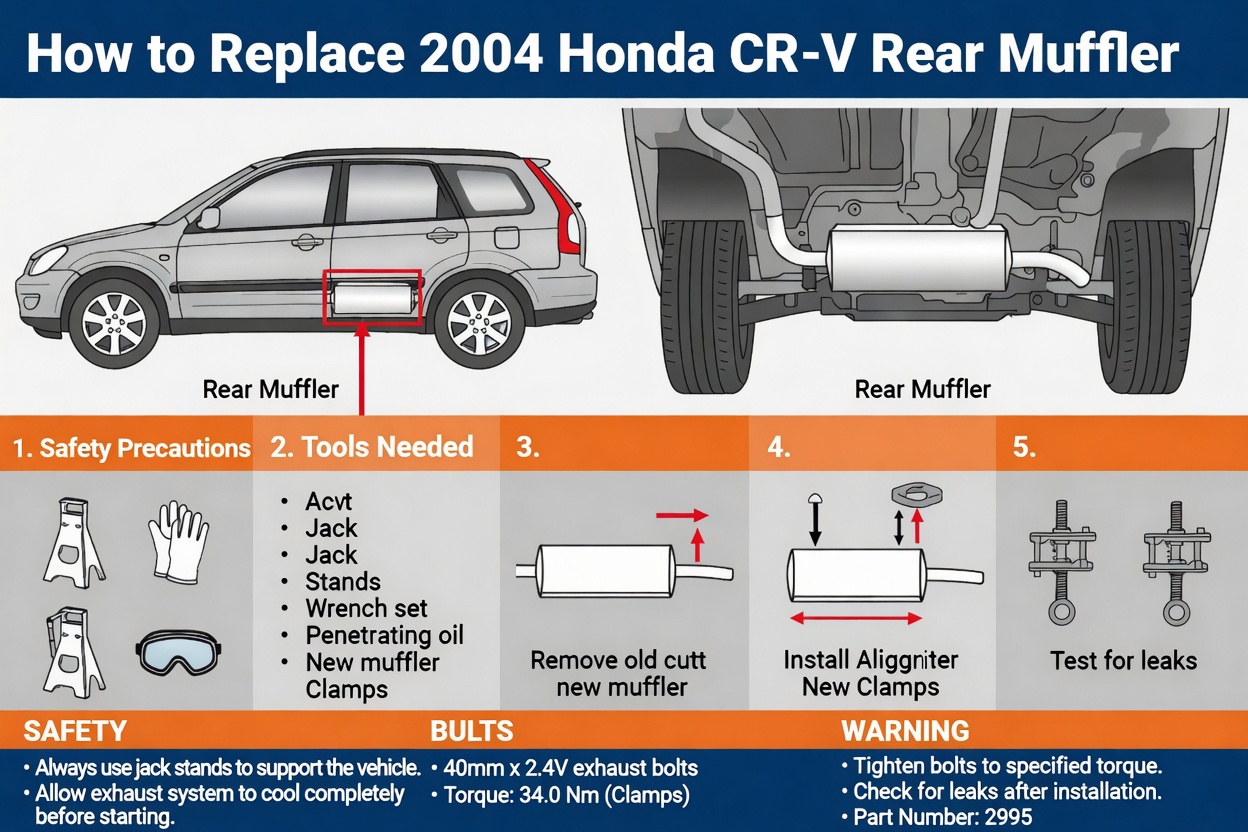
How to Replace a Honda CRV Rear Muffler?
Your Honda CRV is a solid vehicle. It gets you where you need to go. But over time, parts wear out. The muffler is one of them. When your muffler starts to fail, you notice it right away. The noise gets louder. The car sounds rough. This is when you need to replace it.
The good news? You can do this yourself. You don’t need to be a mechanic. You just need some basic tools and patience. This guide will walk you through every step. By the end, you’ll have a working muffler and money saved.
Why Your Muffler Matters
Let’s talk about what a muffler does. The muffler is the part that reduces noise from your engine. It takes the loud exhaust sounds and quiets them down. Without it, your car would sound like a race car.
A bad muffler causes problems. First, it’s loud. Your neighbors won’t be happy. Second, it affects your vehicle’s performance. Exhaust flow gets worse. Third, it can fail your emissions test if you live in a state that requires them.
Honda CRV mufflers don’t last forever. They rust from the inside. They get damaged from hitting bumps. Sometimes they just fall off. When this happens, you have two choices. You can take it to a shop and pay a lot. Or you can do it yourself and save money.
What You’ll Need Before You Start
Before you get under your car, gather your tools and materials. Having everything ready makes the job easier.
Tools you need:
- A socket set with wrenches
- Ratchets and extensions
- A jack to lift your vehicle
- Jack stands for safety
- A wire brush to clean rust
- Screwdrivers (both types)
- Pliers
- A rubber mallet or hammer
- Safety glasses
- Work gloves
- A drain pan
Materials you need:
- A new Honda CRV muffler
- Exhaust hangers (rubber straps)
- Stainless steel bolts
- A gasket or donut seal
- Exhaust tape or high-temp sealant
Where to buy these items: You can find mufflers at auto parts stores. You can also buy them online. Make sure you get the right one for your specific model. Check your vehicle’s make and model before ordering.
Safety First: Preparing Your Vehicle
Before you start working, park your car on level ground. Turn off the engine and let it cool down. This is important. The exhaust system gets very hot. If you touch it while hot, you’ll burn yourself badly.
Set the parking brake. This keeps the car from rolling. Use wheel chocks if you have them. These are wedges you put behind the wheels.
Now you need to lift the vehicle. Use a jack to lift one side. Put a jack stand under the frame. Never work under a car held only by a jack. Jack stands are cheap. Burns are expensive. Use both.
Once the car is lifted safely, put on your safety glasses and gloves. You’ll be working above your head. Rust and dirt fall down. Your eyes need protection.
Finding Your Muffler Location
On a Honda CRV, the muffler hangs below the rear of the car. It’s attached to the exhaust pipe that comes from your engine. You’ll see it clearly when you look under the back of the vehicle.
The muffler connects to the exhaust system at the front. It’s held up by rubber hangers. These hangers are like elastic straps. They allow some movement but keep the muffler in place.
Take a moment to look at how it’s attached. You need to understand this before you remove anything. The muffler bolts to the exhaust pipe at the front. The hangers hold the rear. That’s all that keeps it there.
Removing the Old Muffler
Start by loosening the bolts that connect the muffler to the exhaust pipe. These are usually two bolts. Use your socket wrench to loosen them. Don’t remove them yet. Just loosen them so they’re easy to turn by hand.
Now comes the tricky part. You need to disconnect the rubber hangers. These hold the muffler up. There are usually two or three hangers. They’re at the rear of the vehicle. Simply pull the rubber hanger off the bracket. It takes some force, but they come off.
With the hangers off, the muffler can move. Hold the muffler with one hand. With your other hand, finish removing those two bolts. Be careful. The muffler is heavy. Let it rest on the jack or have a friend help.
Once the bolts are out, you can slide the muffler forward. It may be stuck due to rust or corrosion. Use a rubber mallet to tap it gently. Tap at the sides, not the end. This helps break the seal.
If it’s really stuck, you can spray penetrating oil around the connection. Let it sit for a few minutes. Then try again. Most mufflers come free with some persistence.
Now you have the old muffler out. Set it aside. Look at the connection point on the exhaust pipe. You’ll see rust and gunk. This needs to be clean before you install the new muffler.
Cleaning the Connection Point
Take your wire brush and clean the area where the muffler connected. Remove all the rust. Remove all the corrosion. Get down to bare metal if you can. This is important. A clean connection seals better.
Use the wire brush on both the outside and inside of the pipe opening. Take your time here. The cleaner this is, the better your new muffler will seal. A bad seal leads to leaks. Leaks lead to problems.
If there’s heavy rust, you might need to use a wire wheel on a drill. This speeds up the cleaning. Just be careful not to damage the pipe itself.
Once it’s clean, wipe it with a cloth. Get all the brush dust and debris off. You want bare metal that’s clean and dry.
Installing the New Muffler
Before you install the new muffler, check the gasket or donut seal. This is a rubber ring that creates a seal. If it’s included with your new muffler, great. If not, buy one. It costs a few dollars.
Place the gasket on the exhaust pipe opening. It slides over the pipe. Make sure it’s centered. This is what prevents exhaust leaks.
Now slide the new muffler onto the pipe. It should fit over the gasket. You might need to wiggle it a bit. Align the bolt holes. Once they line up, push it forward so it’s tight against the exhaust pipe.
Insert the two bolts. These hold the muffler to the exhaust pipe. Hand tighten them first. Make sure everything lines up. Then use your socket wrench to tighten them. Don’t overtighten. You can strip the bolts. Just make them snug.
Reconnecting the Hangers
Now you need to reconnect the rubber hangers. These are the straps that hold the muffler in place. Look at where they attach. There are brackets on your car’s frame.
The hangers slide over the brackets. Some hangers have a loop. Some have a hook. Either way, they’re designed to slide on and off easily.
Push the hanger straps onto their brackets. Make sure they’re centered. The muffler should hang evenly. It shouldn’t tilt to one side. If it does, adjust the hangers.
Once the hangers are on, check that the muffler isn’t touching anything. It shouldn’t touch the frame. It shouldn’t touch the undercarriage. Make sure there’s space around it. This allows for movement and prevents noise.
Checking Your Work
Before you lower the vehicle, test the muffler. Push up on it with your hand. It should move slightly but stay attached. The rubber hangers should absorb the movement. This is normal.
Look at all the connections. Make sure the bolts are tight. Make sure the hangers are secure. Make sure nothing is bent or damaged.
Check that the muffler outlet is pointing down and back. This is the correct position. The outlet is the opening where exhaust comes out. Make sure it’s not blocked. Nothing should be in front of it.
Lowering Your Vehicle
Now you’re ready to lower the car. Remove the jack stand first. Then use the jack to lower the vehicle slowly. Lower it until all four wheels touch the ground. Remove the jack.
Back your car out slowly. Listen for any new noises. The exhaust system might creak a little as everything settles. This is normal. After a few miles, these noises usually go away.
Starting Your Engine
Turn on the engine. Listen to the sound. It should be quieter than before. If your old muffler was damaged, you’ll notice a big difference. The car will sound normal again.
Let the engine idle for a minute. Check under the car for exhaust leaks. You shouldn’t see white smoke or smell exhaust. If you do, you have a leak. Turn off the engine and check your connection.
If everything looks good, take your car for a test drive. Drive slowly at first. Listen for any strange noises. Feel how the car performs. After a few minutes of driving, stop and check under the car again. Everything should still be tight.
Common Issues and How to Fix Them
The muffler won’t come off: This is the most common problem. Rust makes bolts stick. Use penetrating oil. Let it soak. Try again. If it still won’t budge, use a breaker bar for more leverage. You can also tap the bolt with a hammer to break the rust seal.
Exhaust leaks from the connection: This means the gasket isn’t sealing right. Remove the muffler. Clean the connection point again. Make sure it’s completely clean. Install a new gasket. Reinstall the muffler. Tighten the bolts firmly but not too tight.
The muffler is touching the frame: This creates rattle noise. Adjust the rubber hangers. Move them until the muffler has space. It should hang about an inch below the frame.
The muffler hangers are broken: You need new ones. Buy replacement exhaust hangers. They’re cheap and easy to install. Just slide the old one off. Slide the new one on. Done.
Your car sounds louder than normal: Check that the muffler is tight. Check the bolts. Make sure they’re snug. If they’re tight and it’s still loud, the muffler might be defective. Contact the store where you bought it for a replacement.
Tips to Make the Job Easier
Work during the day. Good light helps. You need to see what you’re doing. A trouble light or flashlight is essential.
Have a friend help. The muffler is heavy. Having someone hold it while you work is useful. It makes the job faster and safer.
Don’t rush. Take breaks if you need them. Working under a car is tiring. Your back will hurt. Your arms will get sore. That’s normal. Rest when you need to.
Take photos during removal. Use your phone to photograph the old muffler connections. This helps when you install the new one. You can look at the photos to remember how it was attached.
Use a parts cleaner on stubborn rust. Spray cleaner on the connection point. Let it soak. Then use the wire brush. This combination works well for heavy corrosion.
How Much Will This Cost?
Let’s talk money. A new Honda CRV muffler costs between 150 and 400 dollars. The price depends on the specific model. OEM mufflers cost more. Aftermarket mufflers cost less. Both work fine.
You also need a gasket. This costs five to ten dollars. You might need new bolts. These cost a few dollars.
Total parts cost is usually 200 to 450 dollars.
Compare this to a repair shop. A shop will charge you 300 to 700 dollars for the job. This includes parts and labor. By doing it yourself, you save 100 to 300 dollars. That’s money in your pocket.
Alternative: When to Call a Professional
Some situations need professional help. If your exhaust pipe is damaged, a professional should fix it. If you don’t have a jack or jack stands, buy them or get help. If you’re not comfortable working under a vehicle, call a shop.
Some mufflers are corroded to the pipes. They won’t come off. A professional has special tools to remove them. Heat is one tool. Penetrating oil overnight is another. If you’ve spent over an hour trying, it might be time to call for help.
If you break a bolt, a professional can extract it. This requires special tools. It’s not impossible for a DIYer but it’s tricky.
Maintaining Your New Muffler
A new muffler will last many years if you take care of it. Here’s how.
Drive carefully on rough roads. Hitting bumps damages mufflers. Go slowly over potholes. Avoid roads with debris.
Wash under your car occasionally. Salt and moisture cause rust. A good rinse removes both. If you live near the ocean, wash more often.
Check your muffler every few months. Make sure it’s not hanging loose. Make sure the bolts are tight. A quick inspection takes two minutes.
Avoid driving through deep water. Water can enter the muffler. This causes rust from the inside. If you do drive through water, drive slowly.
Signs Your New Muffler Might Fail
Even a new muffler can fail. Here’s what to watch for.
Loud noise during acceleration. This suggests a leak. Check the connections.
Rattling under the car. The hangers might be loose. Tighten them.
Visible damage or dents. If the muffler is dented, it still works. But it’s not ideal. If it’s cracked, it must be replaced.
Rust spots. Surface rust is normal. But deep rust needs attention.
White smoke from under the car. This is moisture. If it persists, you have a leak.
Getting the Right Muffler for Your Car
Not all mufflers fit all cars. Honda makes different mufflers for different models and engine sizes. You need the right one for your vehicle.
Check your owner’s manual. It lists the correct part number. You can also call a Honda dealer. Give them your vehicle identification number. They’ll tell you the exact muffler you need.
Buy from a trusted source. Auto parts stores are reliable. Online retailers are fine too. Just make sure they’re reputable.
Don’t buy the cheapest option. Quality mufflers last longer. They seal better. They sound better. Spend a bit more for peace of mind.
The DIY Advantage
Doing this job yourself teaches you about your vehicle. You learn how exhaust systems work. You gain confidence for the next repair. You save money. You get the satisfaction of a job well done.
This job is perfect for a first-time DIYer. It’s not too hard. It doesn’t require advanced skills. You just need tools, time, and patience.
Final Thoughts
Replacing your Honda CRV muffler is doable. Don’t be intimidated. Thousands of DIYers do this every year. Most of them aren’t mechanics. They’re just regular people like you.
The key is taking your time. Follow each step carefully. Don’t skip the safety steps. Don’t overtighten bolts. Don’t rush the work.
When you’re done, you’ll have a quieter, better-running vehicle. Your car will be safer with a secure muffler. Your wallet will be heavier with the money you saved.
So grab your tools. Park your car. Put on your gloves. You’ve got this. This is one repair you can absolutely do yourself. Thousands have done it before you. You’ll join them in the DIY hall of fame.
Your Honda CRV will thank you with years of quiet, dependable service. And you’ll know that you did it with your own hands.

Peterson is an automotive enthusiast and auto parts reviewer with a passion for vehicle maintenance, upgrades, and performance. He enjoys researching and testing car parts, tools, and accessories to help drivers make informed buying decisions. Through AutoPartsTalk.com, Peterson shares honest reviews, practical maintenance tips, and expert guides to keep vehicles running safely and efficiently.